
Welcome to the GE Profile Dishwasher Bottom Rack Manual! This guide provides essential information for installing, maintaining, and troubleshooting your dishwasher’s bottom rack effectively.
1.1 Overview of the GE Profile Dishwasher Series
The GE Profile Dishwasher Series offers advanced features like SmartDispense Technology and Microban Antimicrobial Protection. Models such as PDT145SSLSS and PDWT380R10SS provide quiet operation (39-42 dBA) and energy efficiency. Designed for versatility, these dishwashers include a third rack for extra capacity and adjustable racks for flexible loading. They combine durability with innovative design to meet various household needs effectively.
1.2 Importance of Proper Rack Maintenance
Proper maintenance of the bottom rack ensures optimal performance and longevity. Cleaning the filters and removing blockages prevents poor water circulation and inefficient cleaning. Regular inspection and cleaning of the rack and spray arms are essential to maintain your GE Profile dishwasher’s functionality and hygiene. Neglecting maintenance can lead to reduced efficiency and potential damage to the appliance over time.
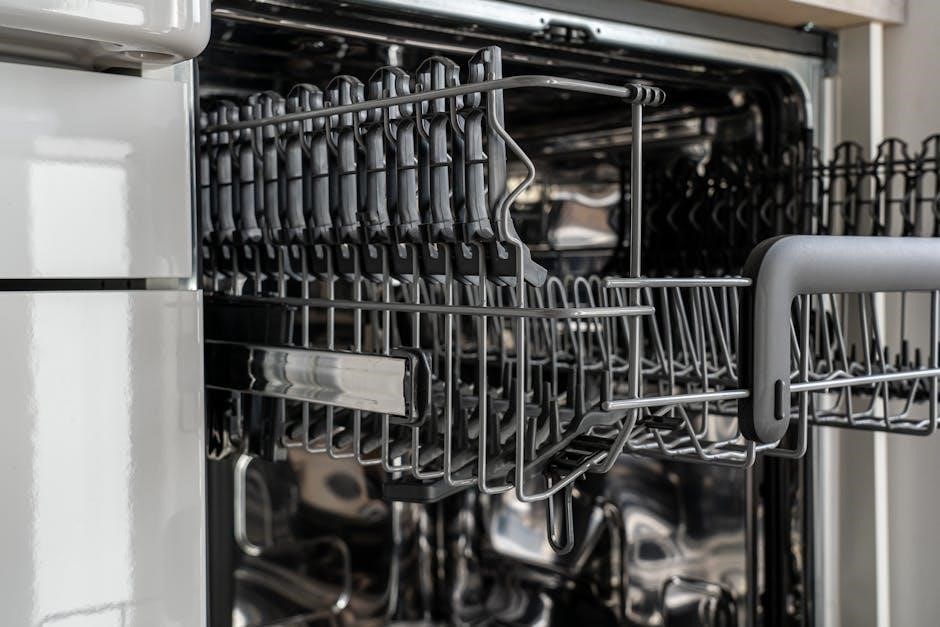
Understanding the Components of the Bottom Rack
The bottom rack features adjustable tines, smooth-rolling wheels, and integrated spray nozzles to ensure dishes are cleaned thoroughly. Its sturdy frame supports heavy loads, promoting efficient water circulation and durability.
2.1 Key Features of the GE Profile Dishwasher Bottom Rack
The GE Profile bottom rack offers adjustable tines for flexible loading, ensuring dishes fit securely. Its smooth-rolling wheels enhance durability and allow easy gliding. The rack’s design supports heavy cookware without compromising water circulation, ensuring optimal cleaning performance. These features make it a reliable component for efficient dishwashing.
2.2 Compatibility with Different GE Profile Models
The GE Profile bottom rack is designed to fit seamlessly with various GE Profile dishwasher models, ensuring versatility. Models like PDWT380R10SS and PDW8280J10SS benefit from its universal design, which accommodates different configurations without compromising functionality. This compatibility ensures optimal performance across the GE Profile series, making it a reliable choice for users with diverse dishwasher setups.
Installation Instructions for the Bottom Rack
Remove the old rack, align the new one with mounting brackets, secure firmly, and ensure stability. Check alignment and test functionality to confirm proper installation.
3.1 Step-by-Step Guide to Installing the Bottom Rack
Remove the old rack by sliding it out. 2. Prepare the new rack, ensuring all clips and adjusters are secure. 3. Align the rack with the dishwasher’s mounting brackets. 4. Slide the rack into place and tighten the screws. 5. Test the rack’s stability and alignment. Ensure proper fitment for optimal performance.
3.2 Ensuring Proper Alignment and Security
To ensure proper alignment, align the rack’s mounting brackets with the dishwasher’s tracks. Gently push the rack into place until it clicks. Check that the rack is level and evenly spaced. Secure it by tightening the screws firmly. Verify that the rack does not obstruct the spray arms or interfere with other components. Test stability by pulling the rack gently. Proper alignment ensures efficient washing and prevents damage.

Cleaning and Maintenance Tips
Regularly clean the bottom rack by removing debris and food particles. Check for blockages in the spray arms and ensure proper water flow for optimal performance.
4.1 How to Remove and Clean the Bottom Rack
To remove the bottom rack, pull it out smoothly. Clean by washing with mild detergent and warm water. Regularly check for debris and food particles. Ensure proper drying before reinstalling to prevent water spots. Avoid using abrasive cleaners to maintain the rack’s finish and functionality.
4.2 Best Practices for Maintaining Rack Durability
Regularly clean the bottom rack to prevent grease buildup. Avoid using abrasive cleaners or scrubbers, as they may damage the finish. Check for blockages in the spray arm area to ensure proper water flow. Store the rack properly when not in use to prevent warping or bending. This will help maintain its structural integrity and functionality over time.

Loading the Bottom Rack for Optimal Performance
Place larger items like plates and cookware facing the center for proper water circulation. Ensure utensils are secured and avoid overcrowding to maximize cleaning efficiency and prevent damage.
5.1 Recommended Items for the Bottom Rack
The bottom rack is ideal for plates, saucers, bowls, and cookware. Place larger items like serving trays, pots, and pans facing the center for better water circulation. Avoid overcrowding to ensure proper cleaning. Secure utensils in designated holders to prevent damage and blockage of the spray arms. This arrangement maximizes cleaning efficiency and protects your dishes during the wash cycle.
5.2 Avoiding Common Loading Mistakes
Avoid overcrowding the bottom rack, as this can block water flow and reduce cleaning efficiency. Do not place large items like pans or trays in a way that obstructs the spray arms. Ensure no items protrude through the rack bottom, as this can hinder middle spray arm rotation. Secure utensils in holders to prevent blockages and damage. Proper arrangement ensures optimal cleaning performance and protects your dishes.

Troubleshooting Common Issues
This section helps you address common issues like blockages or misalignment. Check the lower spray arm, filters, and ensure items don’t obstruct rotation. Consult the manual for detailed solutions.
6.1 Diagnosing and Fixing Rack Alignment Problems
To address rack alignment issues, remove the bottom rack and inspect for obstructions. Ensure the lower spray arm rotates freely without blockages. Check the rack’s wheels and guides for proper alignment. If misaligned, adjust the rack position to ensure smooth movement and optimal cleaning performance. Consult the manual for detailed adjustment instructions.
6.2 Resolving Blockages in the Rack Area
To resolve blockages, remove the bottom rack and inspect for debris. Clean the filter assembly by twisting and lifting it out, then rinsing under warm water. Ensure no items protrude through the rack, as this can obstruct the lower spray arm. Regularly cleaning the rack area ensures proper water flow and optimal washing performance;
User Manual Specifics
The GE Profile Dishwasher manual provides detailed safety information, installation instructions, and maintenance tips; It ensures proper use and troubleshooting, optimizing performance and longevity of your appliance.
7.1 Navigating the Official GE Profile Dishwasher Manual
The official GE Profile Dishwasher manual is well-organized, providing clear sections for product specifications, installation, maintenance, and troubleshooting. It includes detailed diagrams, step-by-step guides, and essential safety information. Users can easily locate sections on rack maintenance, filter cleaning, and error codes. The manual also offers tips for optimal performance and accessories, ensuring a seamless experience for dishwasher owners.
7.2 Key Sections to Reference for Rack Maintenance
For effective rack maintenance, refer to sections on cleaning filters, removing blockages, and ensuring proper rack alignment. The manual also covers adjusting rack positions for better cleaning and using accessories to enhance functionality. Regularly reviewing these sections helps maintain your dishwasher’s performance and extends the rack’s longevity, ensuring optimal results for years to come.
Safety Precautions
Always handle the bottom rack with care to avoid injury. Ensure items do not protrude through the rack and block moving parts. Keep children away during operation and maintenance to prevent accidents.
8.1 Essential Safety Tips for Handling the Bottom Rack
Always handle the bottom rack with care to avoid injury. Ensure items do not protrude through the rack and block moving parts. Regularly inspect the rack for damage or wear. Avoid leaving the rack unattended while removing or installing it. Never overload the rack, as this can cause instability. Keep children away during maintenance to prevent accidents.
8.2 Avoiding Potential Hazards During Maintenance
When maintaining the bottom rack, avoid hazards by ensuring the dishwasher is unplugged. Always handle sharp or heavy items with care. Prevent slipping by keeping the area dry. Avoid forcing components, as this may cause damage or injury. Never leave loose parts unsecured. Ensure proper alignment to prevent accidents during operation. Regular inspections can help identify potential risks early on.

Adjustments for Enhanced Performance
Customize your dishwasher’s bottom rack position for optimal cleaning efficiency. Adjusting the rack height ensures proper water circulation and accommodates larger items. Utilize optional accessories to enhance functionality and organization.
Leverage the Wash Zones feature for targeted cleaning; Ensure stability by aligning the rack correctly after adjustments. Regular checks help maintain performance and prevent issues during cycles.
9.1 Customizing Rack Position for Better Cleaning
Adjusting the bottom rack position enhances cleaning efficiency. Lower the rack for larger items like pots and pans, ensuring proper water circulation. For smaller loads, raise the rack to optimize space. Use the adjustable tabs to secure the rack in your desired position. This customization ensures items are cleaned thoroughly without obstructing water flow or spray arm rotation.
9.2 Utilizing Rack Accessories for Efficiency
Enhance your dishwasher’s performance with compatible accessories. The 3rd rack tray is ideal for small items like utensils and silverware, freeing up space below. Adjustable racks allow flexible loading, ensuring optimal water flow. Install accessories according to the manual to maintain efficiency and prevent blockages. Proper use of these features ensures a cleaner dishwashing experience.

Optional Accessories for the Bottom Rack
Explore optional accessories like the 3rd rack tray, perfect for utensils, and adjustable racks for flexible loading. These enhance efficiency and optimize space.
10.1 Available Add-Ons for Improved Functionality
Add functionality with accessories like the 3rd rack tray, designed for small items, and adjustable tines. These enhancements optimize space and improve cleaning efficiency, ensuring better organization and performance in your GE Profile dishwasher.
10.2 How to Install Additional Rack Features
Install additional features like the 3rd rack tray by aligning it with the existing rack slots. Secure it firmly to ensure stability. For optimal use, place small items like utensils or silverware in the tray. Refer to your GE Profile manual for specific model guidance to ensure proper installation and enhanced functionality.
11.1 Summarizing Key Takeaways
Proper installation, regular cleaning, and correct loading practices are essential for optimal performance. Maintain your GE Profile dishwasher’s bottom rack by following the manual’s guidelines. Regular maintenance ensures longevity and efficiency. Always refer to the official manual for specific instructions tailored to your model. By following these tips, you’ll enjoy a cleaner, more reliable dishwashing experience for years to come.
11.2 Encouraging Regular Maintenance for Longevity
Regular maintenance is crucial for extending the life of your GE Profile dishwasher’s bottom rack. Clean the rack and filters periodically to prevent blockages. Ensure items are loaded correctly and avoid overloading. Check for alignment issues and address them promptly. By following these practices, you can maintain your dishwasher’s efficiency and ensure the bottom rack lasts for years to come.