mercruiser maintenance manual

The Mercruiser Maintenance Manual is an essential guide for boat owners and technicians, providing detailed instructions for proper engine care and troubleshooting․ It ensures optimal performance and longevity of your marine engine․

1․1 Importance of Regular Maintenance

Regular maintenance is crucial for ensuring the longevity and reliability of your Mercruiser engine․ It helps prevent unexpected breakdowns, reduces repair costs, and optimizes performance․ By following the manual’s guidelines, you can identify and address issues early, extending the life of your engine․ Proper upkeep also enhances safety, fuel efficiency, and overall boating experience․ Adhering to factory-recommended schedules ensures your Mercruiser remains in peak condition, ready for every adventure․

1․2 Types of Manuals Available (Service, Repair, Parts Catalogue)

Mercruiser offers various manuals tailored to different needs․ The Service Manual provides detailed procedures for routine maintenance and troubleshooting․ The Repair Manual includes in-depth instructions for complex fixes and overhauls․ Additionally, a Parts Catalogue is available, listing components and their specifications․ These resources ensure users can address specific tasks, whether basic upkeep or advanced repairs, with accurate guidance․ They cater to both DIY enthusiasts and professional mechanics, ensuring optimal engine performance and longevity․

How to Find the Correct Mercruiser Maintenance Manual

Locate your engine’s serial number, found on the side or flame arrester cover, to access the correct digital manual for your specific Mercruiser model․

2․1 Locating the Serial Number on Your Engine

The serial number is crucial for identifying your Mercruiser engine and accessing the correct maintenance manual․ It is typically located on the side of the engine or the top of the flame arrester cover․ The serial number format usually begins with a number, followed by a letter and six digits (e․g․, 0G112233)․ Always ensure you have the correct serial number to obtain the right manual for your specific model․

2․2 Accessing Digital Copies of the Manual

Digital copies of the Mercruiser maintenance manual can be easily accessed online․ Visit the official Mercury Marine website, agree to the terms, and fill out the required form with your engine’s serial number․ You can also purchase a subscription for online access, ensuring you have the most up-to-date information․ This method is convenient and allows you to reference the manual anytime, anywhere, for accurate and efficient maintenance․

Routine Maintenance Procedures

Routine maintenance procedures include regular oil changes, transmission fluid checks, and fuel filter replacements, ensuring optimal engine performance and longevity by following a strict schedule․

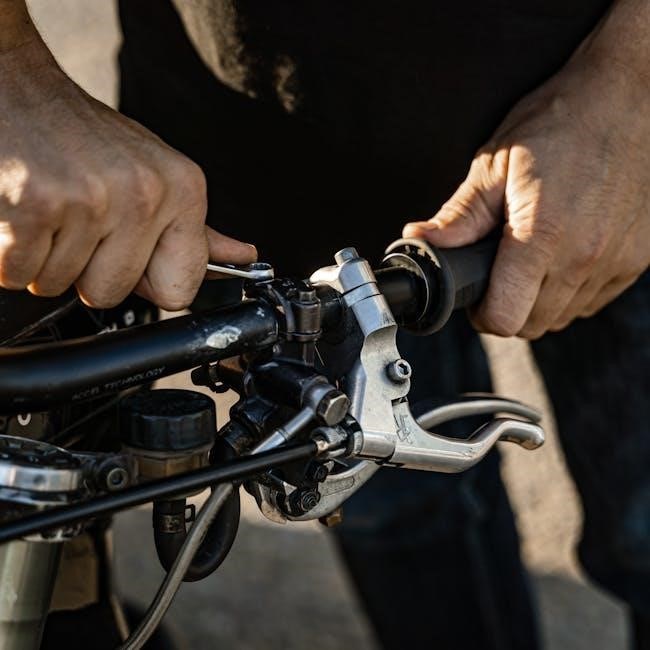
3․1 Daily Checks and Inspections

Daily checks are crucial for ensuring your Mercruiser engine operates smoothly․ Inspect oil and coolant levels, look for leaks, and check belts and hoses for wear․ Verify battery connections are secure and test warning lights․ Examine the propeller for damage and ensure all steering and control systems are functioning properly․ These routine inspections help prevent issues and ensure safe operation, keeping your engine in peak condition for reliable performance on the water․

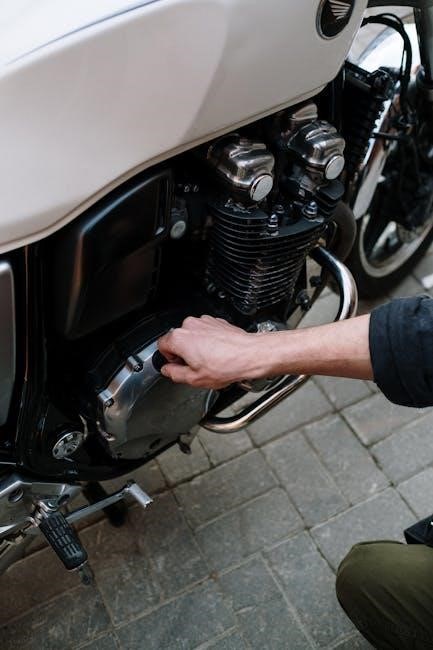
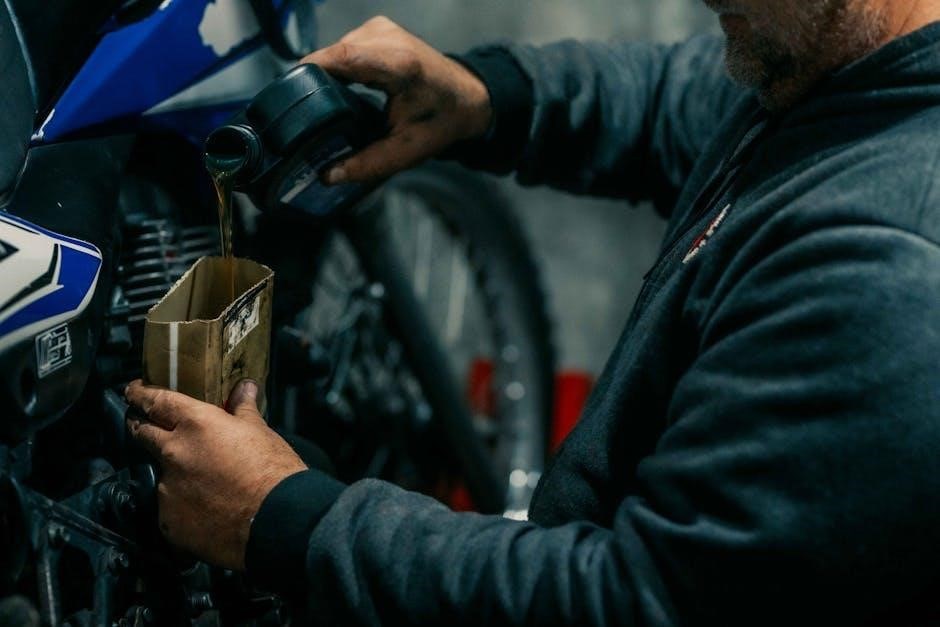
3․2 Changing the Crankcase Oil and Filter

Regular oil and filter changes are vital for maintaining your Mercruiser engine’s health․ Locate the drain plug, typically found at the bottom of the crankcase, and drain the old oil into a pan․ Replace the oil filter with a new one, ensuring it’s properly seated․ Refill with the recommended Marine-rated oil to prevent corrosion and wear․ Dispose of used oil responsibly and consult your manual for specific guidelines and capacities to ensure optimal engine performance․

3․3 Transmission Fluid Maintenance

Regular transmission fluid checks and changes are crucial for smooth operation and longevity․ Locate the transmission fluid dipstick, typically near the engine, and ensure the level is within the recommended range․ Use the specified Marine-rated transmission fluid to prevent corrosion and wear․ Replace the fluid filter if necessary․ Always refer to your manual for specific instructions and capacities․ Proper maintenance ensures optimal performance and prevents costly repairs․ Dispose of used fluid responsibly․

3․4 Fuel Filter Replacement

Regular fuel filter replacement is vital to ensure clean fuel flow and prevent engine damage․ Locate the fuel filter near the engine or fuel line․ Turn off the engine and allow it to cool․ Use a wrench to remove the filter, then install a new one with the correct specifications․ Always use genuine or high-quality replacement parts to maintain performance․ Properly dispose of the old filter to avoid environmental contamination․ Refer to your manual for specific guidance․

Troubleshooting Common Issues

This section guides you through identifying common engine issues and using diagnostic tools and techniques․ It provides solutions and preventive measures to minimize downtime and ensure smooth operation․

4․1 Identifying Common Problems

Regular maintenance and inspections help identify common issues early, such as low oil levels, dirty filters, or worn parts․ Look for signs like unusual noises, leaks, or decreased performance․ The manual provides guidance on diagnosing problems related to the engine, transmission, and fuel system․ Addressing these issues promptly prevents major repairs and ensures reliable operation․ Always refer to the manual for specific troubleshooting steps tailored to your Mercruiser model․

4․2 Using Diagnostic Tools and Techniques

Diagnostic tools like the SmartCraft Network App provide real-time engine data, aiding in quick issue identification․ Factory service manuals offer detailed troubleshooting guides, while compression tests and fuel system checks help pinpoint problems․ Regular inspections of belts, hoses, and connections ensure early detection of wear․ Utilizing these tools and techniques enables precise diagnostics, reducing downtime and ensuring effective repairs tailored to your Mercruiser engine’s specific needs․

Parts and Accessories for Mercruiser Engines

Genuine Mercruiser parts ensure reliability and performance․ Use factory-authorized components and consult the parts catalogue for accurate identification․ Serial numbers help match parts to your engine model․

5․1 Genuine vs․ Aftermarket Parts

Genuine Mercruiser parts are designed to meet strict factory standards, ensuring optimal performance and reliability․ Aftermarket parts may cost less but often lack the quality and compatibility of OEM components․ Always verify the source and specifications to avoid potential issues․ Genuine parts are backed by warranties and are recommended for maintaining your engine’s integrity and longevity․ Choose wisely to ensure your Mercruiser runs at its best․

5․2 Finding the Right Parts for Your Engine Model

To find the correct parts for your Mercruiser engine, always refer to the serial number located on the engine or flame arrester cover․ Use this number to consult the official parts catalogue or contact authorized dealers․ Ensure compatibility by verifying specifications and model year․ Genuine parts are recommended for optimal performance and reliability․ Purchasing from trusted sources guarantees authenticity and warranty coverage, ensuring your engine runs smoothly and maintains its longevity․

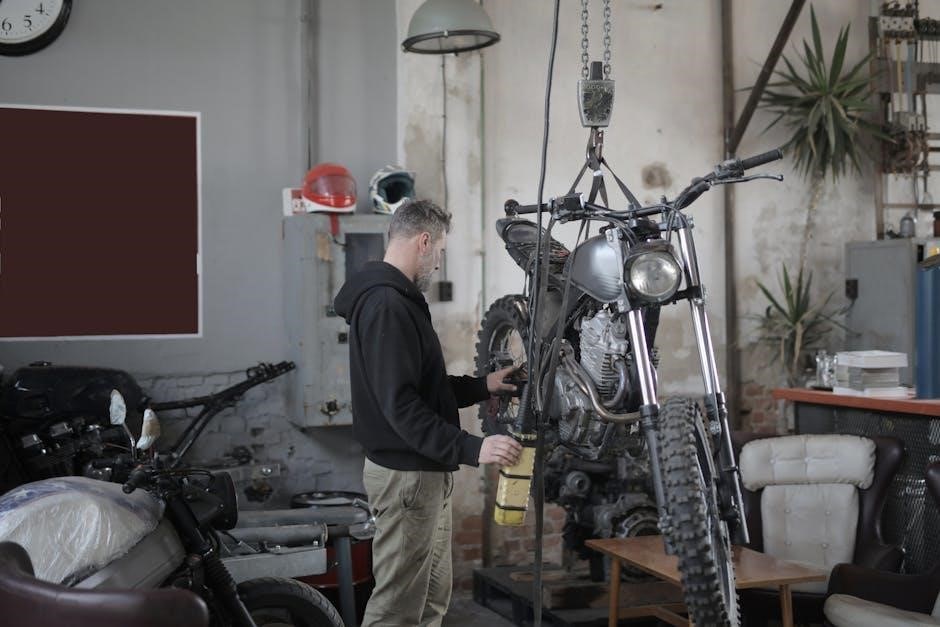
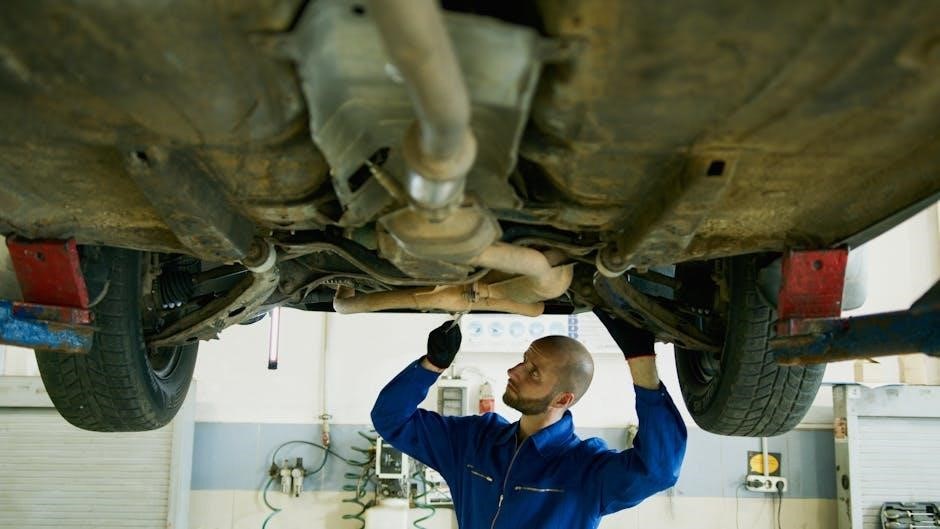
Advanced Maintenance and Repair

Advanced maintenance involves engine overhauls, stern drive servicing, and complex repairs․ Use specialized tools and diagnostic manuals for precise troubleshooting․ Always refer to factory guidelines for rebuilds and replacements, ensuring compatibility with your engine model․ Regular advanced care extends longevity and performance, maintaining peak efficiency and reliability․ Consult certified technicians for intricate tasks to avoid damage and ensure safety․

6․1 Engine Overhaul and Rebuilding

Engine overhauls require meticulous disassembly, inspection, and replacement of worn components․ Use genuine parts and factory manuals to ensure accuracy․ Rebuilding involves honing cylinders, replacing piston rings, and reconditioning bearings․ Proper torque specifications and alignment are critical․ Regular overhauls prevent costly failures and maintain performance․ Always follow safety protocols and seek professional assistance if unsure․

6․2 Servicing the Stern Drive

Servicing the stern drive is crucial for maintaining performance and preventing damage․ Regularly inspect the drive for damage or corrosion, and lubricate all moving parts․ Check the propeller for dents or imbalance and ensure proper alignment․ Replace any worn seals or bearings to prevent leakage․ Use genuine parts and follow torque specifications for all bolts and nuts․ Proper maintenance extends the life of your stern drive and ensures smooth operation․ Always dispose of waste materials responsibly to protect the environment․

Safety Precautions and Best Practices

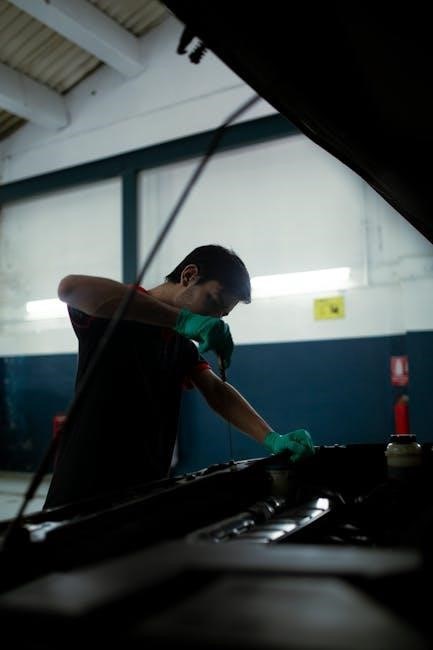
Always wear protective gear like gloves and goggles․ Ensure proper ventilation and keep a fire extinguisher nearby․ Use jack stands for engine support and follow manufacturer guidelines strictly․

7․1 Essential Safety Equipment

Essential safety equipment includes fire extinguishers, gloves, goggles, and jack stands․ Proper ventilation systems and protective clothing are critical when working with marine engines․ Always ensure fire extinguishers are nearby and easily accessible․ Use jack stands to securely support the engine during maintenance․ Protective gear prevents injuries from sharp objects or chemical spills․ Regularly inspect safety equipment to ensure it is in good condition․ Neglecting safety precautions can lead to serious injuries or equipment damage․

7․2 Safe Working Practices

Always disconnect the battery before starting maintenance to prevent accidental startups․ Use jack stands to stabilize the boat or engine, ensuring a secure working environment․ Proper ventilation is crucial when handling flammable materials․ Wear protective gear like gloves and safety glasses to prevent injuries․ Avoid loose clothing that could get caught in moving parts․ Follow the manual’s instructions carefully and stay informed about potential hazards․ Being prepared and vigilant helps prevent accidents and ensures a safe working environment․

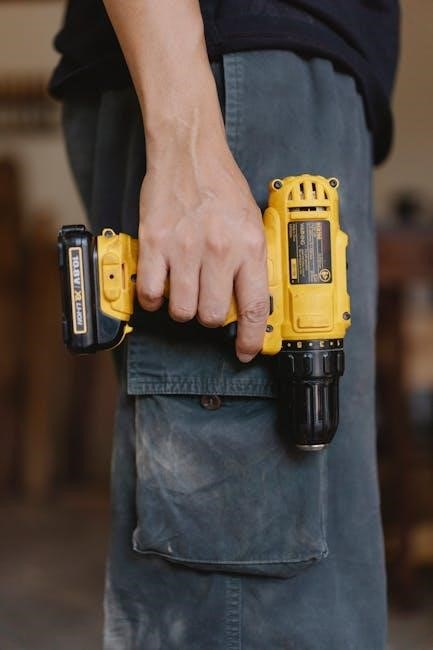
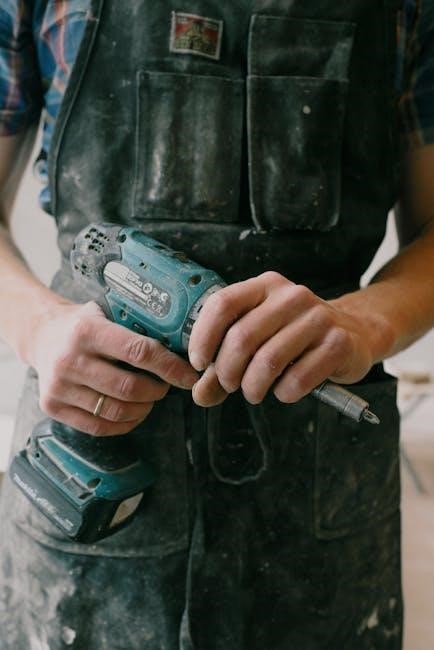
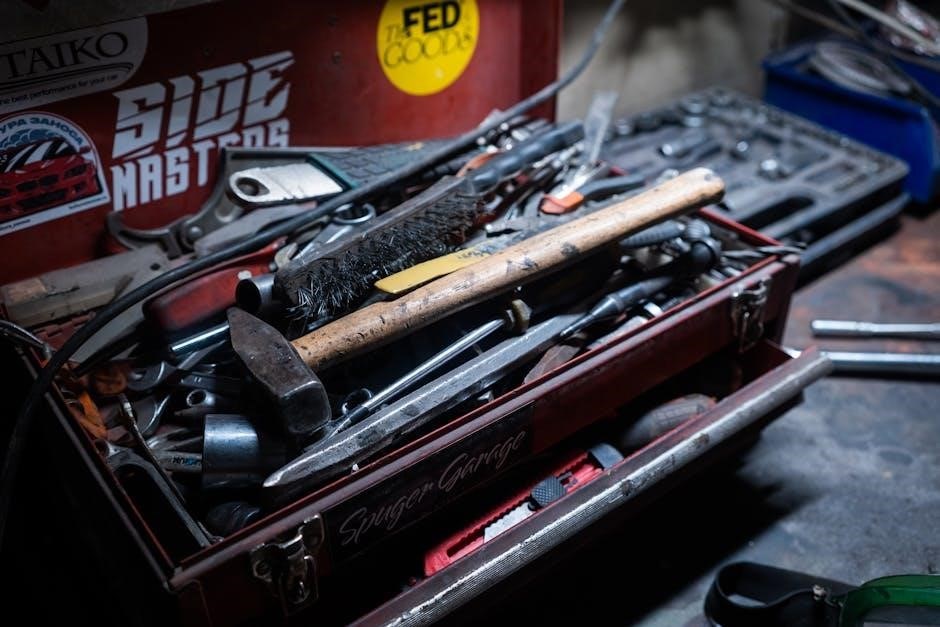
Tools and Equipment Needed

Essential tools include wrenches, screwdrivers, and pliers, while specialized tools like diagnostic devices and pressure testers are required for advanced repairs and maintenance tasks․

8․1 Essential Tools for Maintenance

For routine Mercruiser maintenance, essential tools include wrenches, screwdrivers, pliers, and socket sets․ A multimeter is crucial for diagnosing electrical issues, while an oil filter wrench simplifies filter changes․ A pressure tester helps check for leaks, and a torque wrench ensures proper bolt tightening․ Additionally, a set of Allen keys and a spark plug gap tool are vital for specific tasks․ Always refer to your manual for model-specific tool requirements and maintain an organized toolkit for efficiency․

8․2 Specialized Tools for Advanced Repairs

Advanced Mercruiser repairs require specialized tools like a dial indicator for crankshaft alignment and a piston puller for engine overhauls; A propeller puller is essential for removing stuck props, while a stern drive alignment tool ensures proper installation․ These tools are critical for tasks like engine rebuilding or transmission servicing, ensuring precise adjustments and preventing damage․ Always use factory-recommended tools to maintain engine integrity and avoid costly repairs․

Environmental Considerations

Proper disposal of waste materials like oil and filters is crucial․ Adhere to eco-friendly practices to minimize environmental impact during maintenance and repairs of your Mercruiser engine․

9․1 Proper Disposal of Waste Materials

Proper disposal of waste materials like used oil, filters, and chemicals is essential to prevent environmental contamination․ Always follow local regulations and use authorized facilities for hazardous waste․ The Mercruiser manual emphasizes the importance of eco-friendly practices, ensuring all materials are handled and disposed of safely․ Proper disposal protects marine ecosystems and adheres to environmental laws, promoting sustainable maintenance practices for your engine․

9․2 Eco-Friendly Maintenance Practices

Adhering to eco-friendly maintenance practices is vital for minimizing environmental impact․ Use biodegradable lubricants and eco-friendly cleaners to reduce chemical contamination․ Regularly inspect your engine to prevent leaks and ensure all systems function efficiently․ Properly dispose of waste materials and follow EPA guidelines to protect marine ecosystems․ By adopting these practices, you contribute to sustainable boating and uphold environmental responsibility․

Accessing Additional Resources

Access online forums, communities, and dealer support for further assistance․ These resources provide troubleshooting tips, maintenance advice, and direct help from experienced technicians and enthusiasts․

10․1 Online Forums and Communities

Online forums and communities are valuable resources for Mercruiser owners and technicians․ Platforms like Reddit, marine enthusiast groups, and specialized forums offer real-time discussions, troubleshooting tips, and advice from experienced users․ These communities often include detailed threads on maintenance, repairs, and upgrades, providing practical insights and solutions․ Additionally, many forums host experts who can address specific issues or guide you through complex procedures․ They also share links to official manuals and diagnostic tools, making them an invaluable support network for Mercruiser enthusiasts․

10․2 Dealer Support and Service Centers

Dealer support and service centers provide professional assistance for Mercruiser maintenance and repairs․ Authorized dealers offer genuine parts, expert technicians, and warranty services․ They ensure accurate diagnoses and proper repairs, adhering to factory standards․ Additionally, dealers can provide access to exclusive tools and resources, such as diagnostic manuals and technical updates․ Visiting a certified service center guarantees high-quality care for your engine, ensuring reliability and performance․ Regular check-ups at these centers are highly recommended for maintaining your Mercruiser in optimal condition․

The Mercruiser Maintenance Manual is a comprehensive guide to ensuring your engine runs efficiently․ Regular maintenance and proper care extend its lifespan and performance, keeping your boat reliable and ready for adventures․

11․1 Summary of Key Maintenance Practices

Regular maintenance is crucial for optimal Mercruiser engine performance and longevity․ Key practices include checking fluids, filters, and belts, replacing parts as specified, and following the service manual․ Always use genuine parts for reliability․ Keep maintenance records and ensure proper disposal of waste materials․ Routine inspections and timely repairs prevent major issues․ Stay proactive to enjoy trouble-free boating experiences and maintain your engine’s efficiency and durability over time․

11․2 Encouragement to Stay Proactive

Proactive maintenance is key to ensuring your Mercruiser engine performs reliably and efficiently․ Regular checks, timely repairs, and adherence to the manual prevent unexpected issues․ Invest in genuine parts and follow recommended schedules to maintain your engine’s health․ By staying proactive, you safeguard your investment, enhance safety, and enjoy uninterrupted boating experiences․ Consistent effort now leads to years of trouble-free operation and optimal performance on the water․

volkswagen touareg 2002-2006 factory service workshop repair manual

The Volkswagen Touareg 2002-2006 Factory Service Workshop Repair Manual is an essential resource for owners and mechanics, providing detailed instructions for repairs, maintenance, and diagnostics to ensure optimal performance and reliability.

1.1 Importance of the Factory Service Manual for Repairs and Maintenance

The factory service manual is crucial for ensuring accurate repairs and maintenance of the Volkswagen Touareg (2002-2006). It provides detailed, manufacturer-specific instructions and specifications, enabling technicians to address issues effectively. By following the manual, common problems like coolant leaks or oil changes can be resolved correctly, preventing further damage. It also helps avoid costly mistakes by providing precise torque values and diagnostic procedures. This resource is essential for maintaining the vehicle’s performance, safety, and longevity, making it a must-have for both professional mechanics and DIY enthusiasts.

1.2 Overview of the Volkswagen Touareg (2002-2006) Model

The Volkswagen Touareg, produced from 2002 to 2006, is a luxury SUV known for its robust build and off-road capabilities. Available in various trims, it features a range of engine options, including V6 and V8 configurations, as well as a TDI diesel variant. The Touareg was praised for its spacious interior, advanced 4-wheel-drive system, and premium features. However, its reliability has been a topic of discussion, with some owners reporting issues over time. This generation remains popular among enthusiasts for its blend of power and versatility, making it a sought-after model in the used market.

Key Features of the Volkswagen Touareg 2002-2006 Service Manual

  • Detailed diagrams and illustrations for complex repairs and component identification.
  • Comprehensive repair procedures covering engine, transmission, and drivetrain systems.
  • Troubleshooting guides and diagnostic tips for common issues and fault codes.

2.1 Detailed Diagrams and Illustrations

The manual includes detailed diagrams and illustrations to guide technicians through complex repair procedures. These visuals cover engine components, transmission systems, and electrical circuits, ensuring clarity and precision. High-resolution images help identify parts and their assembly, reducing errors. Step-by-step illustrations are provided for tasks like coolant system repairs and brake overhauls, as seen in user reports of a 2004 Touareg V6 coolant leak. These visuals are essential for DIY enthusiasts and professionals, making the repair process more manageable and efficient. They are often color-coded and labeled for easy reference.

2.2 Comprehensive Repair Procedures

The manual provides detailed step-by-step repair procedures for various components, ensuring clarity and precision. It covers engine overhauls, transmission repairs, and electrical system diagnostics. With clear diagrams and instructions, users can address issues like coolant leaks or brake system overhauls confidently. The guide also includes torque specifications and alignment values, essential for maintaining vehicle performance. Whether replacing a thermostat housing or diagnosing complex faults, the manual offers practical solutions tailored to the Touareg’s unique design, helping users achieve professional-grade repairs at home or in the shop.

2;3 Troubleshooting Guides and Diagnostic Tips

The manual includes comprehensive troubleshooting guides to identify and resolve common issues, such as coolant leaks, oil consumption, and electrical system malfunctions. It provides step-by-step diagnostic procedures, fault code references, and repair steps. Detailed diagrams and charts help pinpoint problems quickly, while diagnostic tips ensure accurate repairs. Specific tools and software recommendations are highlighted, enabling users to address issues efficiently. This section is crucial for DIY enthusiasts and professionals alike, ensuring proper diagnosis and resolution of faults in the Volkswagen Touareg (2002-2006).

  • Covers common faults like coolant leaks and electrical issues.
  • Provides diagnostic codes and repair solutions.
  • Includes tool and software recommendations.

Common Repairs and Maintenance Procedures

The Volkswagen Touareg 2002-2006 often requires repairs like coolant leaks, oil consumption issues, and brake system overhauls. Regular maintenance ensures reliability and prevents major failures.

3.1 Oil Change and Fluid Replacement Guidelines

Regular oil changes are crucial for maintaining the Volkswagen Touareg 2002-2006 engine’s health. The manual specifies using synthetic oil meeting VW standards. Draining the oil requires a warm engine, proper tools, and a drain pan. Replace the oil filter and refill with the recommended viscosity. Torque the drain plug to factory specs. Additionally, fluid replacements for coolant, transmission, and brake systems are detailed, ensuring optimal performance and longevity. Always use VW-approved fluids to avoid contamination and maintain warranty compliance.

3.2 Brake System Overhaul and Replacement

The brake system overhaul for the Volkswagen Touareg (2002-2006) requires careful attention to detail to ensure safety and performance. Common issues include worn brake pads, warped rotors, and fluid leaks. The manual provides step-by-step procedures for inspecting, disassembling, and replacing brake components. Specialized tools, such as a brake bleeding kit, are often necessary to maintain proper system function. Additionally, the guide includes torque specifications for brake calipers and rotors to ensure precise reassembly. Regular maintenance can prevent premature wear and improve overall braking efficiency.

  • Inspect brake pads and rotors for wear or damage.
  • Replace brake fluid and bleed the system to remove air pockets.
  • Use torque wrench for caliper and rotor installation.

3.3 Cooling System Maintenance and Repair

The cooling system of the Volkswagen Touareg (2002-2006) requires regular maintenance to prevent overheating and engine damage. Inspect hoses, belts, and the radiator for leaks or wear. Clean or replace the radiator as needed, and ensure the coolant level is correct. Replace the coolant every 30,000 miles or as specified. If issues arise, such as a leaking thermostat housing, refer to the manual for precise repair steps. Always use the recommended coolant type and follow torque specifications for radiator connections to avoid damage.

Technical Specifications and Torque Values

The manual provides precise engine specifications, torque values, and drivetrain details for the Volkswagen Touareg 2002-2006, ensuring accurate repairs and maintenance procedures are followed.

4.1 Engine Specifications and Bolt Torque Charts

The Volkswagen Touareg 2002-2006 features various engine options, including gasoline and diesel variants. Detailed specifications such as displacement, horsepower, and torque are provided in the manual. Bolt torque charts are essential for ensuring proper assembly and preventing engine damage. These charts outline precise torque values for critical components like cylinder heads, intake manifolds, and engine mounts. Adhering to these values is crucial for maintaining engine performance and reliability, especially during repairs or replacements.

4.2 Transmission and Drivetrain Details

The manual provides extensive information on the transmission and drivetrain of the Volkswagen Touareg (2002-2006), including torque specifications, fluid replacement procedures, and detailed diagrams. It covers the 6-speed automatic and manual transmissions, highlighting common issues like gear slippage and sensor malfunctions. The drivetrain section focuses on the 4MOTION all-wheel-drive system, offering repair guides for transfer cases and differentials. This ensures proper maintenance and repair, maintaining the vehicle’s performance and reliability on both on-road and off-road conditions.

4.3 Suspension and Steering Alignment Values

The manual provides precise suspension and steering alignment values for the Volkswagen Touareg (2002-2006), ensuring proper vehicle handling and stability. It includes detailed specifications for toe, camber, and caster adjustments, along with torque values for suspension components. These guidelines are crucial for maintaining optimal performance and safety. Proper alignment prevents uneven tire wear and improves overall driving dynamics. The manual also outlines procedures for checking and adjusting steering geometry, ensuring accurate wheel alignment and smooth operation of the vehicle’s suspension system.

Tools and Equipment Required for Repairs

The Volkswagen Touareg 2002-2006 Factory Service Workshop Repair Manual outlines essential tools and equipment, including wrenches, screwdrivers, and specialized diagnostic software for efficient repairs and maintenance.

5.1 Specialized Tools for Volkswagen Repairs

Repairing the Volkswagen Touareg requires specific tools designed for its unique systems. Essential tools include a VAG-COM or VCDS diagnostic interface for troubleshooting, alongside specialized wrenches and sockets. A torque wrench is crucial for precise bolt tightening, while a compression test kit helps diagnose engine issues. Additional tools like a coolant pressure tester and brake bleeding kit are necessary for system-specific maintenance. These tools ensure accurate and efficient repairs, aligning with the manual’s guidelines for maintaining the Touareg’s performance and longevity.

5.2 Diagnostic Equipment and Software

Diagnostics for the Volkswagen Touareg 2002-2006 require specialized tools like VAG-COM or VCDS, which enable fault code reading, system scanning, and real-time data monitoring. These tools are essential for identifying issues in the engine, transmission, and electronic systems. Additionally, the factory service manual recommends using Diagnostic Trouble Code (DTC) scanners to pinpoint specific malfunctions. Advanced software, such as OBD-II compatible programs, can also be used for comprehensive diagnostics. Proper equipment ensures accurate troubleshooting and efficient repairs, aligning with the manual’s guidelines for professional-level maintenance and diagnostics.

Warranty and Service History Information

This section covers understanding warranty terms, tracking maintenance, and documenting repairs, ensuring compliance with Volkswagen’s requirements for claims and service history, referencing common issues like coolant leaks.

6.1 Understanding Warranty Coverage and Repairs

Understanding warranty coverage is crucial for Volkswagen Touareg 2002-2006 owners to ensure repairs are covered and performed correctly. The factory service manual outlines warranty terms, including duration and mileage limits. It also details what repairs are covered under warranty and any limitations. Proper documentation and maintenance records are essential to validate warranty claims. The manual emphasizes the importance of using genuine parts and authorized service centers to maintain warranty validity. This section helps owners navigate warranty processes and avoid unnecessary repair costs.

6.2 Keeping Track of Maintenance and Service Records

Maintaining accurate service records is crucial for ensuring the longevity and performance of your Volkswagen Touareg. The factory service manual emphasizes the importance of documenting all repairs, oil changes, and part replacements. By keeping a detailed log, you can track maintenance milestones, verify warranty compliance, and provide proof of proper care. This not only helps in diagnosing issues but also enhances resale value. Use the manual’s guidelines to organize records, whether digital or physical, ensuring clarity and accessibility for future reference. Regular updates and thorough documentation are key to maintaining your vehicle’s health.

Safety Precautions and Best Practices

Always wear protective gear, ensure proper jack placement, and follow manufacturer guidelines to prevent accidents. Be aware of the vehicle’s weight and potential hazards during repairs.

7.1 General Safety Guidelines for Working on Vehicles

When working on your Volkswagen Touareg, always wear protective gear like gloves and safety glasses. Ensure the vehicle is on level ground and apply the parking brake. Disconnect the battery to prevent electrical shocks. Use jack stands for lifting, and never rely solely on a jack. Keep a fire extinguisher nearby and avoid working in enclosed spaces without ventilation. Follow proper procedures for handling fluids and components to minimize risks. Refer to the manual for specific precautions to ensure a safe working environment and prevent accidents.

7.2 Specific Safety Warnings for the Touareg Model

When working on the Volkswagen Touareg 2002-2006, ensure proper precautions to avoid hazards. Be cautious of the cooling system, as leaks or improper repairs can lead to engine damage. Always use Volkswagen-approved fluids and follow torque specifications to prevent component failure. Handling diesel fuel and emissions systems requires extra care to avoid contamination. Refer to the manual for specific guidelines on handling high-pressure systems and electrical components. Failure to follow safety protocols may result in injury or further vehicle damage.

Resources and References

Consult online forums and communities for shared experiences and solutions. Utilize official repair manuals and certified diagnostic tools for accurate troubleshooting and maintenance guidance.

8.1 Additional Repair Manuals and Guides

Beyond the factory service manual, additional resources like DIY repair guides, wiring diagrams, and parts catalogs provide comprehensive support for the Volkswagen Touareg 2002-2006. These materials often include detailed troubleshooting tips, step-by-step instructions for common repairs, and specifications for replacement parts. Online forums and communities also offer valuable insights and shared experiences from other Touareg owners and mechanics. These supplementary resources can enhance your ability to maintain and repair your vehicle effectively, ensuring reliability and performance over time.

8.2 Online Forums and Communities for Support

Online forums and communities provide invaluable support for Volkswagen Touareg owners, offering troubleshooting tips, repair guides, and real-world advice from experienced enthusiasts and mechanics. Platforms like Reddit, specialized Volkswagen forums, and Facebook groups host discussions on common issues such as coolant leaks, Bluetooth connectivity, and maintenance tips. These communities allow owners to share solutions, ask questions, and learn from others’ experiences, fostering a collaborative environment for resolving problems and optimizing vehicle performance. Engaging with these forums can save time and money by providing DIY solutions and recommendations for trusted repair shops.

olympus tough 6 manual

The Olympus Tough TG-6 manual is a comprehensive guide designed to help users unlock the full potential of their camera. Whether you’re a seasoned photographer or a beginner, this manual provides detailed instructions on how to operate and maintain the Olympus Tough TG-6. The manual is structured into several key sections, including Preparation, Shooting, Playback, and Menu Functions, ensuring that every aspect of the camera is covered.

  • It explains how to prepare the camera for use, including charging the battery and inserting the memory card.
  • The manual also covers various shooting modes and settings, allowing users to capture stunning images in different conditions.
  • Additional sections focus on playback options, menu navigation, and advanced features like field sensor data and Wi-Fi connectivity.

By reading the manual, users can troubleshoot common issues, understand safety precautions, and explore the camera’s unique features. This guide is essential for anyone looking to maximize their photography experience with the Olympus Tough TG-6.

1.1 Overview of the Olympus Tough TG-6 Camera

The Olympus Tough TG-6 is a high-performance, rugged compact camera designed to withstand the toughest conditions, making it an ideal choice for outdoor enthusiasts, adventure seekers, and professionals who require durability without compromising on image quality. Built to endure extreme environments, the TG-6 is water-resistant up to 15 meters, shockproof against drops from up to 2.4 meters, crushproof up to 100 kgf, and freeze-proof down to -10°C. These features ensure that the camera can handle the rigors of underwater photography, hiking, skiing, and other demanding activities.

At the heart of the Olympus Tough TG-6 is a high-sensitivity 12-megapixel backlit CMOS image sensor, which delivers excellent image quality with vibrant colors and sharp details. The camera is equipped with a versatile 4x optical zoom lens, covering a focal range of 4.5 to 18 millimeters (equivalent to 25-100mm in 35mm format), making it suitable for capturing wide-angle landscapes, portraits, and macro shots. The lens also features a maximum aperture of f/2.0 at the wide end, allowing for better low-light performance and shallower depth of field.

The Olympus Tough TG-6 is renowned for its advanced underwater capabilities. It supports underwater shooting modes and is compatible with Olympus’ dedicated underwater housing, which extends its water resistance to depths of up to 40 meters. This feature, combined with the camera’s anti-fog glass and advanced autofocus system, makes it a favorite among divers and snorkelers. Additionally, the TG-6 includes a built-in ring light, which can be used as a focus assist lamp or to provide additional illumination for macro photography.

In terms of video capabilities, the TG-6 can record 4K Ultra HD video at 30p and 1080p Full HD video at 120fps for smooth slow-motion playback. The camera also supports time-lapse and interval shooting, allowing users to capture stunning sequences of dynamic scenes. With built-in Wi-Fi and GPS, the TG-6 enables seamless image transfer to smartphones and geotagging of photos, making it easy to share memories on the go.

Despite its rugged design, the Olympus Tough TG-6 is compact and lightweight, weighing just 253 grams, making it easy to carry on any adventure. The camera’s 3-inch LCD screen provides a clear view of images and videos, even in bright sunlight, and the intuitive user interface ensures that users of all skill levels can navigate its features with ease. The TG-6 also supports RAW image capture, giving photographers greater flexibility during post-processing.

Overall, the Olympus Tough TG-6 is a versatile and reliable camera that excels in a wide range of shooting conditions. Its combination of durability, advanced imaging technology, and user-friendly design makes it an excellent choice for anyone looking for a camera that can keep up with their active lifestyle. Whether you’re capturing the beauty of nature, documenting your travels, or exploring the depths of the ocean, the TG-6 is a trusted companion that delivers exceptional results.

1.2 Importance of Reading the Manual

Reading the Olympus Tough TG-6 manual is essential for anyone looking to fully understand and utilize the camera’s extensive features. While the camera is designed to be user-friendly, its advanced capabilities and specialized functions require a thorough understanding to ensure optimal performance. The manual serves as a comprehensive guide, providing detailed explanations of every feature, mode, and setting, allowing users to unlock the camera’s full potential.

One of the primary reasons to read the manual is to gain insight into the camera’s advanced features. The Olympus Tough TG-6 is packed with innovative technologies, such as its underwater shooting modes, anti-fog glass, and advanced autofocus system. Without a clear understanding of these features, users may miss out on the opportunity to capture stunning images in challenging conditions. The manual provides step-by-step instructions on how to activate and use these features, ensuring that photographers can make the most of their camera’s capabilities.

Another important aspect of the manual is its focus on safety and maintenance. The Olympus Tough TG-6 is built to withstand harsh environments, but proper care is still necessary to maintain its performance and longevity. The manual includes guidelines for cleaning the camera, avoiding damage to the lens, and ensuring the camera’s seals remain watertight. By following these recommendations, users can prevent costly repairs and extend the life of their camera.

The manual also plays a crucial role in helping users navigate the camera’s menu system. With a wide range of customizable settings and options, the menu can be overwhelming for new users. The manual breaks down each menu function, explaining its purpose and how to adjust it for different shooting scenarios. This ensures that users can quickly and easily access the settings they need, without spending valuable time searching through the menu during critical moments.

For those new to photography, the manual serves as an excellent learning tool. It explains fundamental concepts, such as aperture, shutter speed, and ISO, and provides practical advice on how to use these settings to achieve desired results. The manual also includes tips for capturing specific types of images, such as macro shots, landscapes, and underwater scenes, helping users improve their photography skills and expand their creative possibilities.

Familiarizing yourself with the manual can also help you troubleshoot common issues. Whether it’s resolving error messages, understanding battery management, or addressing connectivity problems, the manual provides clear solutions and guidance. This ensures that users can quickly resolve any issues and get back to capturing the moments that matter.

Additionally, the manual highlights the camera’s specialized features, such as its built-in ring light, GPS capabilities, and RAW image capture. These features set the Olympus Tough TG-6 apart from other cameras and provide users with unique tools for creative and professional photography. By reading the manual, users can learn how to harness these features to enhance their images and stand out as photographers.

r5 manual download

The Canon EOS R5 manual is a comprehensive guide for mastering the camera’s advanced features‚ including detailed operating instructions‚ firmware updates‚ and troubleshooting tips.

1.1 Overview of the Canon EOS R5 Camera

The Canon EOS R5 is a high-performance mirrorless camera designed for professional photographers and enthusiasts. It features a 45MP full-frame sensor‚ 8K video recording‚ and advanced autofocus. With a robust build and intuitive interface‚ it delivers exceptional image quality and versatility. The R5 supports high-speed continuous shooting and boasts a vari-angle touchscreen for enhanced creativity. Its weather-sealed design ensures durability in challenging conditions. Whether for photography or videography‚ the EOS R5 is a powerful tool‚ offering cutting-edge technology and unmatched performance‚ making it a favorite among creative professionals and hobbyists alike;

1.2 Importance of the User Manual for photographers

The user manual is an essential resource for photographers‚ providing detailed insights into the Canon EOS R5’s features‚ settings‚ and operations. It helps users unlock the camera’s full potential‚ understand advanced functions‚ and troubleshoot issues. Whether you’re a novice or an expert‚ the manual offers step-by-step guidance to enhance your photography skills. It covers firmware updates‚ customization options‚ and best practices for optimal performance. By referencing the manual‚ photographers can ensure they are using their equipment effectively‚ leading to better results and a more satisfying creative experience.

Sources for Downloading the Canon EOS R5 Manual

The Canon EOS R5 manual can be downloaded from official Canon websites‚ support sections‚ and trusted third-party sources‚ ensuring safe and reliable access to the guide.

2.1 Official Canon Website

The official Canon website is the most reliable source for downloading the EOS R5 manual. It provides direct access to the latest versions of the manual‚ ensuring authenticity and security. Users can navigate to the support section‚ select the EOS R5 model‚ and choose the desired document type. The website is user-friendly‚ offering a seamless download experience. Additionally‚ it includes supplementary materials like firmware update instructions and advanced user guides‚ making it a one-stop resource for all EOS R5-related documentation needs. Regular updates ensure that users have the most current information available.

2.2 Canon Support and Drivers Section

The Canon Support and Drivers section is a dedicated resource for EOS R5 users‚ offering easy access to the manual and other essential documentation. This section is designed for quick navigation‚ allowing users to find and download the latest versions of the manual‚ drivers‚ and firmware updates. It ensures that users can access all necessary materials in one place‚ with clear categorization for easy searching. The section is regularly updated to reflect the latest firmware versions and user guides‚ making it a trusted destination for maintaining and optimizing the EOS R5 camera. This resource is particularly useful for troubleshooting and enhancing camera performance.

2.3 Third-Party Reliable Sources

Beyond official channels‚ third-party websites offer the Canon EOS R5 manual‚ ensuring accessibility for users who prefer alternative download options. These platforms are vetted for reliability and safety‚ providing authentic documents without compromising on quality. They often host multiple versions of the manual‚ catering to different firmware updates and regional requirements. Users can benefit from these sources when official sites are unavailable or slow. However‚ caution is advised to avoid malicious links‚ ensuring downloads are from trusted repositories. These third-party sources remain a valuable backup for obtaining the EOS R5 manual efficiently and securely.

System Requirements for the Manual

The Canon EOS R5 manual requires compatible operating systems and software like Adobe Acrobat for viewing. Ensure your device meets these specifications for optimal performance.

3.1 Compatible Operating Systems

The Canon EOS R5 manual is compatible with various operating systems‚ including Windows 10/11 and macOS 10.15 or later. Ensure your device runs on a supported OS for seamless manual viewing. Compatibility ensures proper functionality of the PDF viewer and any accompanying software. Verify your system meets these requirements before downloading to avoid issues. For the latest updates‚ visit the official Canon website‚ as compatibility may expand with new OS releases. Always check the system requirements section for the most accurate information.

3.2 Required Software for Viewing the Manual

The Canon EOS R5 manual is typically provided in PDF format‚ requiring a compatible PDF viewer like Adobe Acrobat Reader. Ensure you have the latest version installed for optimal performance. Additional software‚ such as Canon’s Camera Connect app‚ may be recommended for enhanced functionality. Download these tools from official sources to avoid security risks. The manual may also include links to dedicated firmware update software. Always verify the software’s compatibility with your operating system before installation. Updating your software regularly ensures access to the latest features and security patches.

Key Features of the Canon EOS R5 Manual

The manual offers detailed operating instructions‚ advanced user guides‚ and firmware update instructions‚ ensuring photographers can fully utilize the EOS R5’s capabilities and features.

4.1 Detailed Operating Instructions

The EOS R5 manual provides step-by-step guides for camera setup‚ shooting modes‚ and customization options‚ enabling users to optimize their photography experience and explore creative possibilities effectively.

4.2 Firmware Update Instructions

The manual includes detailed firmware update instructions‚ ensuring users can safely and efficiently upgrade their EOS R5‚ accessing new features and performance improvements without risking device stability or functionality.

4.3 Advanced User Guide Sections

The manual’s advanced sections cater to professional photographers‚ offering in-depth customization options‚ autofocus configurations‚ and metering modes. It also covers video recording settings‚ including 8K resolution and HDR support‚ ensuring users can optimize their workflow. Troubleshooting tips and maintenance advice are included to enhance camera longevity. The guide also explores wireless connectivity features‚ such as Wi-Fi and Bluetooth‚ enabling seamless file transfers and remote shooting. These sections empower users to unlock the EOS R5’s full potential‚ tailored for those seeking advanced control and creative freedom.

Steps to Download and Install the Manual

Visit Canon’s official website‚ navigate to the support section‚ select your EOS R5 model‚ and choose the manual. Download the PDF‚ save it‚ and open it.

5.1 Navigating the Canon Official Website

Visit the official Canon website and locate the Support or Drivers and Downloads section. Select your region‚ then choose the EOS R5 model from the product list. Navigate to the Manuals section‚ where you’ll find the user manual available for download. Ensure you select the correct document type‚ such as the EOS R5 Instruction Manual or the Advanced User Guide. Use the search bar if needed for quicker access. Once selected‚ follow the prompts to complete the download process.

5.2 Selecting the Correct Model and Document Type

On the Canon website‚ ensure you select the EOS R5 model from the product list. Use the search bar to quickly locate the camera. Once selected‚ browse the available documents and choose the Instruction Manual or Advanced User Guide specific to your needs. Verify the document title corresponds to your camera model and language preference. Additionally‚ select the correct format‚ such as PDF‚ for easy viewing. For firmware updates‚ look for the Firmware Update Instructions document. Always confirm the document type matches your requirements to avoid confusion and ensure you have the correct guide for your EOS R5.

5.3 Completing the Download Process

After selecting the correct model and document type‚ click the download button to initiate the process. Depending on your internet speed‚ the download may take a few moments. Once completed‚ locate the file in your downloads folder and ensure it is in a recognizable format‚ such as PDF. Open the file using a compatible viewer‚ like Adobe Acrobat Reader. Review the manual to familiarize yourself with its contents. If prompted‚ consider saving the document for future reference or printing it for offline use. Ensure the file is not corrupted by verifying its size and contents match the website’s specifications. If issues arise‚ refer to the troubleshooting section for assistance.

Troubleshooting Common Download Issues

Common issues include connectivity problems and corrupted files. Ensure a stable internet connection and verify file integrity. If errors persist‚ restart the download or contact Canon support.

6.1 Resolving Connectivity Problems

Connectivity issues during manual download can be resolved by ensuring a stable internet connection. Restart your router‚ check network settings‚ and avoid peak usage times. If problems persist‚ use a direct ethernet connection or switch to a reliable Wi-Fi network. Additionally‚ disable any VPN or firewall settings that might interfere with the download process. Clearing browser cache and cookies can also help resolve connection-related issues. For persistent problems‚ consider downloading the manual from an alternative device or location to rule out local network constraints.

6.2 Handling Corrupted Files and Error Messages

If you encounter corrupted files or error messages during the manual download‚ restart your browser and retry the process. Ensure you are downloading from a trusted source‚ such as the official Canon website. If the issue persists‚ try using a different browser or device. Clear your browser’s cache and cookies before attempting the download again. If the file remains corrupted‚ check for any firmware updates or re-download the manual from the Canon Support section. If errors continue‚ contact Canon Customer Support for assistance or alternative download options.

Additional Resources and Support

For further assistance‚ visit the official Canon EOS R5 support page or explore online forums like Canon Community for troubleshooting and firmware update guidance.

7.1 Canon Customer Support Contact Information

For direct assistance‚ visit the Canon official website and navigate to the Support section. Here‚ you can find regional contact details‚ including phone numbers‚ email addresses‚ and live chat options. Canon also provides a contact form for inquiries. Additionally‚ the Canon Help Center offers a comprehensive database of articles and FAQs. Ensure to select your region to access accurate support information. Operating hours and contact methods may vary depending on your location. This resource is ideal for resolving issues related to the EOS R5 manual or firmware updates.

7.2 Online Communities and Forums

Online communities and forums are excellent resources for photographers seeking advice on the Canon EOS R5 manual. Platforms like Canon Rumors‚ DPReview‚ and Reddit host active discussions. Users share tips‚ troubleshooting solutions‚ and experiences with firmware updates. These forums often include detailed guides and answers to common questions. Additionally‚ Canon’s official forums provide direct support from experts. Engaging with these communities can help photographers optimize their use of the EOS R5 manual and resolve technical issues efficiently. Many forums also offer links to downloadable resources and updates‚ making them a valuable complement to official support channels.

7.4 Firmware Update Assistance

Firmware updates are crucial for optimizing the Canon EOS R5’s performance. The official Canon website provides detailed guides and downloadable firmware versions. Users can access update instructions through the EOS R5 manual or Canon’s support page. Additionally‚ the Camera Connect app offers firmware update assistance. Canon’s customer support also provides step-by-step guidance. Online forums and communities share user experiences and tips for smooth updates. Ensuring the firmware is up-to-date enhances camera functionality and resolves potential issues‚ making it essential for photographers to regularly check for updates and follow the provided instructions carefully.

crown wp 3000 service manual pdf

Welcome to the Crown WP 3000 Service Manual PDF, your comprehensive guide for maintaining, troubleshooting, and repairing the Crown WP 3000 pallet truck series․ This manual provides detailed instructions, diagrams, and parts catalogs to ensure optimal performance and longevity of your equipment․ Designed for technicians and operators, it covers essential procedures, safety guidelines, and compatibility with Windows and Mac systems for seamless access․

1․1 Overview of the Crown WP 3000 Series

The Crown WP 3000 Series is a line of electric walkie pallet trucks designed for efficient material handling in warehouses and distribution centers․ Built for durability and reliability, these trucks operate on a 24-volt system and offer a load capacity of 4,500 lbs (2,020 kg)․ The series is known for its ergonomic design, ease of operation, and compatibility with tight spaces․ Ideal for short-distance moves, the WP 3000 supports safe and efficient load management, ensuring smooth handling in various applications․ As part of Crown’s extensive range of material handling equipment, this series is well-supported by comprehensive service manuals and maintenance guides, making it a preferred choice for industries requiring robust and reliable pallet trucks․

1․2 Importance of the Service Manual for Maintenance and Repair

The Crown WP 3000 Service Manual is essential for maintaining and repairing the pallet truck․ It provides detailed parts catalogs, service procedures, and troubleshooting guides, enabling technicians to identify and resolve issues efficiently; By following the manual, users can ensure proper maintenance, reduce downtime, and extend equipment lifespan․ Its clear instructions and compatibility with Windows and Mac systems make it an indispensable resource for technicians and operators alike․

Key Features of the Crown WP 3000 Service Manual

The Crown WP 3000 Service Manual features a detailed parts catalog, service procedures, and diagrams․ It is compatible with Windows and Mac, offering instant access for efficient repairs․

2․1 Detailed Parts Catalog and Service Procedures

The Crown WP 3000 Service Manual includes a comprehensive parts catalog, listing every component with specifications and diagrams․ Detailed service procedures guide technicians through maintenance, repairs, and replacements, ensuring accuracy and efficiency․ This section helps identify parts quickly and outlines step-by-step instructions for common tasks, making it an invaluable resource for keeping the pallet truck in optimal condition․

2․2 Diagrams and Illustrations for Repair Guidance

The Crown WP 3000 Service Manual features detailed diagrams and illustrations to guide technicians through complex repair procedures․ These visuals provide clear instructions for component identification, assembly, and disassembly․ High-quality images and schematics ensure accurate troubleshooting and efficient repairs․ The manual’s visual aids are essential for understanding hydraulic, electrical, and mechanical systems, making it easier to diagnose and resolve issues effectively․

2․3 Compatibility with Windows and Mac Operating Systems

The Crown WP 3000 Service Manual PDF is compatible with both Windows and Mac operating systems, ensuring universal accessibility․ This feature allows technicians to access repair information seamlessly across different devices․ The digital format enables easy viewing and printing, making it a versatile resource for maintenance and repair tasks․ Its compatibility ensures that users can utilize the manual regardless of their preferred operating system, enhancing workflow efficiency․

Obtaining the Crown WP 3000 Service Manual PDF

The Crown WP 3000 Service Manual PDF is available for download from official Crown sources and third-party websites like Truckmanualshub․com․ This digital manual provides instant access, featuring a 96․7 MB file in English, compatible with both Windows and Mac operating systems․

3․1 Official Sources for Download

The Crown WP 3000 Service Manual PDF can be officially obtained from Crown Equipment Corporation’s website or authorized distributors․ Visit www․crown․com for direct access to the manual․ Additionally, contact Crown’s customer support via email or phone for assistance․ The manual is also available through Crown’s European headquarters in Munich, Germany, ensuring global accessibility for technicians and operators․ Always verify the source for authenticity and compliance with Crown’s policies․

3․2 Third-Party Websites and Availability

The Crown WP 3000 Service Manual PDF is also available on third-party websites like truckmanualshub․com, offering instant downloads․ These platforms provide access to the manual in PDF format, compatible with both Windows and Mac systems․ While convenient, ensure the source is reliable to avoid unauthorized or outdated versions․ Always verify the manual’s authenticity to comply with Crown’s policies and maintain equipment safety․

Detailed Contents of the Crown WP 3000 Service Manual

The manual includes detailed maintenance procedures, troubleshooting guides, and a comprehensive parts catalog․ It also features diagrams and specifications to assist technicians in efficient repairs and diagnostics․

4․1 Maintenance and Repair Procedures

The Crown WP 3000 Service Manual provides step-by-step maintenance and repair procedures, ensuring technicians can efficiently address issues․ Detailed instructions cover routine inspections, component replacements, and system diagnostics․ Visual aids like diagrams and illustrations guide users through complex tasks, while troubleshooting sections help identify and resolve common faults quickly․ This section is essential for maintaining optimal performance and extending the lifespan of the pallet truck․

4․2 Troubleshooting Common Issues

The Crown WP 3000 Service Manual includes a dedicated section for troubleshooting common issues, ensuring quick resolution of problems․ It provides detailed fault codes, diagnostic steps, and repair solutions․ From electrical system malfunctions to hydraulic issues, the manual offers clear guidance to help technicians identify and address problems efficiently, minimizing downtime and ensuring smooth operation of the pallet truck․

4․3 Parts Catalog with Detailed Specifications

The Crown WP 3000 Service Manual features an extensive parts catalog, offering detailed specifications for every component․ This section includes part numbers, descriptions, and diagrams, ensuring accurate identification and ordering of genuine Crown parts․ Technicians can easily locate replacement components, streamlining maintenance and repair processes to keep the pallet truck operational and performing at its best․

Safety Guidelines and Precautions

The Crown WP 3000 Service Manual emphasizes essential safety protocols for technicians, including proper tool usage and adherence to safety codes to prevent accidents during maintenance․

5․1 General Safety Instructions for Technicians

The Crown WP 3000 Service Manual PDF outlines essential safety practices for technicians, including proper tool usage, adherence to safety codes, and wearing protective gear․ Always ensure the forklift is powered off and secured before starting repairs․ Compliance with industry safety standards is crucial to prevent accidents and ensure a safe working environment․ Refer to the operator’s manual for specific safety guidelines․

5;2 Proper Use of Tools and Equipment

Always use manufacturer-recommended tools and equipment when servicing the Crown WP 3000․ Follow proper diagnostic and repair techniques outlined in the manual․ Ensure tools are in good condition and calibrated correctly․ Adhere to torque specifications and safety guidelines to prevent equipment damage and ensure technician safety․ Proper tool usage is critical for accurate repairs and maintaining the integrity of the forklift’s systems․

Diagnostic Procedures for the Crown WP 3000

This section outlines diagnostic procedures for identifying and resolving issues with the Crown WP 3000․ It covers fault code identification, alarm troubleshooting, and step-by-step methods for systematic diagnosis․

6․1 Identifying Fault Codes and Alarms

The Crown WP 3000 service manual provides detailed guidance on identifying fault codes and alarms․ It includes lists of common error codes, their meanings, and corresponding diagnostic steps․ Technicians can refer to sections like DIA-2730-001․pdf for troubleshooting specific issues, ensuring accurate and efficient repairs․ This section is essential for resolving electrical and hydraulic system faults promptly․

6․2 Step-by-Step Troubleshooting Methods

The Crown WP 3000 service manual offers a systematic approach to troubleshooting, providing step-by-step methods for resolving issues․ Detailed in sections like DIA-2730-001․pdf, these procedures guide technicians through diagnosing and fixing faults․ The manual’s compatibility with Windows and Mac ensures accessibility, while included diagrams and illustrations enhance understanding, aiding in efficient repairs and minimizing downtime․

Maintenance and Inspection Schedules

The Crown WP 3000 service manual outlines recommended maintenance intervals and inspection checklists to ensure optimal performance․ Regular checks and timely servicing prolong equipment lifespan and reliability․

7․1 Recommended Maintenance Intervals

The Crown WP 3000 service manual specifies regular maintenance intervals to ensure optimal performance․ Daily inspections, weekly checks of hydraulic systems, and monthly battery and brake evaluations are recommended․ Following these schedules helps prevent breakdowns, extends equipment lifespan, and maintains operational efficiency․ Adhering to these intervals ensures compliance with industry standards and guarantees reliable material handling operations․ Proper maintenance scheduling is key to minimizing downtime and maximizing productivity․

7․2 Inspection Checklist for Optimal Performance

The Crown WP 3000 service manual provides a detailed inspection checklist to ensure optimal performance․ Regularly check tires, brakes, hydraulic fluid levels, and control functions․ Inspect battery terminals, wiring, and safety features like horns and lights․ Verify proper operation of lifting mechanisms and ensure all components are free from wear or damage․ This checklist helps prevent issues and ensures efficient material handling operations․ Regular inspections are essential for maintaining safety and productivity․

Common Repairs and Replacement Parts

The Crown WP 3000 service manual outlines common repairs, such as brake replacements and hydraulic component servicing․ Frequently replaced parts include tires, batteries, and control modules, ensuring optimal functionality and longevity․

8․1 Frequently Replaced Components

The Crown WP 3000 service manual identifies components that require regular replacement, such as traction batteries, hydraulic hoses, and control modules․ These parts are essential for maintaining the truck’s performance and safety․ Ensuring timely replacement prevents unexpected downtime and extends equipment lifespan․ The manual provides detailed part numbers and replacement procedures for these frequently serviced items, ensuring efficient maintenance and repair processes․

8․2 Guidelines for Ordering Genuine Crown Parts

When ordering genuine Crown parts, refer to the detailed parts catalog in the service manual․ Ensure compatibility by verifying part numbers and model specifications․ Order directly from authorized Crown dealers or through Crown’s official website for authenticity․ Genuine parts guarantee optimal performance, safety, and warranty compliance․ Always double-check part numbers and quantities before finalizing orders to avoid errors․

Troubleshooting Tips and Tricks

Master troubleshooting techniques for electrical and hydraulic systems in the Crown WP 3000․ This section offers practical solutions to common issues, ensuring efficient repairs and minimal downtime․

9;1 Resolving Electrical System Issues

The Crown WP 3000 service manual provides detailed guidance for diagnosing and repairing electrical system issues․ Check for fault codes, inspect connectors, and verify wiring integrity․ Use the manual’s troubleshooting charts to identify common problems like faulty sensors or relays․ Ensure proper battery connections and charge levels․ Refer to the electrical diagrams for precise repair instructions, and avoid improvising repairs to maintain safety and compliance with Crown’s standards․

9․2 Addressing Hydraulic System Problems

The Crown WP 3000 service manual includes detailed procedures for diagnosing hydraulic system issues․ Check fluid levels, inspect for leaks, and verify valve functionality․ Use the manual’s diagnostic charts to identify common problems like faulty pumps or clogged lines․ Follow step-by-step instructions for replacing components and ensure proper system bleeding after repairs to maintain optimal hydraulic performance and prevent further malfunctions․

Compliance and Regulatory Information

The Crown WP 3000 service manual ensures adherence to international safety and environmental standards, including ISO certifications, promoting sustainable practices and regulatory compliance in material handling operations․

10․1 Adherence to Industry Standards

The Crown WP 3000 service manual ensures compliance with ISO 9001 standards, guaranteeing high-quality manufacturing and maintenance practices․ It aligns with global industry norms, providing detailed specifications and guidelines to meet regulatory requirements․ This ensures that all repairs and maintenance are conducted safely and efficiently, maintaining the equipment’s performance and reliability over time․

10․2 Environmental and Safety Regulations

The Crown WP 3000 service manual emphasizes adherence to environmental and safety regulations, ensuring eco-friendly practices and operator safety․ It includes guidelines for proper disposal of materials, energy efficiency, and safe operating practices to minimize environmental impact․ Regular maintenance checks are highlighted to prevent hazards, aligning with global safety standards and promoting sustainable material handling operations․

The Crown WP 3000 Service Manual PDF is an essential resource for maintaining and repairing your pallet truck, offering detailed guidance for optimal performance and longevity․

11․1 Summary of Key Points

The Crown WP 3000 Service Manual PDF is a comprehensive guide covering maintenance, repair, and troubleshooting procedures․ It includes detailed parts catalogs, diagrams, and compatibility with Windows and Mac systems․ The manual ensures optimal performance and longevity of the Crown WP 3000 pallet truck series․ By following the outlined procedures and safety guidelines, users can efficiently manage their equipment, reducing downtime and ensuring operational excellence․

11․2 Final Recommendations for Users

Adhere to the Crown WP 3000 Service Manual PDF guidelines for optimal maintenance and repair․ Regularly inspect and maintain equipment to prevent issues․ Use the provided diagrams and troubleshooting tips for effective problem-solving․ Always purchase genuine Crown parts for reliability․ Follow safety protocols to ensure operational efficiency and longevity of your Crown WP 3000 pallet truck, maximizing performance and minimizing downtime․

viking hot tub owners manual

Viking Spas offers a variety of hot tub models designed for relaxation and hydrotherapy. Popular models include Viking 1P, 2P, and 3, each featuring unique jet systems and advanced control panels for optimal comfort and wellness.

1.1 Overview of Popular Viking Hot Tub Models

Viking Spas offers a range of models designed to cater to different needs and preferences. The Viking 1P is a compact, round hot tub ideal for smaller spaces, while the Viking 2P and Viking 3 are larger models with additional jets and seating capacity. The Aurora series, including the Aurora 1P, 2P, and 3, features advanced hydrotherapy options and customizable settings; Other models like the Royale and Regal series offer luxurious designs with premium features. Each model is equipped with energy-efficient systems and user-friendly controls, ensuring a relaxing and rejuvenating experience. These models are popular for their durability, performance, and aesthetic appeal.

1.2 Features and Specifications of Viking Spas

Viking Spas are known for their advanced features and specifications, ensuring a luxurious and safe experience. They come with high-quality jets, adjustable massage settings, and energy-efficient heating systems. The spas are designed with durable materials and sleek designs, making them both functional and aesthetically pleasing. Many models include digital control panels for easy temperature and jet adjustments, while some feature economy modes to optimize energy use. Safety is a priority, with GFCI protection and self-closing gates. The spas also have varying capacities, such as the Viking 1P holding 240 gallons and the Viking 2P and 3 holding 250 gallons. These features make Viking Spas a top choice for relaxation and wellness.

Safety Precautions and Instructions

Always follow safety guidelines when using Viking Spas. Ensure GFCI protection is installed, and never use extension cords. Keep gates self-closing and self-latching for added safety.

2.1 Important Safety Guidelines for Hot Tub Use

Always follow essential safety guidelines when using Viking Spas. Ensure GFCI protection is installed, and never use extension cords. Keep gates self-closing and self-latching. Supervise children and avoid using the spa during electrical storms or extreme weather. Set the temperature below 104°F to prevent health risks. Avoid using the spa if you have certain medical conditions without consulting a doctor. Never use alcohol or drugs while in the spa. Ensure all users are in good health before entering. Regularly inspect the spa and its components for damage. Read and follow all instructions in the manual carefully to ensure safe and enjoyable use.

2.2 Personal Safety Precautions

Personal safety is crucial when using Viking Spas. Always supervise children and ensure they understand safety rules. Avoid using the spa if you have health conditions without medical approval. Refrain from using alcohol or drugs before or during spa use. Enter and exit the spa carefully to prevent slips. Maintain a safe temperature setting, avoiding extreme heat. Never leave the spa unattended while in use, especially if children are present. Be aware of your physical limits and avoid prolonged exposure to high temperatures. Follow all guidelines in the manual to ensure a safe and enjoyable experience. Regularly inspect the spa area for hazards.

Installation and Setup

Proper installation ensures safe and efficient operation. Hire a licensed electrician for connections, ensuring compliance with local codes. Use a GFCI-protected circuit. Follow manual instructions carefully.

3.1 Electrical Requirements and Connections

Ensure your Viking hot tub is connected to a GFCI-protected circuit with a 15-amp or 20-amp rating, depending on the model. Hardwiring is required; extension cords are prohibited. The spa must be installed by a licensed electrician to meet local electrical codes. For most models, a 240-volt connection is necessary. Check the owner’s manual for specific voltage and amp requirements. The Viking 1P requires a 240-volt, 40-amp service, while the Viking 2P and 3 models need a 240-volt, 50-amp service. Proper electrical setup ensures safety and optimal performance. Always refer to the manual for precise installation guidelines.

3.2 Step-by-Step Installation Guide

Begin by preparing a level, stable surface for your Viking hot tub, ensuring it can support the weight. Next, connect the electrical supply according to the manual’s specifications, using a licensed electrician for safety. For round models like the Viking 1P or 2P, access the GFCI cord by removing the lower left panel. Fill the tub with water, then power on and test all functions. Finally, ensure proper drainage and ventilation. Always follow local building codes and manufacturer instructions for a safe and successful installation. Regular maintenance will ensure optimal performance and longevity.

Operating Your Viking Hot Tub

Operating your Viking hot tub involves adjusting temperature, jets, and modes for a personalized experience. Models like Viking 1P, 2P, and 3 offer intuitive controls for relaxation and therapy.

4.1 Basic Operations and Controls

Operating your Viking hot tub begins with understanding the control panel. Models like Viking 1P, 2P, and 3 feature intuitive controls for temperature, jets, and lighting. To start, press the Jets button to activate the pump. Adjust the temperature using the Temp button, with a default setting of 37°C. The Light button controls the spa’s illumination. For energy efficiency, enable Economy Mode, which heats the water only during set times. Always ensure the GFCI cord is properly connected and avoid using extension cords. Regularly check the gate valves to ensure they are open for optimal water flow.

4.2 Temperature Settings and Maintenance

The Viking hot tub default temperature is set to 37°C for comfort. Adjust the temperature using the Temp button, with a range of 32°C to 40°C. To change modes, press the Temp button, then the Light button. Economy Mode heats the spa only during set times, saving energy. Regularly check and maintain the water temperature to ensure safety and efficiency. Drain and refill the water every 3-4 months to prevent chemical buildup. Annual maintenance of the heater and sensors is recommended to maintain optimal performance. Always follow the manual’s guidelines for temperature adjustments and maintenance to prolong your spa’s lifespan.

4.3 Understanding Economy Mode and Other Functions

Economy Mode on Viking hot tubs optimizes energy use by heating the spa to the set temperature only during programmed times. Activate this mode by pressing the Temp button, then the Light button. This feature helps reduce energy consumption while maintaining your preferred temperature. Additional functions include customizable jet settings and lighting options for enhanced relaxation. Regularly review the control panel to ensure settings align with your usage patterns. Proper use of these features extends the spa’s lifespan and enhances your hydrotherapy experience. Refer to the manual for detailed instructions on activating and adjusting these functions for optimal performance.

4.4 Jets and Massage Functions

Viking hot tubs feature advanced jet systems designed for therapeutic massage and relaxation. Models like the Viking 1P, 2P, and 3 include directional and pulsating jets to target specific muscle groups. Users can adjust jet pressure and flow to customize their experience. Some models offer interchangeable jet inserts, allowing for varied massage intensity. The control panel simplifies operation, enabling easy adjustment of jet functions. Regular maintenance, such as cleaning jets and ensuring proper water flow, is essential for optimal performance. These features enhance the hydrotherapy experience, providing relief from stress and muscle tension while promoting overall wellness.

Maintenance and Upkeep

Regular cleaning and sanitizing are essential for optimal hot tub performance. Test water chemistry frequently and adjust as needed to ensure safety and clarity. Always check filters.

5.1 Cleaning and Sanitizing the Hot Tub

Regular cleaning and sanitizing are crucial for maintaining a hygienic and safe hot tub environment. Begin by testing and adjusting the water chemistry to ensure proper sanitizer levels. Use a skimmer to remove floating debris and clean the filter cartridges weekly. Shock the water if needed to eliminate contaminants. For deeper cleaning, drain and refill the tub every 3-4 months. Always follow the manufacturer’s instructions for cleaning products to avoid damage. Sanitizing is essential to kill bacteria, so maintain the recommended chlorine or bromine levels. Regular maintenance ensures a clean, safe, and enjoyable spa experience.

5.2 Balancing Chemical Levels in the Water

Properly balancing the chemical levels in your Viking hot tub is essential for maintaining clean, safe, and comfortable water. Begin by testing the pH and alkalinity levels, ensuring they fall within the recommended range of 7.2-7.8 for pH and 80-120 ppm for alkalinity. Adjust these levels using pH balancer or alkalinity increaser as needed. Next, check the calcium hardness and maintain it between 175-275 ppm to prevent corrosion or scaling. Finally, ensure sanitizer levels (chlorine or bromine) are within the ideal range of 1-3 ppm. Regular testing and adjustments will help maintain optimal water quality and protect your spa equipment.

5.3 Regular Maintenance Schedule

To ensure your Viking hot tub operates efficiently and remains in optimal condition, follow a regular maintenance schedule. Daily, check the water level and top it off as needed. Weekly, clean the filter cartridges and test chemical levels. Monthly, drain and refill the water, and inspect the jets for blockages. Every 3-4 months, perform a deep clean of the spa shell and plumbing. Seasonally, inspect the heater and pump for proper function. Regular maintenance prevents issues like bacterial growth and equipment damage, ensuring a safe and enjoyable experience. Stay consistent to extend the lifespan of your Viking hot tub.

Troubleshooting Common Issues

Common issues with Viking hot tubs include pump failure, heater malfunctions, and electrical problems. Always consult the manual or contact Viking Spas support for solutions.

6.1 Identifying and Solving Pump and Heater Problems

Pump failure may occur due to blockages or worn parts. Check for unusual noises or reduced water flow. Ensure the GFCI cord is securely connected. For heater issues, verify temperature settings and electrical connections. If problems persist, consult the manual or contact Viking Spas support for professional assistance. Always follow safety guidelines when troubleshooting.

6.2 Addressing Electrical or Control Panel Issues

If the control panel malfunctions, ensure all connections are secure and the GFCI circuit is functioning. restarting the system may resolve minor software glitches. For persistent issues, refer to the user manual or contact Viking Spas support. Always use the correct electrical configurations to avoid damage and ensure safe operation.

Warranty and Support

Viking Spas provides comprehensive warranty coverage for their hot tubs, ensuring durability and customer satisfaction. For support, contact Viking Spas directly or visit their official website.

7.1 Understanding Your Warranty Coverage

Viking Spas offers comprehensive warranty coverage to ensure customer satisfaction and protect your investment. The warranty typically covers the spa shell, jets, and electrical components for a specified period. Coverage varies by model and component, with detailed terms outlined in the owners manual. Proper registration and adherence to maintenance guidelines are required to maintain warranty validity. Transferable warranties add value for owners. Always review the manual or contact Viking Spas directly for specific details on your model’s coverage. Understanding your warranty ensures peace of mind and hassle-free ownership.

7.2 Contacting Viking Spas Support and Dealers

For assistance with your Viking Spa, contact their dedicated support team through the official website or local dealers. The Owners Corner provides access to manuals, warranty info, and troubleshooting guides. Dealers offer personalized support, repairs, and genuine spa parts. Use the dealer locator on the Viking Spas website to find authorized representatives near you. Whether you need technical help or parts, their network ensures prompt and reliable service. Contacting Viking Spas directly or visiting a certified dealer guarantees professional assistance tailored to your specific needs, ensuring optimal performance and longevity of your hot tub.

beurer blood pressure monitor manual

Welcome to the Beurer Blood Pressure Monitor Manual. This guide provides essential information to help you understand and use your device effectively, ensuring accurate readings and proper maintenance.

Overview of the Beurer Blood Pressure Monitor

The Beurer Blood Pressure Monitor is a high-quality, user-friendly device designed for accurate blood pressure measurement at home. Models like the BM49, BM67, BM27, and BM58 offer features such as automatic shut-off, universal cuff sizes, and compatibility with PC connectivity for data transfer. These monitors are equipped with LCD displays for clear readings, including systolic and diastolic blood pressure, as well as pulse rate. Many models include a color-coded risk indicator to help users quickly assess their readings. The devices are designed for upper arm use, ensuring non-invasive and comfortable measurements. With their sleek designs and intuitive interfaces, Beurer monitors are ideal for individuals seeking to monitor their heart health regularly. The manuals, available in multiple languages, provide detailed instructions for setup, usage, and maintenance. Accessories like storage bags and batteries are often included, making these monitors a practical choice for home use.

Importance of Reading the Manual

Reading the Beurer Blood Pressure Monitor manual is essential for proper usage, safety, and accuracy. The manual provides detailed instructions on setup, operation, and maintenance, ensuring you get reliable readings. It explains how to interpret systolic and diastolic values, understand the color-coded risk indicator, and troubleshoot common issues. By following the guidelines, you can avoid errors and prolong the device’s lifespan. The manual also covers safety precautions, such as proper cuff placement and usage limitations, to prevent inaccurate measurements or damage. Additionally, it highlights special features like data transfer to a PC and automatic shut-off. Understanding these functions ensures optimal performance and helps you make informed decisions about your health. Always keep the manual handy for future reference and share it with other users to ensure everyone uses the device correctly.

Key Features of the Beurer Blood Pressure Monitor

The Beurer Blood Pressure Monitor features an LCD display, color-coded risk indicator, memory storage, PC and app connectivity, automatic shut-off, and cuff fitting technology for accurate, convenient measurements.

Technical Specifications and Components

The Beurer Blood Pressure Monitor comes with a high-resolution LCD display for clear readings, memory storage for multiple users, and PC connectivity via USB. It operates on 4 x 1.5V LR6 AA batteries or an optional power adapter. The device includes an adjustable upper arm cuff, storage bag, and instructions for use. The monitor supports automatic shut-off, cuff fitting technology, and color-coded risk indicators for quick assessment. Models like the BM75 include NFC technology for app connectivity. The device measures systolic, diastolic pressure, and pulse rate, storing up to 60 readings. Technical specifications ensure accuracy and reliability, making it suitable for home use. Accessories like the cuff and USB cable enhance functionality, while the durable design ensures long-term performance. Proper use and maintenance are detailed in the manual to optimize device longevity and measurement accuracy.

Special Functions and Settings

The Beurer Blood Pressure Monitor features advanced functions for enhanced accuracy and convenience. The cuff position indicator ensures proper placement, while the color-coded risk indicator provides quick health assessments. It offers memory storage for multiple users, allowing up to 60 readings per profile. The device supports data transfer to a PC via USB for detailed tracking and analysis. Certain models, like the BM75, include NFC technology for seamless smartphone app connectivity. Additional settings include automatic shut-off, adjustable averaging of measurements, and a high-capacity memory for storing historical data. The monitor also offers a cuff fitting technology to ensure accurate readings. These special functions make it a versatile and user-friendly option for managing blood pressure at home. The manual provides detailed instructions on how to customize these settings for optimal performance.

Setting Up and Using the Monitor

Setting up your Beurer Blood Pressure Monitor involves unboxing, installing batteries, and preparing the cuff. Follow the manual for proper usage, ensuring accurate and reliable blood pressure readings at home.

Step-by-Step Installation and Preparation

Begin by carefully unboxing the Beurer Blood Pressure Monitor, ensuring all components are included. Insert the provided batteries or connect the power adapter as specified in the manual. Next, locate a comfortable and quiet area for measurement. Place the cuff on your upper arm, adjusting it to fit snugly without being too tight. Ensure the cuff is positioned correctly, with the artery marker aligned with your arm’s inner crease. Turn on the device and allow it to initialize. Follow the on-screen instructions to set the date and time if necessary. Finally, sit relaxed with your arm at heart level and press the start button. The monitor will inflate the cuff and begin measuring your blood pressure and pulse rate, providing clear results on the LCD display.

How to Take Accurate Blood Pressure Readings

To ensure accurate readings, prepare by sitting comfortably in a quiet room with your back supported. Avoid eating, drinking, or exercising for at least 30 minutes prior to measurement. Remove any tight clothing and place your arm on a flat surface at heart level. Secure the cuff snugly around your upper arm, ensuring it’s not too tight or loose. The cuff should align with the artery marker on the inside of your arm. Turn on the device and wait for it to initialize. Press the start button to begin the measurement. Remain still and silent during the process to avoid errors. The monitor will inflate the cuff, measure your blood pressure, and display the results on the LCD screen, along with your pulse rate. For consistent accuracy, follow these steps carefully and refer to the manual for additional tips.

Troubleshooting and Maintenance

Identify common issues like error codes, low battery, or cuff misalignment. Clean the device regularly with a soft cloth and avoid harsh chemicals. Store it in a dry place to maintain accuracy and longevity.

Common Issues and Solutions

Common issues with the Beurer Blood Pressure Monitor include error codes, low battery, or cuff misalignment. If you encounter an error code, refer to the manual for specific solutions. Low battery warnings indicate it’s time to replace or recharge the batteries. Ensure the cuff is correctly positioned on your upper arm, as improper placement can lead to inaccurate readings. If the monitor fails to turn on, check the power button and battery connections. For display issues, restart the device or consult the troubleshooting section. Regularly cleaning the device with a soft cloth and avoiding extreme temperatures can prevent malfunctions. If problems persist, contact Beurer customer support for assistance. Proper maintenance and adherence to guidelines will ensure optimal performance and accurate blood pressure measurements.

Cleaning and Storing the Device

Regular cleaning and proper storage of your Beurer Blood Pressure Monitor are essential to maintain its accuracy and longevity. Use a soft, dry cloth to wipe the device and cuff, avoiding harsh chemicals or moisture. For tougher stains, slightly dampen the cloth with water, but ensure the device is completely dry before use. Store the monitor in a cool, dry place, away from direct sunlight and extreme temperatures. Avoid bending or folding the cuff, as this could damage the internal components. If not in use for an extended period, remove the batteries to prevent corrosion. Keep the device out of reach of children and pets. Proper care will ensure your Beurer Blood Pressure Monitor remains reliable for years to come.

acs355 manual

The ABB ACS355 is a high-performance variable frequency drive designed for controlling AC motors in various industrial applications. It offers advanced control features, high reliability, and energy efficiency, making it suitable for precise speed and torque regulation in diverse machinery. The drive is known for its user-friendly interface and robust design, ensuring optimal performance in harsh environments. Its versatility and compatibility with multiple motor types make it a preferred choice across industries.

Overview of the ACS355 Series

The ABB ACS355 series is a versatile and high-performance variable frequency drive (VFD) designed for controlling AC motors in industrial applications. It offers a wide range of power ratings and is compatible with various motor types, ensuring flexibility for diverse operational needs. The series is known for its compact design, user-friendly interface, and advanced control features, making it suitable for applications requiring precise speed and torque regulation.

The ACS355 series is built for reliability and durability, with robust construction to withstand harsh industrial environments. Its energy-efficient operation and customizable settings make it a cost-effective solution for optimizing motor performance in various industries.

Applications and Industries Served

The ABB ACS355 VFD is widely used in various industries, including food and beverage, textile, printing, and packaging. It is ideal for applications requiring precise speed control, such as pumps, fans, and conveyors. The drive’s high performance and reliability make it suitable for harsh industrial environments. Its energy-efficient design and compatibility with AC motors ensure versatility across manufacturing and automation sectors, catering to diverse machinery needs while maintaining operational efficiency and productivity.

Safety Precautions and Installation Guidelines

Isolate the drive from dangerous voltage sources before starting work. Obtain a permit from the person in charge of electrical installation. Ensure drive-motor compatibility using the rating table. Always verify safety before proceeding with installation or maintenance tasks.

General Safety Warnings

Always isolate the drive from dangerous voltage sources before starting work. Ensure the drive is safe to handle, as residual voltage may remain. Obtain a permit for electrical work and follow safety instructions in the user manual. Avoid operating the drive in hazardous environments without proper protection. Never bypass safety features or ignore warning labels. Ensure proper grounding and adhere to electrical standards to prevent risks of electric shock or equipment damage. Always wait for capacitors to discharge before performing maintenance tasks. Follow all safety guidelines to ensure safe operation and compliance with regulations.

Electrical Installation Requirements

Ensure the ACS355 drive is installed by qualified personnel, adhering to local electrical codes and safety standards. Isolate the drive from all dangerous voltage sources before starting work, and verify that capacitors have discharged. Use appropriately rated circuit breakers and wiring, as specified in the manual. Check motor compatibility using the rating tables provided. Proper grounding is essential to prevent electrical noise and ensure safe operation. Follow ABB’s guidelines for environmental conditions and mounting requirements to maintain performance and longevity. Always refer to the official ACS355 manual for detailed installation instructions.

Operation and Control of the ACS355 Drive

The ACS355 drive operates by converting fixed AC voltage to variable frequency and voltage, enabling precise motor speed control. It supports advanced start-stop functions and safe operation.

Basic Operating Principles

The ABB ACS355 VFD operates by converting fixed AC voltage to variable frequency and voltage to control motor speed. It uses advanced pulse-width modulation (PWM) to regulate output, ensuring smooth motor operation. The drive consists of a rectifier, DC bus, and inverter, which adapt the input power to match the motor’s requirements. PID controllers adjust torque and speed based on feedback, enabling precise control. Users can interact via the control panel or software tools, while built-in protections prevent overcurrent and voltage spikes. Proper parameter settings and motor compatibility ensure efficient and reliable performance across applications.

Advanced Start and Restart Control Options

The ABB ACS355 offers sophisticated start and restart features, ensuring smooth motor operation under various conditions. Soft starting reduces inrush current, while adaptive acceleration adjusts speed based on load demand. Multiple restart modes, like flying start and cold start, cater to different applications. These advanced controls enhance performance, reduce mechanical stress, and improve overall system reliability. Users can customize settings via the control panel or software, ensuring optimal operation tailored to specific industrial needs. This versatility makes the ACS355 ideal for demanding environments requiring precise control and seamless restart capabilities.

Programming and Configuration

The ABB ACS355 offers flexible programming and configuration options through its user-friendly interface, allowing customization of motor control parameters and advanced tuning for optimal performance. Comprehensive resources are available for guidance.

Parameter Settings and Customization

The ABB ACS355 VFD allows for extensive parameter customization to tailor its performance to specific applications. Users can adjust settings like motor speed, torque, and acceleration/deceleration rates. The drive also supports advanced parameters for optimizing energy efficiency and motor compatibility. Configuration can be done via the control panel or through software tools. Proper customization ensures smooth operation and maximizes the drive’s efficiency. Always refer to the user manual for detailed guidance on parameter settings and customization options to achieve optimal results in your application.

Tuning the Drive for AC Motor Compatibility

Tuning the ABB ACS355 VFD ensures optimal performance with AC motors. Start by verifying motor and drive compatibility using the rating tables. Adjust parameters like flux and torque to match motor specifications. Use the drive’s built-in tuning modes, such as automatic motor tuning, to synchronize settings. Refer to the manual for specific instructions and advanced customization options. Proper tuning minimizes vibration, improves efficiency, and extends equipment lifespan. Always ensure power supplies and wiring meet specifications to avoid issues like fault codes related to voltage or motor incompatibility.

Troubleshooting Common Issues

Identify fault codes like Code 100 for logic board issues. Check wiring connections and voltage supplies. Ensure motor compatibility as per rating tables to prevent operational faults.

Identifying Fault Codes and Solutions

The ABB ACS355 VFD features a diagnostic system that displays fault codes to help identify issues. Common faults include code 100, indicating logic board problems like faulty resistors or diodes. Users can refer to the manual or the drive’s display for code meanings; Solutions often involve checking wiring, power supplies, or replacing defective components. For unresolved issues, consulting the manual or contacting ABB technical support is recommended. Regular maintenance and compatibility checks with motors can prevent many faults, ensuring smooth operation and minimizing downtime.

Addressing Voltage and Wiring-Related Problems

Addressing voltage and wiring-related problems in the ABB ACS355 VFD involves checking for proper installation and ensuring compatibility with motor ratings. Verify input voltage matches specifications, and inspect wiring for damage or loose connections. Fault codes like code 100 indicate logic board issues, possibly with resistors or diodes. Consult the ACS355 manual for detailed troubleshooting steps and manufacturer guidelines to resolve these issues effectively.

Maintenance and Technical Support

The ABB ACS355 drive requires routine maintenance checks to ensure optimal performance. Regularly inspect wiring, clean the unit, and verify cooling efficiency. ABB provides comprehensive technical support, including detailed manuals, diagnostic tools, and expert assistance to address operational issues promptly and effectively.

Routine Maintenance Checks

Regular maintenance ensures optimal performance and longevity of the ABB ACS355 VFD. Always verify the voltage supply and wiring connections match the drive’s specifications. Check for dust or debris buildup and clean the unit as needed to prevent overheating. Ensure the motor is compatible with the drive by referring to the rating table in the manual. Inspect the cooling system for proper airflow and functionality. Perform firmware updates if available and recommended by ABB. Always follow the user manual’s guidelines for safe and effective maintenance procedures.

Accessing Manuals and Manufacturer Resources

ABB provides comprehensive manuals and resources for the ACS355 VFD, available on their official website. Users can download PDF manuals from the Document Library section, ensuring access to detailed instructions, safety guidelines, and technical specifications. For additional support, contacting local ABB representatives is recommended. These resources are designed to assist with installation, troubleshooting, and optimal use of the drive, ensuring seamless integration into industrial applications.

Visit the ABB website for direct access to these materials.

Technical Specifications and Compatibility

The ACS355 VFD supports a wide power range and is compatible with various AC motors. It adheres to rating tables for motor matching and operates within specified environmental limits, ensuring reliable performance across industrial applications.

Rating Tables and Motor Compatibility

Consult the rating tables in the ACS355 manual to ensure proper motor compatibility. These tables list typical motor and drive combinations, helping users verify suitability for their applications. Compatibility is crucial for optimal performance and to prevent damage. Always cross-reference the motor’s specifications with the drive’s ratings. Mismatching can lead to inefficiency or operational issues. The manual provides detailed guidelines to simplify selection, ensuring safe and efficient operation across various industrial scenarios.

Environmental and Operational Limits

The ABB ACS355 VFD operates effectively within specific environmental conditions. It is designed to function in temperatures ranging from 0°C to 40°C (32°F to 104°F) and up to 70°C (158°F) with derating. The drive requires a relative humidity of up to 95% non-condensing and a maximum altitude of 1,000 meters (3,300 feet) above sea level. For operational limits, the VFD supports supply voltages from 110V to 690V AC, with a frequency of 50/60 Hz. Proper ventilation and protection from pollutants like dust or chemicals are essential for optimal performance and longevity. Adhering to these limits ensures reliable operation and prevents damage to the unit.

honeywell home rth6580wf manual

The Honeywell Home RTH6580WF is a Wi-Fi-enabled programmable thermostat designed for smart home integration, offering advanced temperature control and energy efficiency features.

1.1 Overview of Features and Benefits

The Honeywell Home RTH6580WF offers a range of features, including Wi-Fi connectivity for remote access, programmable scheduling, and energy-saving modes. It supports geofencing technology and Smart Response, which learns your system’s behavior to optimize heating and cooling. The thermostat is compatible with various HVAC systems, including heat pumps, and features a backlit display for easy navigation. Its remote management via the Honeywell app enhances convenience, while the programmable schedule helps reduce energy consumption and lower utility bills.

1.2 Compatibility with Home Heating and Cooling Systems

The Honeywell Home RTH6580WF is compatible with a variety of heating and cooling systems, including conventional HVAC systems, heat pumps, and radiant heating setups. It supports up to two stages of cooling and heating, making it adaptable to different home configurations. The thermostat also works with both high-efficiency gas furnaces and electric forced-air systems, ensuring versatility for various home setups and energy needs, while maintaining optimal performance and efficiency.

Installation and Setup

The Honeywell Home RTH6580WF thermostat offers a straightforward installation process, compatible with most HVAC systems, and features a user-friendly setup menu for easy configuration and customization.

2.1 Tools and Materials Needed

To install the Honeywell Home RTH6580WF thermostat, you’ll need basic tools like a screwdriver, wire strippers, and a drill. Materials include mounting screws, a wall anchor, and potentially a C-wire adapter for power. Ensure your system is compatible and turn off power before starting. Follow the step-by-step guide for a smooth setup, and refer to the manual for specific wiring diagrams and safety precautions.

2.2 Step-by-Step Installation Guide

Start by turning off power at the circuit breaker; Remove the old thermostat and label the wires. Mount the new base plate, ensuring it’s level. Connect the wires to the appropriate terminals, following the wiring diagram. Reattach the faceplate and restore power. Use the setup menu to configure system settings, such as heating type and Wi-Fi connectivity. Finalize by testing the system to ensure proper operation and connectivity.

2.3 Wiring Diagrams for Conventional Systems

Wiring diagrams for conventional systems are provided in the manual to ensure proper installation. Identify the terminal labels (R, W, Y, G, C, etc.) and connect wires accordingly. Follow the step-by-step guide to match your system type. Ensure the power is off before starting. Refer to the diagram for correct connections to avoid damage or safety hazards. Always double-check the wiring configuration against the manual’s specifications.

2.4 Wiring Diagrams for Heat Pump Systems

For heat pump systems, use the provided wiring diagrams to connect terminals correctly. Ensure proper connections for reversing valve control (O/B) and auxiliary heat. Match the wiring configuration with your heat pump’s specifications. Turn off power before starting. Verify compatibility with dual-fuel or multi-stage systems. Follow the manual’s guidelines to prevent errors. Double-check connections to avoid operational issues and ensure safe installation. Consult the manual for specific heat pump wiring requirements.

System Operation and Settings

The Honeywell Home RTH6580WF operates in Heat, Cool, or Auto modes, with adjustable temperature setpoints. Fan settings include auto, on, and circulation modes for consistent airflow. Smart Response Technology optimizes heating and cooling cycles for precise temperature control, ensuring comfort and energy efficiency. Settings can be customized to suit preferences and schedules.

3.1 System Modes (Heat, Cool, Auto)

The Honeywell Home RTH6580WF thermostat operates in three primary modes: Heat, Cool, and Auto. In Heat mode, it warms your home to the set temperature. Cool mode cools your space. Auto mode automatically switches between heating and cooling based on the setpoint. System mode settings can be adjusted manually or programmed for efficiency. This feature ensures comfort while optimizing energy usage, adapting to your home’s specific needs. Customizable settings enhance flexibility for precise temperature control.

3.2 Fan Operation Settings

The Honeywell Home RTH6580WF offers precise fan control with options for continuous operation or automatic cycling. Users can select “Auto” for the fan to run only when heating or cooling, or choose “On” for constant airflow. This feature improves air circulation, enhancing comfort and efficiency. Adjustments are made via the thermostat menu, ensuring optimal fan operation tailored to your home environment and preferences. Customizable settings help maintain consistent air quality and temperature distribution.

3.3 Smart Response Technology

Smart Response Technology in the Honeywell Home RTH6580WF learns your system’s behavior, optimizing performance by predicting heating and cooling cycles. It ensures the set temperature is reached precisely at scheduled times, enhancing comfort and energy efficiency. This adaptive feature adjusts operation based on your home’s thermal characteristics, preventing temperature overshoots and maintaining consistent indoor conditions. It works seamlessly with programmed schedules to deliver reliable and efficient climate control.

Programming and Scheduling

The Honeywell Home RTH6580WF allows for customizable scheduling, optimizing energy efficiency with pre-set or adjustable temperature setpoints. Program schedules can be enabled or disabled as needed for flexibility and remote access via the app.

4.1 Creating a Custom Schedule

Creating a custom schedule on the Honeywell Home RTH6580WF is straightforward. Users can set up to four time periods daily, with different settings for weekdays and weekends. The thermostat allows for precise temperature adjustments, ensuring optimal comfort and energy savings. Pre-set schedules are available, but users can modify them to suit their preferences. Adjustments can be made manually or through the app, offering flexibility and convenience for any lifestyle.

4.2 Adjusting Temperature Setpoints

Adjusting temperature setpoints on the Honeywell Home RTH6580WF allows for precise control of your home’s comfort. Using the thermostat’s interface or the app, you can set specific temperatures for different times of the day. Geofencing technology automatically adjusts settings based on your location, optimizing energy use. Customizable setpoints ensure efficiency and comfort, adapting to your unique schedule and preferences with ease.

4.3 Enabling and Disabling the Schedule

Enabling or disabling the schedule on the Honeywell Home RTH6580WF is straightforward. Use the menu to toggle the schedule on or off, allowing you to switch between programmed settings and manual control. This feature provides flexibility for days when your routine changes, ensuring your system operates efficiently without unnecessary adjustments. Managing your schedule through the app offers additional convenience, allowing you to modify settings remotely whenever needed.

Advanced Features

The Honeywell Home RTH6580WF offers advanced features like Wi-Fi connectivity, geofencing, and energy-saving modes, enhancing comfort and efficiency through smart, adaptive temperature management and remote control capabilities.

5.1 Wi-Fi Connectivity and Remote Access

The Honeywell Home RTH6580WF features Wi-Fi connectivity, allowing users to control their thermostat remotely via smartphones or tablets. Through the Honeywell Home app, users can adjust temperatures, monitor energy usage, and receive system alerts. This seamless integration ensures convenience and energy efficiency, enabling users to manage their home comfort settings from anywhere, anytime, with a stable internet connection. This feature enhances smart home capabilities and user experience.

5.2 Geofencing Technology

Geofencing technology in the Honeywell Home RTH6580WF allows the thermostat to detect your location and automatically adjust temperatures based on your proximity to home. This feature learns your daily routines and preferences, optimizing energy usage by reducing heating or cooling when you’re away. It ensures your home is comfortable upon arrival and saves energy when you’re not there, seamlessly integrating with the thermostat’s smart capabilities for enhanced convenience and efficiency.

5.3 Energy-Saving Modes

The Honeywell Home RTH6580WF features energy-saving modes that optimize heating and cooling usage. These modes adjust temperature settings based on your schedule and preferences, reducing energy consumption when the home is unoccupied or during off-peak hours. By learning your system’s performance, the thermostat ensures efficient operation, helping you save on utility bills while maintaining comfort. This feature is customizable to align with your lifestyle and energy-saving goals.

Maintenance and Troubleshooting

Regular maintenance ensures optimal performance. Clean the screen, check wiring, and replace batteries annually. Address common issues like system non-response or incorrect temperatures promptly for reliability.

6.1 Replacing Batteries

To replace batteries, remove the old ones from the thermostat’s battery compartment. Insert fresh alkaline batteries, ensuring correct polarity. Replace the compartment and wait for the display to confirm power restoration. Replace batteries annually or when the low-battery icon appears, typically two months before depletion. This ensures uninterrupted operation and maintains all programmed settings without requiring a system reset.

6.2 Common Issues and Solutions

If the thermostat isn’t responding, check the circuit breaker or reset it if necessary. Ensure the power switch at the HVAC system is on and the furnace door is closed. For display issues, verify battery levels or replace them with fresh alkaline batteries. If the system doesn’t heat or cool, confirm the temperature setpoint and system mode. Refer to the troubleshooting guide for additional solutions to common problems.

6.3 Resetting the Thermostat

To reset the Honeywell Home RTH6580WF thermostat, remove the batteries and press the reset button (if available) or use the touchscreen menu to restore factory settings. This will clear custom settings, so you’ll need to reconfigure preferences. If issues persist, refer to the user manual or contact Honeywell support for assistance. Resetting ensures a fresh start for troubleshooting or system recalibration.

Warranty and Customer Support

Honeywell offers a 1-year limited warranty for the RTH6580WF, covering defects in materials and workmanship. Visit their website or call 1-800-468-1502 for customer assistance and troubleshooting.

7.1 Warranty Terms and Conditions

The Honeywell Home RTH6580WF thermostat is backed by a 1-year limited warranty covering defects in materials and workmanship under normal use. This warranty does not cover removal or reinstallation costs. Damages caused by misuse or external factors are excluded. Honeywell is not liable for incidental or consequential damages. Some states may not allow the exclusion of certain damages or limitations on implied warranties. Warranty details vary by region.

7.2 Contacting Honeywell Customer Assistance

For assistance with your Honeywell Home RTH6580WF, visit http://yourhome.honeywell.com or call Honeywell Customer Care toll-free at 1-800-468-1502. In Canada, contact Honeywell Limited at 35 Dynamic Drive, Toronto, Ontario M1V4Z9. Customer support is available to address installation, troubleshooting, and warranty inquiries, ensuring a seamless experience with your thermostat.

Additional Resources

Explore online manuals, video tutorials, and setup guides for the Honeywell Home RTH6580WF thermostat to maximize its features and optimize your home comfort experience.

8.1 Online Manuals and Guides

Access comprehensive online manuals and guides for the Honeywell Home RTH6580WF thermostat on the official Honeywell website or authorized portals. These resources provide detailed installation steps, troubleshooting tips, and feature explanations. Additionally, downloadable PDF manuals ensure you have offline access to critical information, helping you navigate setup, programming, and maintenance with ease. Utilize these resources to optimize your thermostat’s performance and enjoy enhanced home comfort.

8.2 Video Tutorials and Setup Instructions

Benefit from video tutorials and detailed setup instructions available on Honeywell’s official website and YouTube channel. These visual guides walk you through installation, programming, and advanced feature activation, ensuring a seamless setup process. Step-by-step demonstrations help troubleshoot common issues and maximize the Honeywell Home RTH6580WF thermostat’s functionality, making it easier to achieve optimal home comfort and energy efficiency.

arctic king air conditioner manual

This manual provides essential guidance for installing‚ operating‚ and maintaining your Arctic King air conditioner‚ ensuring optimal performance and trouble-free use. Refer to it for tips on energy efficiency‚ safety‚ and troubleshooting common issues.

1.1 Importance of Reading the Manual

Reading the manual is crucial for understanding installation‚ operation‚ and maintenance of your Arctic King air conditioner. It ensures proper usage‚ safety‚ and troubleshooting‚ preventing potential damage or hazards. The manual provides essential guidelines to maximize efficiency‚ comfort‚ and longevity of the unit‚ making it a vital resource for users.

1.2 Overview of the Manual Content

This manual covers installation‚ operation‚ maintenance‚ and troubleshooting for Arctic King air conditioners. It includes technical specifications‚ safety precautions‚ and energy-saving tips. The guide provides step-by-step instructions for optimal performance‚ ensuring users can address common issues and maintain their unit effectively. Key sections focus on remote control functions‚ basic operation modes‚ and warranty information for comprehensive support.

Installation Guidelines

Proper installation is crucial for your Arctic King air conditioner’s efficiency and safety. Follow the manual’s guidelines to secure the unit‚ align it correctly‚ and ensure proper power supply connections.

2.1 Pre-Installation Checks

Before installation‚ ensure the location is suitable for your Arctic King air conditioner. Verify the electrical supply matches the unit’s requirements and that the area is clear of obstructions. Check for level ground and proper ventilation to ensure safe and efficient operation‚ as outlined in the manual.

2.2 Step-by-Step Installation Process

Unpack the air conditioner and ensure all components are included.
Place the unit on a level‚ stable surface near a window or exterior wall.
Ensure proper drainage by positioning the unit slightly tilted.
Secure the unit to prevent movement during operation.
Connect electrical and drainage components as outlined.
Test the system to confirm proper function before full use.

2.3 Post-Installation Testing

After installation‚ turn on the air conditioner and check for proper operation.
Ensure cool air is flowing and the unit is functioning quietly.
Verify drainage by running the unit for 30 minutes.
Test all remote control functions and settings.
Check for any leaks or unusual noises.
Confirm the system reaches desired temperature efficiently.

Operating Instructions

Understand the control panel and remote functions to operate your Arctic King air conditioner effectively. Familiarize yourself with cooling‚ heating‚ fan‚ and dehumidify modes for optimal comfort. Refer to the manual for detailed guidance on temperature settings and advanced features like timers. Proper operation ensures energy efficiency and extends the unit’s lifespan. Always follow the instructions provided for smooth functionality.

3.1 Understanding the Control Panel

The control panel features buttons for power‚ temperature adjustment‚ mode selection‚ and fan speed. The display shows the current settings‚ and buttons like ON/OFF‚ TEMP‚ and TIMER simplify operation. Use the remote control to access advanced features. Familiarize yourself with the panel to navigate cooling‚ heating‚ and fan modes effortlessly. Refer to the manual for detailed explanations of each function and symbol.

3.2 Remote Control Functions

The remote control allows you to adjust temperature‚ set timers‚ and switch modes effortlessly. Buttons like ON/OFF‚ TEMP‚ and TIMER provide quick access to key functions. Use the remote to toggle between cooling‚ heating‚ and fan modes or adjust fan speed. This convenient feature enhances user experience‚ enabling seamless control from anywhere in the room. Refer to the manual for detailed instructions on remote operations.

3.3 Basic Operation Modes (Cooling‚ Heating‚ Fan‚ Dehumidify)

The Arctic King air conditioner offers four primary operation modes. Cooling lowers room temperature‚ while Heating maintains warmth during colder months. The Fan mode circulates air without cooling or heating‚ and Dehumidify removes excess moisture to prevent mold growth. Each mode is designed for specific comfort needs‚ ensuring efficient and reliable performance in various settings.

Maintenance and Care

Regular maintenance ensures optimal performance. Clean filters‚ check drainages‚ and inspect components regularly to maintain efficiency and extend the unit’s lifespan‚ ensuring reliable operation;

4.1 Routine Cleaning and Filter Maintenance

Regularly clean filters to ensure optimal airflow and efficiency. Check and clean the air filter every 2-4 weeks. Wipe the exterior with a damp cloth and inspect internal components for dust buildup. Clean the drain pan and ensure proper drainage to prevent moisture issues. Replace filters as recommended to maintain performance and energy efficiency.

4.2 Troubleshooting Common Issues

Address common issues by checking power supply and ensuring the thermostat is set correctly. If the unit doesn’t cool‚ verify filter cleanliness and ensure proper installation. For icing issues‚ check refrigerant levels. Strange noises may indicate loose parts or internal damage. Turn off the unit if electrical issues arise and contact customer support for unresolved problems.

Safety Precautions

Always follow installation and operation guidelines to prevent electrical hazards and fire risks. Avoid overloading circuits and ensure proper grounding for safe usage of your Arctic King air conditioner.

5.1 Important Safety Warnings

Ensure the air conditioner is installed and operated according to the manual to prevent electrical hazards and fire risks. Avoid overloading circuits‚ and never use damaged power cords. Proper grounding is essential for safe operation. Keep the unit out of reach of children and pets‚ and avoid exposing it to extreme temperatures or moisture.

5.2 Electrical Safety Tips

Always use a dedicated circuit for your Arctic King air conditioner to prevent power overload. Ensure proper grounding to avoid electrical shock. Never use damaged cords or plugs‚ and keep the unit dry. Avoid exposing electrical components to water or moisture. Follow all electrical safety guidelines in the manual to ensure safe and reliable operation.

Technical Specifications

This section details the Arctic King air conditioner’s cooling capacity‚ refrigerant type‚ noise levels‚ and dimensions. It provides technical data to help users understand the unit’s performance and compatibility.

6.1 Cooling Capacity and Types of Units

The Arctic King air conditioner offers various cooling capacities‚ including 10‚000 BTU‚ 15‚000 BTU‚ and 24‚000 BTU models. These units are designed to efficiently cool small rooms‚ medium spaces‚ or large areas. The product line includes window/wall-type and portable units‚ catering to different installation preferences and room layouts‚ ensuring flexibility and optimal cooling performance for diverse needs.

6.2 Refrigerant Type and Charge

The Arctic King air conditioner uses R410a refrigerant‚ a environmentally friendly option. The refrigerant charge varies by model‚ with typical amounts ranging from 10.5 kg to 27.0 kg. Proper charging ensures efficient cooling performance. Always consult a professional for refrigerant handling to avoid safety risks and maintain unit efficiency.

6.3 Noise Levels and Dimensions

The Arctic King air conditioner operates with noise levels ranging from 65.8 to 81 dB(A)‚ depending on the model. Dimensions vary‚ such as 1870x1175x1000 mm for some units‚ ensuring compact installation. These specifications help users choose a model that fits their space and noise preferences‚ optimizing both performance and comfort in various environments.

Remote Control Guide

This section explains the remote control’s basic and advanced functions‚ including timer settings‚ temperature adjustments‚ and operation modes‚ ensuring easy control of your Arctic King air conditioner.

7.1 Basic Remote Control Functions

The remote control allows you to turn the air conditioner on/off‚ adjust the temperature‚ select operation modes (Cool‚ Heat‚ Fan‚ Dry)‚ and regulate fan speed. Use the ON/OFF button to power the unit‚ TEMP to set your desired temperature‚ and FAN to choose fan speed. The remote also features a TIMER for scheduled operation‚ enhancing convenience and energy efficiency.

7.2 Advanced Features (Timer‚ Temperature Settings)

The timer function allows you to set the air conditioner to turn on or off automatically within a 24-hour period. Temperature settings enable precise control‚ adjusting the room temperature in 1°F increments. Use the remote to program these features‚ ensuring energy efficiency and personalized comfort. These advanced options help maintain optimal conditions while minimizing energy usage and enhancing convenience.

Troubleshooting Common Problems

Identify issues like uneven cooling or noise. Check power supply‚ filters‚ and settings. Use the remote to adjust settings. Contact customer support if problems persist for assistance.

8.1 Identifying Common Issues

Common issues include the unit not turning on‚ insufficient cooling‚ or unusual noises; Check power supply‚ thermostat settings‚ and air filters. Ensure proper installation and verify refrigerant levels. If issues persist‚ consult the troubleshooting guide or contact customer support for professional assistance to resolve the problem effectively and safely.

8.2 Error Codes and Solutions

Refer to the error code list in your manual for specific issues. For example‚ E1 may indicate a temperature sensor fault‚ while E2 could signal a refrigerant issue. E3 often relates to communication errors between indoor and outdoor units. Restart the unit or consult a technician if problems persist. Always follow manual guidelines for accurate troubleshooting and solutions.

8.3 Resetting the Air Conditioner

To reset your Arctic King air conditioner‚ unplug it from the power source‚ wait for 30 seconds‚ and plug it back in. This process often resolves minor glitches. If issues persist‚ refer to the troubleshooting section or contact a certified technician for professional assistance to ensure proper functioning and safety.

Energy Efficiency Tips

Optimize energy use by adjusting settings seasonally‚ ensuring proper installation‚ and maintaining filters. Regular maintenance helps sustain efficiency‚ reducing long-term energy consumption and costs effectively.

9.1 Optimizing Energy Consumption

To minimize energy use‚ set your Arctic King air conditioner to eco-mode‚ use the programmable timer‚ and maintain consistent temperatures. Regularly cleaning filters and ensuring proper insulation can also enhance efficiency‚ reducing overall energy consumption and lowering utility bills while maintaining comfort.

9.2 Smart Usage Practices

Use the ionizer and air purification features to improve air quality while cooling. Adjust fan speed based on room size and occupancy for efficient cooling. Utilize natural cooling during cooler hours and close windows to retain chilled air. These practices enhance performance and energy savings without compromising comfort.

Warranty and Support Information

The Arctic King air conditioner is backed by a comprehensive warranty covering parts and labor. For support‚ contact customer service via phone or visit the official website.

10.1 Understanding the Warranty

The Arctic King air conditioner warranty covers parts and labor for a specified period‚ ensuring protection against manufacturing defects. Register your product to activate the warranty‚ and refer to the manual for terms and conditions. Contact customer support for claims or inquiries regarding warranty coverage.

10.2 Contacting Customer Support

For assistance‚ contact Arctic King customer support via phone‚ email‚ or their official website. Provide your model number and a detailed description of your issue for efficient service. Visit the support page for contact details and additional resources to resolve your queries promptly and effectively.

Additional Features and Accessories

Explore programmable timers‚ ionizers‚ and air purification features that enhance your Arctic King air conditioner’s performance. These accessories improve efficiency‚ air quality‚ and user convenience significantly.

11.1 Programmable Timer

The programmable timer allows you to schedule your Arctic King air conditioner’s operation in advance‚ enhancing energy efficiency and convenience. Set specific cooling or heating schedules to customize your comfort levels throughout the day. This feature ensures your unit operates only when needed‚ saving energy and optimizing performance. Refer to the manual for detailed setup instructions.

11.2 Ionizer and Air Purification Features

The Arctic King air conditioner features an ionizer and air purification system‚ designed to enhance indoor air quality. The ionizer releases negative ions to trap pollutants‚ while the purification system removes allergens and odors. These features promote cleaner‚ healthier air and improved comfort. Refer to the manual for specific settings and maintenance tips to optimize these functions effectively.

By following this manual‚ you’ve gained essential knowledge to maximize your Arctic King air conditioner’s efficiency‚ safety‚ and longevity. Proper usage ensures optimal cooling and air quality.

12.1 Summary of Key Points

This manual has provided comprehensive guidance on installation‚ operation‚ maintenance‚ and troubleshooting for your Arctic King air conditioner. It emphasized energy efficiency‚ safety precautions‚ and proper usage to ensure optimal performance. By following these instructions‚ you can enjoy reliable cooling‚ improved air quality‚ and extended appliance longevity while minimizing energy consumption and potential hazards.

12.2 Final Tips for Optimal Performance

Regularly clean filters‚ use the timer for efficient operation‚ and maintain consistent temperatures. Ensure proper ventilation and avoid overloading the unit. Utilize the ionizer for cleaner air and schedule annual professional inspections. By following these tips‚ you can maximize your Arctic King air conditioner’s efficiency‚ longevity‚ and performance while enjoying a comfortable and energy-saving experience.