pro fitness treadmill user manual

Welcome to the Pro Fitness Treadmill User Manual! This guide provides essential information for safe assembly, operation, and maintenance of your treadmill. Designed to enhance your fitness journey, this manual ensures optimal performance and longevity of the equipment while promoting a safe and effective workout experience.

By following the instructions carefully, you can maximize the benefits of your treadmill and enjoy a variety of workout options tailored to your fitness goals. Always prioritize safety and proper usage to get the most out of your Pro Fitness Treadmill;

1.1 Understanding the Purpose of the Manual

This manual is designed to guide you through the safe and effective use of your Pro Fitness Treadmill. It covers essential topics like assembly, operation, and maintenance to ensure optimal performance and longevity of the equipment. The purpose of this manual is to provide clear instructions and safety guidelines, helping you achieve your fitness goals while minimizing risks.

By following the instructions in this manual, you can understand the treadmill’s features, troubleshoot common issues, and maintain it properly. This comprehensive guide is your key to unlocking a safe and rewarding workout experience with your Pro Fitness Treadmill.

1.2 Key Features of the Pro Fitness Treadmill

The Pro Fitness Treadmill is equipped with advanced features to enhance your workout experience. It includes a sturdy frame, a spacious running deck, and a powerful motor for smooth operation. Additional features like programmable workouts, heart rate monitoring, and Bluetooth connectivity allow for personalized training sessions and seamless integration with fitness apps.

The treadmill also offers adjustable speed and incline settings, enabling users to customize their workouts according to their fitness goals. Its folding design makes it convenient for home use, while the durable construction ensures long-lasting performance and reliability.

Safety Precautions and Warnings

Always read the manual thoroughly before use. Consult a healthcare provider before starting any exercise program. Wear proper attire and avoid loose clothing. Soft-soled shoes are not recommended for running. ICON assumes no responsibility for injuries or damages caused by improper use. Follow all safety guidelines to ensure a safe workout experience.

2.1 General Safety Guidelines

Always read the manual thoroughly before using the treadmill. Consult a healthcare provider before starting any exercise program. Wear proper athletic attire and avoid loose clothing. Ensure the area around the treadmill is clear of hazards. Keep children and pets away during use. Follow all safety guidelines to minimize risks and ensure a safe workout experience.

2.2 Important Warnings Before Use

Always adhere to the warnings provided in this manual to ensure safe operation. Consult a healthcare professional before starting any exercise program. Wear proper athletic attire and avoid loose clothing that may entangle. Do not use the treadmill in commercial or rental settings. Keep children and pets away during use. Never wear soft-soled shoes or sandals while exercising. Follow all safety guidelines to prevent accidents and injuries.

2.3 Safety Instructions for Assembly and Maintenance

Always follow the guidelines in this manual for safe assembly and maintenance. Lubricate moving parts as instructed to ensure smooth operation. Wear protective gloves and eyewear during assembly. Ensure the area is clear of obstacles before starting. Avoid overexertion when lifting or moving parts. Never attempt repairs without disconnecting power. Keep children supervised during assembly and maintenance tasks.

Assembly and Installation Instructions

This section guides you through unpacking, inventorying parts, and step-by-step assembly of your Pro Fitness Treadmill. Follow instructions carefully to ensure proper installation and functionality. Troubleshooting common assembly issues is also covered for a smooth setup experience.

3.1 Unpacking and Inventory of Parts

Begin by carefully unpacking all components from the box. Inspect each part for damage and cross-verify with the provided inventory list to ensure no items are missing or damaged. This step is crucial for smooth assembly and proper functionality of your Pro Fitness Treadmill. Organize the parts neatly before proceeding to the next step.

3.2 Step-by-Step Assembly Process

Start by unfolding the treadmill frame and securing it in place using the provided locking mechanism. Next, attach the console and handrails, ensuring all bolts are tightened firmly. Proceed to align and fasten the running belt, followed by the side rails and any additional accessories. Refer to the diagram for precise alignment and tightening instructions to ensure stability and safety. Finally, test the treadmill at a low speed to confirm proper assembly and functionality.

3.4 Troubleshooting Common Assembly Issues

If parts do not align, check for correct orientation and re-tighten bolts. For a wobbly frame, ensure all screws are securely fastened. If the running deck doesn’t fold, verify the locking mechanism is disengaged. For belt misalignment, adjust the tension and re-center it. Refer to the diagram for guidance and consult the manual for additional solutions to ensure proper assembly and functionality.

Operating the Treadmill

Operating the Pro Fitness Treadmill is straightforward. Start by setting your desired speed and incline. Monitor your progress on the console, and use programmable workouts for variety.

4.1 Starting Your First Workout

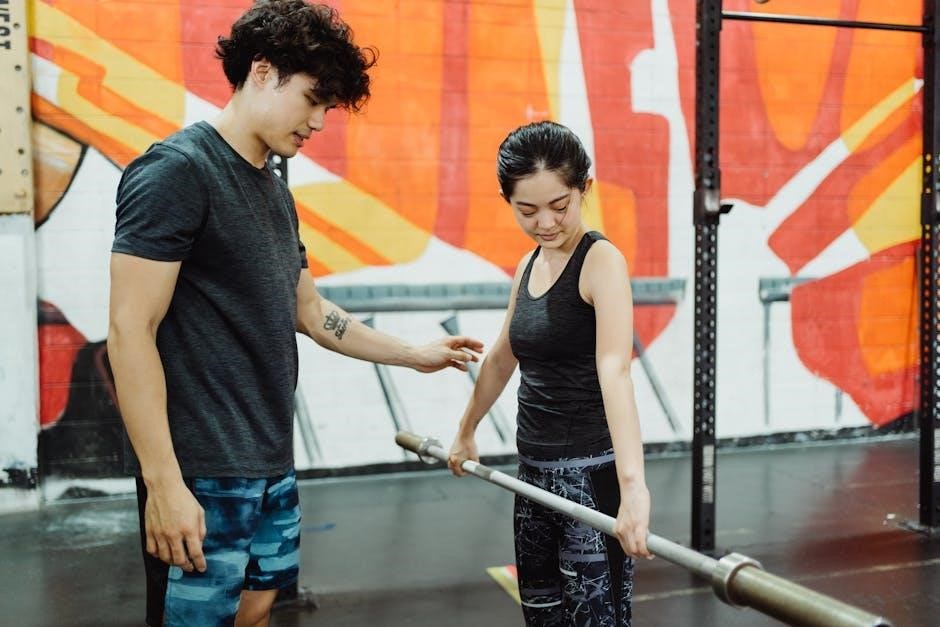
Starting your first workout on the Pro Fitness Treadmill begins with a warm-up. Ensure you’re wearing proper attire and footwear. Plug in the treadmill, press the power button, and select a low-intensity program or manual mode. Familiarize yourself with the controls, then gradually increase speed and incline as you get comfortable. Always begin with a gentle pace to avoid injury and ease into your routine.

4.2 Adjusting Speed and Incline Settings

Adjust the speed by pressing the plus (+) or minus (-) buttons on the console. Incline settings can be modified using the up or down arrows to choose from levels 1 to 10. Always make gradual changes to avoid sudden movements. Monitor your comfort and adjust settings as needed to maintain a safe and effective workout pace.

4.3 Monitoring Your Progress and Settings

The console displays your speed, incline, time, distance, calories, and heart rate. Use these metrics to track your workout progress and stay motivated. Adjust settings as needed to meet your fitness goals. Ensure the emergency stop is easily accessible for safety. Regularly review your progress to optimize your training and achieve desired results efficiently. Refer to the manual for detailed console operation guidance.

Maintenance and Care

Regularly clean the treadmill and lubricate the running belt for smooth operation. Inspect and replace worn parts to ensure optimal performance and longevity of the equipment.

5.1 Cleaning the Treadmill Regularly

Regular cleaning is essential to maintain your treadmill’s performance and hygiene. Use a soft cloth and mild detergent to wipe down the running belt, console, and frame. Avoid harsh chemicals that may damage the surface. Pay special attention to areas around the motor and belt to prevent dust buildup.

For optimal results, clean the treadmill after each use and perform a deep clean weekly. Use a silicone-based spray on pivot points to ensure smooth operation. Always unplug the treadmill before cleaning to ensure safety and check for any blockages in the belt or vents.

5.2 Lubricating the Running Belt

Regular lubrication of the running belt is crucial to ensure smooth operation and prevent wear. Apply a high-quality silicone-based lubricant to the center of the running belt, then walk on it to distribute evenly. Avoid over-lubrication, as it may attract dust. Lubricate every 3 months or as needed to maintain optimal performance and extend the belt’s lifespan.

Always unplug the treadmill before lubricating for safety. Consult your manual for specific recommendations on lubricant type and application frequency. Proper lubrication ensures a quiet and durable workout experience.

5.3 Checking and Replacing Parts

Regularly inspect the treadmill’s components, such as bolts, alignment, and wear parts, to ensure they are secure and functioning properly. Replace worn or damaged parts immediately to prevent further damage or safety hazards. Use only genuine replacement parts to maintain performance and warranty validity. Consult the manual for specific instructions and diagrams to guide replacements.

Always unplug the treadmill before performing any maintenance or replacements for your safety. Properly check and replace parts to ensure optimal performance and extend the lifespan of your Pro Fitness Treadmill.

Troubleshooting Common Issues

This section helps identify and resolve common problems, such as power issues, belt misalignment, or console malfunctions. Refer to the guide for step-by-step solutions to ensure quick fixes and optimal performance.

6.1 Diagnosing Power and Motor Problems

If your treadmill won’t turn on, check the power cord connection and ensure it’s plugged into a working outlet. Verify the circuit breaker hasn’t tripped and all electrical connections are secure. For motor issues, listen for unusual noises or vibrations. Consult the manual or contact customer support if problems persist to avoid further damage.

6.2 Resolving Belt Alignment and Tracking Issues

If the running belt is misaligned, it may cause noise or uneven wear. To adjust, tighten or loosen the alignment bolts using an Allen wrench. Ensure the belt is centered and evenly tensioned. After adjustments, walk on the belt at a slow speed to test alignment. Regular cleaning and lubrication can help prevent tracking issues and extend the belt’s lifespan.

6.3 Fixing Console and Display Problems

If the console or display is not functioning properly, first restart the treadmill. Check power connections and ensure all cables are securely attached. If the display remains unresponsive, refer to the troubleshooting section in the manual. For issues like frozen screens or incorrect readings, ensure the running belt is properly aligned and lubricated, as misalignment can affect console performance. Consult customer support if problems persist.

Advanced Features of the Pro Fitness Treadmill

The Pro Fitness Treadmill offers advanced features like programmable workouts, heart rate monitoring, and smart device connectivity. These features enhance your workout experience, allowing customization and tracking of your fitness goals with ease.

7.1 Using Programmable Workouts

The Pro Fitness Treadmill allows you to customize workouts with programmable settings. Choose from pre-set routines or create personalized plans to suit your fitness goals. This feature ensures variety and keeps your workouts engaging and effective, helping you stay motivated and track your progress effortlessly.

  • Customize speed and incline settings for tailored workouts.
  • Pre-set programs offer diversity for different fitness levels.
  • Track progress and adjust plans as you advance.

7.2 Heart Rate Monitoring and Controls

The Pro Fitness Treadmill features heart rate monitoring to optimize your workouts. Use the built-in handgrip sensors or connect a wireless chest strap for accurate readings. This system provides real-time feedback, helping you stay within your target zone and maximize your exercise efficiency.

  • Monitor heart rate continuously during exercise.
  • Set custom heart rate zones for personalized workouts.
  • Receive alerts when exceeding target zones.
  • Track heart rate data for progress analysis.

This feature ensures safe and effective training, adapting to your fitness needs.

7.3 Connecting to Smart Devices and Apps

Enhance your workout experience by connecting your Pro Fitness Treadmill to smart devices and apps. Use Bluetooth to sync with compatible apps like the Pro Fitness App, tracking progress and controlling settings remotely. This seamless integration allows you to monitor workouts, set goals, and receive notifications, making your fitness journey more engaging and efficient.

  • Sync workout data for detailed analysis.
  • Control speed and incline settings via app.
  • Track progress and set fitness goals.
  • Receive real-time feedback and notifications.

Workout Tips and Guidelines

Optimize your fitness journey with tailored tips! Start with a warm-up, set achievable goals, and gradually increase intensity. Stay consistent, monitor progress, and cool down properly for best results.

8.1 Setting Up a Effective Workout Routine

Create a balanced routine by defining clear fitness goals and scheduling regular workouts. Begin with a warm-up, incorporate varied exercises like interval training or incline walks, and monitor progress. Adjust intensity and duration gradually to avoid overexertion. Stay motivated by tracking achievements and incorporating rest days for recovery. Consistency is key to achieving long-term fitness success.

8.2 Warm-Up and Cool-Down Exercises

A proper warm-up and cool-down are essential for a safe and effective workout. Start with light walking or dynamic stretches to prepare your muscles and increase blood flow. After exercising, finish with gentle walking and static stretches to relax your muscles and gradually lower your heart rate. This helps prevent injury and reduces post-workout soreness.

8.3 Maximizing Your Training Results

To maximize your training results, focus on consistent workouts and gradually increase intensity. Use the treadmill’s preset programs or create custom routines to target specific goals, such as endurance or weight loss. Monitor your progress, adjust speed and incline settings, and incorporate interval training for enhanced effectiveness. Stay hydrated, wear proper footwear, and listen to your body to optimize performance and avoid injury.

Folding and Storage Instructions

To fold the treadmill, lift the running deck until it clicks into place. Ensure the deck is securely locked to prevent movement during storage. Store in a dry, cool area to maintain equipment condition and longevity. Always use the safety lock provided to keep the treadmill stable when folded.

9.1 Properly Folding the Treadmill

Start by lifting the running deck gently until it clicks into the folded position. Ensure the deck is fully locked to avoid accidental unfolding. Always check for obstructions before folding. Use the safety latch to secure the deck in place. This ensures stability and prevents damage during storage. Proper folding saves space and maintains the treadmill’s condition for future use.

9.2 Safe Storage and Transportation

Store the treadmill on a firm, level surface in a dry, cool area. Clean the treadmill before storage and cover it to protect from dust and moisture. Ensure the area is clear of flammable materials. Never store the treadmill near open flames or sparks; Proper storage maintains the equipment’s condition and ensures safety.

When transporting, use a sturdy dolly or Moving equipment to prevent damage. Secure the treadmill firmly to avoid shifting during transit. Always follow local safety guidelines for moving heavy objects. Protect the treadmill from extreme temperatures and vibrations during transport. Safe handling ensures the treadmill remains functional and ready for future use.

Warranty and Customer Support

Your Pro Fitness Treadmill comes with a comprehensive warranty covering parts and labor for up to 5 years. For inquiries or issues, contact customer support via phone, email, or the official website. Remember to register your product to validate the warranty and ensure prompt assistance.

10.1 Understanding Your Warranty Coverage

Your Pro Fitness Treadmill is backed by a comprehensive warranty, ensuring protection against manufacturing defects. The warranty covers parts and labor for up to 5 years and the frame for 10 years. Domestic use only; commercial or institutional use voids coverage. Register your product within 30 days of purchase to activate the warranty. Damage from misuse or improper maintenance is excluded. Refer to the manual for full terms. Always keep your proof of purchase for warranty claims.

10.2 Contacting Pro Fitness Customer Service

For assistance, contact Pro Fitness Customer Service via phone, email, or their official website. Service representatives are available Monday-Friday, 9 AM-5 PM EST. Have your product serial number ready for faster support. Visit the support section on their website for contact details and online forms. Ensure to describe your issue clearly for prompt resolution. They are committed to helping you with any inquiries or concerns about your treadmill.

diary of a worm pdf

The Diary of a Worm PDF offers a humorous and engaging story by Doreen Cronin, illustrated by Harry Bliss, providing a unique worm’s perspective on life, school, and friendships. The PDF format ensures accessibility and convenience for readers of all ages, making it easy to explore the worm’s adventures and lessons about nature and empathy.

Overview of the Book

Diary of a Worm by Doreen Cronin is a charming children’s book that explores the daily life of a worm through diary entries. Illustrated by Harry Bliss, the story offers a unique perspective on friendship, school, and the natural world. The worm’s adventures and observations provide humor and insight into its underground world. The PDF format allows readers to easily access and enjoy the story, making it a popular choice for kids and educators. The book’s themes of empathy, environmental awareness, and creativity resonate with readers of all ages.

  • Unique storytelling through diary entries.
  • Explores themes of friendship and nature.
  • PDF format enhances accessibility.

The book’s engaging narrative and vibrant illustrations make it a delightful read for children and parents alike.

Importance of the PDF Format

The PDF format of Diary of a Worm offers unparalleled convenience and accessibility; It allows readers to download or read the book online, making it easily accessible on various devices. The PDF preserves the book’s vibrant illustrations and formatting, ensuring an engaging reading experience. Additionally, the digital version enables interactive features, such as zooming and searching, which enhance readability. This format is particularly beneficial for educators and students, as it facilitates classroom activities and sharing. The PDF also reduces the need for physical storage, making it environmentally friendly.

  • Convenient access on multiple devices.
  • Preserves illustrations and formatting.
  • Supports interactive reading features.

Overall, the PDF version of Diary of a Worm is a practical and eco-friendly way to enjoy this beloved story.

Key Themes and Lessons

Diary of a Worm PDF explores themes of friendship, perseverance, and understanding. The worm’s diary entries reveal challenges and joys, teaching empathy and appreciation for nature. The story highlights the importance of teachers and learning, while its humor makes complex lessons relatable. It encourages children to embrace differences and find joy in everyday life. These themes resonate with readers, making the book a valuable tool for teaching social and emotional growth. The worm’s adventures inspire curiosity and creativity, fostering a deeper connection with the natural world.

  • Friendship and perseverance.
  • Empathy and appreciation for nature.
  • Humor and relatable lessons.
  • Embracing differences and curiosity.

Overall, the book’s themes promote personal growth and a positive outlook on life;

Author and Illustrator Information

Doreen Cronin and Harry Bliss collaborated on Diary of a Worm. Cronin’s humorous storytelling and Bliss’s vibrant illustrations bring the worm’s world to life, making the PDF a delightful read for children and educators alike.

Doreen Cronin: The Author

Doreen Cronin is a celebrated children’s book author known for her engaging and humorous storytelling. Her unique voice brings characters to life, making complex themes relatable for young readers. Cronin’s work often explores friendships, nature, and everyday life through a child’s or animal’s perspective. In Diary of a Worm, her witty dialogue and creative narrative style captivate audiences, while her collaboration with illustrator Harry Bliss enhances the storytelling experience. Cronin’s books are praised for their ability to inspire empathy and curiosity in readers of all ages.

Harry Bliss: The Illustrator

Harry Bliss is a renowned illustrator and cartoonist, best known for his work on Diary of a Worm. His whimsical and expressive illustrations bring the worm’s world to life, adding visual charm and humor to Doreen Cronin’s story. Bliss’s artistry captures the essence of the characters, making them relatable and endearing to readers. His collaboration with Cronin has been instrumental in making the book a beloved classic, blending storytelling with vibrant visuals that resonate with audiences of all ages.

Book Content and Structure

The book is structured as diary entries, detailing the worm’s daily adventures, friendships, and humorous insights into his underground world. The PDF includes activities like creating worm habitats, encouraging interactive learning and creativity among readers.

Diary Entries of the Worm

The diary entries of the worm provide a unique and humorous perspective on its daily life, school experiences, and interactions with friends. Each entry highlights the worm’s observations about the world above and below ground, showcasing its curiosity and creativity. The worm’s diary also includes fun activities, such as building a wormery or observing bugs, which engage readers and encourage them to explore nature. The PDF format makes these entries easily accessible, allowing readers to enjoy the worm’s adventures and lessons at their convenience.

The Worm’s Daily Life and Adventures

The worm’s daily life is filled with fascinating adventures and observations. From discovering that teachers have birthdays to exploring the underground world, the worm’s experiences are both humorous and educational. The PDF version captures these moments, showcasing the worm’s interactions with friends and humans. Each adventure highlights the worm’s curiosity and creativity, making the story engaging for readers of all ages. The worm’s journey also emphasizes the importance of empathy and understanding, while its daily routines provide insight into the often-overlooked world of insects.

Relationships and Friendships

The worm’s relationships with friends and humans are central to the story. The worm and his friends work together to find the perfect birthday gift for their teacher, Mrs. Mulch, showcasing teamwork and camaraderie. The worm’s interactions with humans, particularly his teacher, highlight a unique bond built on understanding and respect. These friendships are portrayed with humor and warmth, emphasizing the importance of cooperation and empathy. The PDF version beautifully captures these moments, making the worm’s social adventures relatable and endearing to readers of all ages;

Themes and Messages

The Diary of a Worm PDF explores themes of environmental awareness, empathy, and humor. It highlights the worm’s perspective on nature, friendship, and human interactions, encouraging creativity and understanding through its engaging storytelling.

Environmental Awareness

The Diary of a Worm PDF emphasizes the worm’s role in the ecosystem, highlighting their importance in soil health and gardening. Through the worm’s diary entries, readers gain insight into the underground world and the impact of human actions on nature. The book simplifies complex environmental concepts, making them accessible to children while fostering an appreciation for the natural world. It encourages young readers to think critically about their relationship with the environment and the creatures that inhabit it, promoting a deeper understanding of ecological balance and conservation.

Empathy and Understanding

The Diary of a Worm PDF fosters empathy by sharing the worm’s daily challenges and joys, allowing readers to connect with its unique perspective. Through the worm’s experiences, children learn to appreciate the importance of kindness, friendship, and understanding. The story encourages readers to see the world from another creature’s viewpoint, promoting compassion and reducing prejudices. By highlighting the worm’s emotions and interactions, the book teaches young readers to value diversity and treat all living beings with respect and kindness, regardless of their differences. This fosters a deeper sense of empathy and connection.

Humor and Creativity

The Diary of a Worm PDF captivates readers with its humorous and creative storytelling. Through the worm’s witty diary entries, the book presents everyday life as an adventure, filled with amusing observations about school, friends, and humans. Harry Bliss’s engaging illustrations add to the humor, bringing the worm’s world to life. The story’s light-hearted tone makes it entertaining while encouraging creative thinking. Activities like writing a worm diary or building a wormery inspire children to explore their imagination and connect with nature in fun ways. This blend of humor and creativity makes the book a delightful read for all ages.

PDF Version and Accessibility

The Diary of a Worm PDF is easily accessible for reading online or downloading, ensuring convenience across various devices. Its digital format enhances readability and portability.

Downloading the PDF

Downloading the Diary of a Worm PDF is straightforward, with free options available online. The file can be easily saved to devices for offline reading. Many platforms offer the PDF for free, ensuring accessibility. Users can search for “Diary of a Worm PDF free download” to find reliable sources. Once downloaded, the PDF can be viewed on computers, tablets, or smartphones, making it a convenient option for readers. Additionally, some websites provide flipbook versions, enhancing the reading experience with interactive features and page-turning animations.

Reading the PDF Online

Reading the Diary of a Worm PDF online is a convenient option for those who prefer not to download the file. Many websites offer the book in a flipbook or digital reader format, allowing users to view it directly in their browser. Platforms like Scribd or educational databases often host the PDF, making it easily accessible. The online version typically includes zoom features and page-turning animations, enhancing the reading experience. This method is ideal for quick access or for users who prefer not to store the file on their devices. It’s also compatible with various devices, ensuring readability on computers, tablets, or smartphones.

Interactive Features in the PDF

The Diary of a Worm PDF often includes interactive features such as zoom options, page-turning animations, and clickable navigation. Some versions offer a flipbook format, mimicking the feel of turning physical pages. These features enhance readability and engagement, especially for younger audiences. Additionally, interactive elements like hyperlinks to activities or related content can be included, allowing readers to explore beyond the story. The PDF’s interactivity makes it a dynamic tool for both entertainment and education, fostering a more immersive experience for readers of all ages.

Educational Value

The Diary of a Worm PDF teaches children about nature, empathy, and creativity while fostering a love for reading and writing through its engaging storytelling and illustrations.

Teaching Children About Nature

The Diary of a Worm PDF introduces children to the fascinating world of insects and ecosystems. It highlights the importance of worms in soil health and their role in decomposing organic matter. The story encourages kids to explore nature, observe bugs, and understand the interconnectedness of all living creatures. By focusing on a worm’s daily life, it sparks curiosity about the natural world. Activities such as building wormeries or creating bug journals complement the learning experience, making it a valuable resource for environmental education in classrooms and at home. The PDF format ensures easy access for educators and students alike.

Encouraging Reading and Writing

The Diary of a Worm PDF serves as a delightful tool to foster a love for reading in children. Its engaging storyline and humorous tone make it appealing for young readers, while the simple language supports early literacy skills. Additionally, the diary format inspires children to write their own stories or journals, encouraging creative expression. Teachers and parents can use the PDF to assign reading comprehension tasks or writing prompts, such as imagining a day in the life of a worm. This makes it an excellent resource for developing both reading and writing abilities in a fun and interactive way.

Classroom Activities Inspired by the Book

The Diary of a Worm PDF sparks creative classroom activities that enhance learning. Teachers can assign students to create their own worm diaries, encouraging observational writing and artistic expression. Group projects, such as building worm habitats or conducting soil experiments, provide hands-on science lessons. Discussions about the worm’s adventures can lead to reflections on empathy and environmental stewardship. Additionally, the PDF’s accessibility allows for digital sharing, making it easy to incorporate multimedia presentations or interactive reading sessions, fostering engagement and collaboration among students.

Cultural and Social Impact

Diary of a Worm PDF has captivated readers globally, inspiring adaptations like Diary of a Fly and fostering community engagement through its relatable themes and humorous storytelling.

Popularity Among Children and Parents

Diary of a Worm PDF has gained widespread popularity among children and parents for its humorous and relatable storytelling. The book’s unique perspective, focusing on a worm’s daily life and adventures, resonates with kids, making it a favorite in classrooms and homes. Parents appreciate its educational value, as it teaches empathy, environmental awareness, and creativity through engaging narratives. The PDF format enhances accessibility, allowing families to enjoy the story together on various devices, further boosting its appeal as a shared reading experience.

Adaptations and Spin-offs

Diary of a Worm PDF has inspired various adaptations, including sequels like Diary of a Fly and Diary of a Spider, expanding the series’ charm. Educational activities, such as building wormeries and writing diaries, complement the book. These extensions engage children creatively, fostering a deeper connection with the worm’s unique perspective. The series’ success has led to interactive features in the PDF, enhancing learning and fun for young readers, while maintaining the core themes of nature and friendship introduced in the original story.

Community Engagement and Reviews

The Diary of a Worm PDF has fostered strong community engagement, with readers sharing their experiences and creative projects inspired by the book. Many educators and parents praise its ability to spark curiosity and creativity in children. Online forums and reviews highlight the book’s relatable humor and educational value, making it a favorite among both kids and adults. The PDF’s accessibility has also encouraged interactive discussions and reading groups, further enriching the community’s connection to the story.

2023 gmc sierra 1500 owners manual pdf

Welcome to the 2023 GMC Sierra 1500! This manual provides essential information on features‚ safety guidelines‚ maintenance‚ and troubleshooting for optimal performance and safety;

Overview of the Manual

The 2023 GMC Sierra 1500 owner’s manual is a comprehensive guide designed to help owners understand and utilize their vehicle’s features‚ maintenance requirements‚ and safety protocols. Organized into clear sections‚ it covers technical specifications‚ troubleshooting‚ and customization options‚ ensuring drivers can optimize performance and safety while enjoying the truck’s advanced capabilities.

Importance of Reading the Manual

Reading the 2023 GMC Sierra 1500 owner’s manual is crucial for understanding its advanced features‚ safety guidelines‚ and maintenance requirements. It provides essential insights to ensure safe operation‚ optimal performance‚ and longevity of the vehicle. By familiarizing yourself with the manual‚ you can avoid potential issues‚ maximize efficiency‚ and enjoy a trouble-free ownership experience tailored to your needs and preferences.

Key Features of the 2023 GMC Sierra 1500

The 2023 GMC Sierra 1500 boasts advanced technology‚ robust safety features‚ powerful engine options‚ and impressive towing capabilities. Its luxurious interior and customizable options enhance driving comfort and productivity.

Advanced Technology and Safety Features

The 2023 GMC Sierra 1500 is equipped with cutting-edge technology‚ including an HD Surround Vision camera system‚ adaptive cruise control‚ and lane-keeping assist. Enhanced safety features like forward collision alert and automatic emergency braking ensure a secure driving experience. The intuitive infotainment system integrates seamlessly with smartphone functionality‚ offering voice command and real-time navigation updates. These advancements prioritize driver convenience‚ safety‚ and connectivity on the road.

Engine and Performance Specifications

The 2023 GMC Sierra 1500 offers powerful engine options‚ including a 6.2L V8 delivering 420 horsepower and 460 lb-ft of torque‚ and a 2.7L Turbo engine producing 310 horsepower and 430 lb-ft of torque. Paired with a 10-speed automatic transmission‚ it ensures smooth shifting and optimal performance. The Sierra also features an advanced drivetrain system‚ including AutoTrac 4WD‚ enabling superior traction and control. Its capabilities extend to a maximum towing capacity of up to 14‚000 lbs and a payload capacity of 3‚855 lbs‚ making it a versatile and robust pickup for various tasks.

Towing and Payload Capacity

The 2023 GMC Sierra 1500 delivers a maximum towing capacity of up to 14‚000 lbs and a payload capacity of 3‚855 lbs. Equipped with the ProGrade Trailering System‚ it offers advanced trailering technologies for enhanced safety and performance. Always adhere to guidelines for proper equipment and setup to ensure safe and efficient towing and hauling.

Technical Specifications

The 2023 GMC Sierra 1500 features a 6.2L V8 engine‚ 10-speed automatic transmission‚ and 4WD drivetrain. It offers impressive fuel efficiency and robust performance capabilities.

Engine Details

The 2023 GMC Sierra 1500 is equipped with a powerful 6.2L EcoTec3 V8 engine‚ delivering exceptional performance and efficiency. It features direct fuel injection and Dynamic Fuel Management‚ optimizing power and fuel consumption. The engine produces up to 420 horsepower and 460 lb-ft of torque‚ ensuring robust capability for towing and hauling. Additionally‚ it includes Active Cylinder Closure technology for improved fuel efficiency and a smooth driving experience.

Transmission and Drivetrain

The 2023 GMC Sierra 1500 features a 10-speed automatic transmission with electronic controls‚ ensuring smooth shifting and optimal performance. Available in rear-wheel drive (2WD) or four-wheel drive (4WD)‚ the drivetrain offers enhanced traction and control. The 4WD system includes an Auto mode for versatile driving conditions. This advanced setup ensures efficient power delivery and improved towing capacity‚ making it suitable for both on-road and off-road adventures.

Fuel Efficiency and Range

The 2023 GMC Sierra 1500 offers impressive fuel efficiency‚ with EPA-estimated ratings varying by engine and drivetrain. The 2.7L Turbo engine achieves up to 20 MPG combined‚ while the 5.3L V8 provides up to 18 MPG combined. The Duramax 3.0L Turbo-Diesel delivers exceptional efficiency‚ with up to 23 MPG combined. Proper maintenance and driving habits can maximize range‚ ensuring optimal performance and efficiency for both daily driving and long hauls.

Safety Features and Guidelines

The 2023 GMC Sierra 1500 prioritizes safety with advanced technologies and clear guidelines to ensure driver and passenger protection‚ enhancing overall driving confidence and vehicle reliability.

Active Safety Technologies

The 2023 GMC Sierra 1500 features cutting-edge active safety technologies‚ including Forward Collision Alert‚ Lane Keep Assist‚ and Adaptive Cruise Control. These systems enhance driver awareness and assist in preventing accidents by monitoring surroundings and adjusting vehicle responses. Adaptive Cruise Control maintains a safe distance from traffic ahead‚ while Lane Keep Assist gently steers the vehicle back into its lane if it drifts. Together‚ these technologies provide an added layer of protection and confidence on the road.

Passive Safety Features

The 2023 GMC Sierra 1500 is equipped with advanced passive safety features to protect occupants in the event of a collision. A robust framework‚ multiple airbags‚ and high-strength materials ensure maximum safety. The vehicle features dual-stage frontal airbags‚ seat-mounted side-impact airbags‚ and head-curtain airbags for comprehensive protection. Additionally‚ the Sierra includes safety belts with pretensioners to secure occupants and reduce injury risk during sudden stops or crashes.

Emergency Procedures

In case of an emergency‚ the 2023 GMC Sierra 1500 provides clear guidelines to ensure safety. If a collision occurs‚ secure the vehicle‚ activate hazard lights‚ and call emergency services. The manual outlines steps for evacuating the vehicle‚ providing first aid‚ and handling fire emergencies. Additionally‚ features like automatic crash notification systems enhance rapid assistance and response during critical situations.

Infotainment and Connectivity

The 2023 GMC Sierra 1500 features a state-of-the-art infotainment system with a touchscreen display‚ offering navigation‚ Bluetooth connectivity‚ and smartphone integration for seamless entertainment and voice command controls.

Navigation and Entertainment System

The 2023 GMC Sierra 1500 features a premium infotainment system with a high-resolution touchscreen display. It includes advanced navigation‚ voice command functionality‚ and seamless smartphone integration. The system supports popular apps and offers customizable settings to enhance your driving experience. With crystal-clear audio and intuitive controls‚ it ensures entertainment and connectivity are always within reach‚ providing comfort and convenience for both driver and passengers.

Bluetooth and Smartphone Integration

The 2023 GMC Sierra 1500 offers seamless Bluetooth and smartphone integration‚ enabling hands-free calls‚ music streaming‚ and app control. Compatible with Apple CarPlay and Android Auto‚ it ensures a connected driving experience. The intuitive system allows voice commands and touch-screen interactions‚ enhancing convenience and safety while on the road.

Voice Command and Controls

The 2023 GMC Sierra 1500 features advanced voice command technology‚ allowing drivers to control navigation‚ calls‚ and media seamlessly. With a dedicated voice button on the steering wheel‚ you can access features hands-free‚ ensuring safety and convenience. The system supports natural voice recognition‚ enabling easy interaction with the infotainment system. This feature enhances your driving experience by keeping your eyes on the road and hands on the wheel.

Maintenance and Care

Regular maintenance is crucial for optimal performance. Schedule routine checks‚ monitor fluid levels‚ and follow care tips for exterior and interior longevity.

Scheduled Maintenance Requirements

Regular maintenance ensures optimal performance and longevity. Follow the recommended schedule for oil changes‚ tire rotations‚ and fluid checks. Check the manual for specific intervals and procedures. Adhere to mileage-based services to maintain warranty coverage and prevent wear. Address any alerts or notifications promptly to avoid potential issues. Proper upkeep enhances safety‚ efficiency‚ and overall vehicle reliability.

Fluid Checks and Replacements

Regular fluid checks are crucial for maintaining your GMC Sierra 1500. Check engine oil‚ coolant‚ transmission‚ and brake fluids monthly. Replace engine oil every 5‚000 to 7‚500 miles‚ depending on usage. Coolant and transmission fluids should be inspected every 30‚000 miles. Brake fluid should be replaced every 60‚000 miles or as indicated by the manual. Use genuine GMC products for optimal performance and longevity.

Exterior and Interior Care Tips

Regularly wash and wax your Sierra 1500 to protect the paint and trim. Clean the interior surfaces with gentle products to maintain upholstery and dashboard condition. For leather seats‚ use a conditioner to prevent cracking. Vacuum carpets frequently and apply protective sprays to repel stains. Avoid harsh chemicals that may damage materials. Regular cleaning ensures long-lasting durability and preserves the vehicle’s appearance.

Understanding the Instrument Cluster

The 2023 GMC Sierra 1500 Owner’s Manual explains the instrument cluster‚ detailing displays‚ gauges‚ and indicators. It provides guidance on understanding warning lights and customizable settings for a safer‚ more informed driving experience.

Dashboards and Warning Lights

The dashboard in your 2023 GMC Sierra 1500 is designed to keep you informed with essential gauges and indicators. The manual explains the meaning of each warning light‚ such as low fuel‚ engine issues‚ or system malfunctions. Understanding these indicators helps ensure your safety and the vehicle’s optimal performance. Customizable settings allow you to tailor the display to your preferences.

Customizable Settings

The 2023 GMC Sierra 1500 allows for extensive personalization. Through the manual‚ you can learn how to customize the instrument cluster‚ ambient lighting‚ and driver assistance features. Adjust settings to suit your preferences‚ ensuring a tailored driving experience. The manual guides you through these adjustments‚ enhancing comfort and functionality. Customization options are designed to make your Sierra uniquely yours‚ optimizing both convenience and performance.

Customization and Personalization

The 2023 GMC Sierra 1500 offers extensive customization options‚ including trim levels‚ interior themes‚ and exterior accents. Personalize your truck to reflect your style and preferences with ease. The manual details how to tailor features like seating‚ technology‚ and exterior styling for a unique driving experience. Explore the variety of available options to make your Sierra truly yours.

Options for Interior and Exterior Accessories

The 2023 GMC Sierra 1500 offers a wide range of interior and exterior accessories to enhance functionality and personal style. Inside‚ customize with premium upholstery‚ ergonomic seating‚ and advanced tech features. Externally‚ choose from alloy wheels‚ chrome accents‚ and practical additions like bed extenders or tonneau covers. These accessories allow you to tailor your truck to your preferences‚ ensuring a perfect blend of comfort and durability while maintaining its rugged appeal.

Trim Levels and Packages

The 2023 GMC Sierra 1500 is available in multiple trim levels‚ including Pro‚ SLE‚ SLT‚ AT4‚ and Denali. Each trim offers unique features‚ such as enhanced off-road capabilities‚ luxurious interiors‚ or advanced technology. Packages like the Sierra HD AT4 provide additional upgrades for specific needs‚ ensuring customers can customize their truck to suit their lifestyle‚ whether for work‚ adventure‚ or everyday comfort.

Troubleshooting Common Issues

The manual provides detailed guidance for diagnosing and resolving common problems‚ including error codes‚ system resets‚ and maintenance tips to ensure your truck runs smoothly and efficiently.

Diagnosing and Addressing Common Problems

The manual offers step-by-step guidance for identifying and resolving common issues‚ such as error codes‚ system malfunctions‚ and performance concerns. It includes detailed instructions for checking fluid levels‚ resetting systems‚ and addressing warning lights. By following the troubleshooting procedures‚ owners can quickly identify and resolve problems‚ ensuring their Sierra 1500 operates at peak performance. Refer to the manual for specific diagnostic codes and repair recommendations.

Resetting Systems and Codes

The manual provides clear instructions for resetting various systems and clearing error codes on your 2023 GMC Sierra 1500. Learn how to reset features like adaptive cruise control‚ lane-keeping assist‚ and tire pressure monitoring systems. It also outlines steps for clearing diagnostic trouble codes using the instrument cluster or a scan tool‚ ensuring your truck runs smoothly and efficiently after addressing issues.

Warranty and Support

The 2023 GMC Sierra 1500 comes with a comprehensive warranty‚ including coverage for parts and labor. Contact GMC support at [phone number] or visit [website] for assistance.

Coverage and Duration

The 2023 GMC Sierra 1500 is backed by a comprehensive warranty program. The bumper-to-bumper coverage lasts for 3 years or 36‚000 miles‚ while the powertrain warranty extends to 5 years or 60‚000 miles. Additional benefits include 5 years or 60‚000 miles of roadside assistance and 6 years of rust-through coverage. These programs ensure protection and peace of mind for GMC Sierra 1500 owners for years to come.

Contact Information for Assistance

For questions or concerns about your 2023 GMC Sierra 1500‚ contact GMC Customer Assistance at 1-800-GMC-4YOU (1-800-462-4868). Visit the official GMC website at www.gmc.com for additional support resources. Support is available Monday through Friday‚ 8:00 AM to 9:00 PM ET. Use these resources to address any inquiries or issues regarding your vehicle.

Final Thoughts on Using the Manual

The 2023 GMC Sierra 1500 Owner’s Manual is a comprehensive guide designed to enhance your ownership experience. It provides detailed insights into features‚ safety‚ maintenance‚ and troubleshooting‚ ensuring optimal performance and safety. By referencing this manual‚ you can maximize your truck’s capabilities‚ address issues promptly‚ and enjoy a personalized driving experience. Familiarize yourself with its contents to make the most of your vehicle.

Encouragement to Explore and Utilize Features

Take the time to explore the 2023 GMC Sierra 1500’s advanced features and technologies. From its robust engine options to cutting-edge infotainment systems‚ this truck is designed to enhance your driving experience. Familiarize yourself with the manual to discover how to customize settings‚ utilize safety features‚ and optimize performance. Embrace the opportunity to unlock your Sierra 1500’s full potential.

ge monogram oven manual

Welcome to the GE Monogram Oven Manual, your guide to understanding and operating your advanced cooking appliance. This manual provides essential insights into installation, safety, features, and maintenance.

Overview of the GE Monogram Oven

The GE Monogram Oven is a sophisticated appliance designed for seamless integration into modern kitchens, offering a perfect blend of style and functionality. Known for its precision engineering and advanced features, it provides versatile cooking options, including convection and self-cleaning modes. Its sleek design and customizable settings ensure enhanced cooking experiences, making it a reliable choice for home chefs seeking durability and high performance.

Importance of Reading the Manual

Reading the GE Monogram Oven Manual is essential for ensuring safe and optimal operation; It provides critical information on safety precautions, troubleshooting common issues, and maintaining your appliance. The manual also guides you through advanced features like convection cooking and self-cleaning functionality. By understanding the instructions, you can maximize your oven’s performance, prevent potential hazards, and extend its lifespan. It’s a valuable resource for both beginners and experienced users.

Installation and Setup

Proper installation ensures your GE Monogram Oven operates safely and efficiently. Follow the manual’s step-by-step guide for leveling, connecting utilities, and enabling smart features.

Pre-Installation Requirements

Before installing your GE Monogram Oven, ensure the site meets all specifications. Verify the model number, check electrical and gas connections, and confirm proper ventilation. Review local building codes and ensure the installation area is clear, level, and accessible. Consult a professional if unsure about any requirements. Proper preparation ensures safe and efficient installation.

Step-by-Step Installation Guide

To install your GE Monogram Oven, begin by disconnecting power and gas supplies. Carefully unpack and inspect the oven for damage. Position the oven in its designated space, ensuring it is level. Secure it with screws if applicable. Connect gas lines tightly and test for leaks. Reconnect electrical power and ensure all connections are safe. Finally, test the oven to ensure proper operation. Always follow safety guidelines.

Connecting to Wi-Fi and Smart Features

To connect your GE Monogram Oven to Wi-Fi, enable the Wi-Fi feature via the oven’s settings. Download the SmartHQ app and follow in-app instructions to link your oven. Select your oven model and enter the password from the appliance sticker. Ensure your router is on the 2.4 GHz band for optimal connectivity. Once connected, you can control and monitor your oven remotely through the app.

Safety Precautions and Guidelines

Always follow safety guidelines to ensure safe operation. Never leave children unattended near the oven. Keep flammable materials away and avoid touching hot surfaces. Proper installation is crucial.

General Safety Tips

Always follow safety guidelines to ensure safe operation. Never leave children unattended near the oven. Keep flammable materials away and avoid touching hot surfaces. Proper installation is crucial. Ensure the oven is installed by a qualified technician. Read the manual thoroughly before use. Never use abrasive cleaners, as they may damage surfaces. Regularly inspect the oven door gasket for wear. If damaged, replace it immediately to maintain proper sealing.

Specific Safety Instructions for GE Monogram Oven

Always ensure the oven is installed by a qualified technician. Keep children away from the oven door handle and controls. Never place flammable materials near the oven. Avoid using abrasive cleaners, as they may damage surfaces. For self-cleaning models, ensure proper ventilation. Never operate the oven with a damaged door gasket. Regularly inspect racks and shelves for stability. Refer to the manual for model-specific safety features and guidelines.

Features of the GE Monogram Oven

The GE Monogram Oven offers advanced cooking modes, including convection and self-cleaning functionality. It features a sleek design, precision temperature control, and smart integration capabilities for enhanced culinary experiences.

Convection Cooking Options

The GE Monogram Oven offers advanced convection cooking options, ensuring even heat circulation for consistent results. Modes include convection bake, roast, and broil, with precise temperature control. Dual-fan technology enhances air circulation, promoting even browning and crispy textures. Smart cooking sensors automatically adjust settings for optimal performance. These features allow for faster cooking times while maintaining moisture and flavor, making it ideal for various culinary creations.

Self-Cleaning Functionality

The GE Monogram Oven features a robust self-cleaning mode that uses high temperatures to burn food residue into ash. This convenient option eliminates manual scrubbing and reduces maintenance. For optimal results, ensure the oven is empty, racks are removed, and ventilation is proper. Follow the manual’s guidelines to avoid damage or fumes. Regular use of this feature keeps your oven in pristine condition.

Advanced Cooking Modes and Sensors

The GE Monogram Oven offers advanced cooking modes, including convection, bake, and broil, ensuring precise temperature control. Equipped with smart sensors, it automatically adjusts cooking times and temperatures for optimal results. These features enhance efficiency and ensure consistent cooking performance. The oven also integrates seamlessly with smart technology, allowing remote monitoring and control through the SmartHQ app for a modern culinary experience.

Operating the Oven

The GE Monogram Oven is designed for intuitive operation, with features like a user-friendly interface, precise temperature control, and smart cooking modes.

Using the Clock and Timer

The GE Monogram Oven features an intuitive clock and timer system. Set the clock using the touch screen, ensuring it matches your local time. The timer can be set in minutes or hours, either by entering the time directly or using the arrows to adjust. Press the timer button to start or cancel. For delayed cooking, set both the start time and duration. The timer signals when done but does not automatically turn off the oven. Sabbath mode is available for extended, uninterrupted operation. Use the SmartHQ app for remote timer control via Wi-Fi.

Selecting Cooking Modes (Bake, Broil, Convection)

The GE Monogram Oven offers versatile cooking modes. For baking, select the desired temperature and press the bake button. Broil mode is ideal for high-heat cooking; choose from high or low broil settings. Convection mode uses circulating air for even cooking and can be combined with bake or broil. Use the mode selector knob or touch screen to choose your preferred option. Adjust settings like temperature and time as needed. The oven also features advanced sensors for precise control.

Adjusting Temperature and Settings

To adjust temperature and settings on your GE Monogram Oven, use the control panel or touch screen. Select the desired mode, then use the arrows or numerical keypad to set the temperature in 1-degree increments. For precision, enable smart features like convection conversion or multi-rack cooking. Preheat the oven and confirm settings with a tone or display message. Always ensure settings match your recipe for optimal results.

Care and Maintenance

Regular maintenance ensures optimal performance of your GE Monogram Oven. Clean the interior and racks after use to prevent food buildup. Use the self-cleaning feature or manual cleaning. Always check and replace worn-out gaskets and seals. Schedule professional servicing annually for long-lasting efficiency and reliability.

Cleaning the Oven and Racks

Maintaining your GE Monogram Oven involves regular cleaning. Use the self-cleaning feature for a hands-off approach, running cycles at high temperatures to burn food residue. For manual cleaning, wipe surfaces with mild soap and water after cooling. Remove racks and soak them in warm soapy water. Avoid abrasive cleaners to prevent damage. Cleaning ensures optimal performance and prevents food residue buildup. Always refer to the manual for specific guidance.

Maintaining the Oven Door and Gasket

Properly maintaining the oven door and gasket is crucial for optimal performance. Regularly inspect the gasket for wear or damage; replace it if compromised to ensure a tight seal. Clean the door with mild soap and water, avoiding harsh chemicals. Lubricate the hinges periodically to maintain smooth operation. A well-maintained door and gasket prevent heat loss, ensuring efficient cooking and energy savings. Always follow manual guidelines for best results.

Scheduling Regular Maintenance

Regular maintenance is essential to prolong the life of your GE Monogram Oven. Schedule annual professional inspections to check for gas leaks, electrical issues, and venting efficiency. Clean filters and fans to ensure proper airflow. Additionally, plan routine checks of the oven’s exterior and interior components to prevent wear and tear. A well-maintained oven ensures safety, efficiency, and consistent performance over time, adhering to the manual’s guidelines.

Troubleshooting Common Issues

This section provides solutions for common issues like error codes, gas ignition problems, and more. Refer to the manual for detailed guidance and maintenance tips to resolve issues quickly and ensure optimal performance.

Resolving Error Codes (e.g., F2 Error)

The F2 error on your GE Monogram oven indicates a temperature-related issue, often due to a faulty sensor or excessive heat during self-cleaning. To resolve this, ensure the oven is cool, then check the temperature sensor for proper connection and functionality. If issues persist, reset the oven by turning off the circuit breaker for 30 minutes. If the error recurs, contact a professional for further assistance. Regular maintenance can help prevent such issues.

Addressing Gas Ignition Problems

If your GE Monogram oven’s gas ignition fails to light, ensure the gas supply is turned on and check for blockages in the burner or igniter. Verify that the oven’s child safety lock is not engaged. If issues persist, inspect the igniter for cleanliness or damage. Resetting the oven by switching off the circuit breaker for 30 minutes may also resolve the problem. If not resolved, contact a certified technician for assistance.

Frequently Asked Questions (FAQs)

  • Why is my GE Monogram oven showing an error code like F2?
  • How do I connect my oven to Wi-Fi for smart features?
  • Can I stop the self-cleaning cycle once it has started?
  • Why isn’t the gas igniting after using the self-clean option?

These FAQs address common concerns and provide quick solutions for optimal oven performance.

Advanced Features and Customization

The GE Monogram Oven offers advanced features like SmartHQ app integration, customizable cooking presets, and energy efficiency settings for personalized and efficient cooking experiences.

SmartHQ App Integration

The SmartHQ App seamlessly connects your GE Monogram Oven to your smartphone, enabling remote control, scheduling, and monitoring. Adjust cooking settings, receive notifications, and access advanced features like voice control and recipe integration. Ensure your oven is Wi-Fi enabled, then follow in-app instructions to link your appliance. This smart integration enhances convenience and streamlines your cooking experience, allowing you to manage meals effortlessly from anywhere.

Customizing Cooking Presets

Customizing cooking presets on your GE Monogram Oven allows you to tailor settings for specific dishes, ensuring optimal results. Simply navigate to the preset menu, select a cooking mode, and adjust temperature, time, and other parameters to suit your preferences. Save these settings for quick access in the future. This feature is ideal for frequently cooked meals like roasts or baked goods, streamlining your culinary routine.

Energy Efficiency Settings

The GE Monogram Oven offers energy efficiency settings to help reduce energy consumption. Using the SmartHQ app, you can schedule cooking sessions during off-peak hours and monitor energy use. The manual provides guidance on optimizing settings for energy conservation while maintaining performance. These features ensure your oven operates efficiently, aligning with eco-friendly practices and lowering utility costs.

Model-Specific Information

This section helps you identify your GE Monogram Oven model number and access tailored guides. Locate your model number on the appliance or manual for precise support.

Identifying Your Oven Model Number

Your GE Monogram Oven model number is located on a label inside the oven or on the back of the appliance. For single ovens, it’s often behind the door, while double ovens have it on the lower oven’s door. Once identified, visit the GE Appliances website to download the specific manual for your model, ensuring accurate guidance for installation, operation, and troubleshooting. Always refer to the Appliance Manuals section for the most reliable information.

Model Differences and Features

Each GE Monogram Oven model offers unique features catering to diverse cooking needs. The 27-inch and 30-inch models vary in size and functionality, with options like convection cooking and self-cleaning. Advanced models include smart integration via the SmartHQ app, allowing remote control. Some feature double ovens, while others offer European-design convection systems. Visit the GE Appliances website to explore model-specific details and choose the best fit for your kitchen.

Downloading Model-Specific Manuals

Visit the GE Appliances website to download your Monogram Oven manual. Enter your model number in the search bar, and select the relevant document. Manuals include use and care guides, installation instructions, and troubleshooting tips. Ensure you have the correct manual for your specific oven model to access accurate information and optimal performance. This resource is available 24/7 for your convenience.

Customer Support and Resources

For assistance with your GE Monogram Oven, contact our Preferred Service Specialists at 1-800-626-2005, available 24/7. Visit our website for online manuals, troubleshooting guides, and warranty details.

Contacting GE Monogram Support

For inquiries or issues with your GE Monogram Oven, reach out to our dedicated support team at 1-800-626-2005, available 24/7. Visit the official website for online resources, including troubleshooting guides, manuals, and warranty information. Ensure your model number is ready for faster assistance. Our experts are here to help you maintain your appliance’s optimal performance and address any concerns promptly.

Accessing Online Manuals and Guides

Visit the GE Appliances website to access your GE Monogram Oven manual and guides. Enter your model number in the search bar to find specific literature. Download digital copies of use and care manuals, installation guides, and energy efficiency information. This resource allows you to save paper by printing only the pages you need. Available 24/7, it ensures comprehensive support for your appliance.

Warranty and Service Options

Your GE Monogram Oven is backed by a comprehensive warranty, ensuring coverage for parts and labor. For service needs, contact the Monogram Preferred Service team, available 24/7. Extended warranty options are also available for added protection. Additionally, GE offers a Fit Guarantee, ensuring your new oven will replace your old one perfectly. Visit the GE Appliances website for detailed warranty terms and service scheduling.

chosen study guide

The Chosen Study Guide is a comprehensive resource designed to deepen your understanding of the series. It includes detailed episode summaries, discussion questions, and biblical references, making it perfect for individual reflection or group study. This guide helps viewers connect with the show’s themes and spiritual messages, enhancing their faith journey.

Purpose and Significance of the Study Guide

The purpose of the Chosen Study Guide is to deepen viewers’ understanding of the series by providing a structured framework for reflection and discussion. It serves as a valuable tool for individuals and groups to explore the biblical context, character development, and spiritual themes presented in each episode. The guide’s significance lies in its ability to enhance faith growth, foster meaningful conversations, and connect the show’s narrative with Scripture. By offering detailed summaries, discussion questions, and biblical references, it empowers users to engage more profoundly with the story of Jesus and its relevance to their lives.

Understanding the Structure of the Study Guide

The Chosen Study Guide is organized into sections corresponding to each episode, featuring summaries, discussion questions, and biblical references for deeper engagement and reflection.

Overview of Seasons and Episodes

The Chosen Study Guide spans four seasons, each exploring unique aspects of faith and spirituality; Season 1 examines what it means to be chosen, focusing on the lives of ordinary people who encountered Jesus. Season 2 delves into the way of the chosen, highlighting spiritual growth and discipleship. Season 3 immerses viewers in the life of Jesus through the Gospels, offering a deeper biblical context. Season 4 provides advanced insights, encouraging reflection on God’s promises and the application of faith in everyday life. Each season is divided into episodes, with study materials tailored to enhance understanding and engagement.

Key Features of the Study Guide

The Chosen Study Guide offers detailed episode summaries, character analyses, and scriptural references, providing a rich framework for exploration. It includes discussion questions tailored for groups or individuals, fostering deeper engagement. Interactive elements such as maps and historical context enhance understanding. The guide also features bios of key characters, helping viewers connect emotionally with the story. Additionally, it includes space for personal reflection and prayer, making it a versatile tool for spiritual growth. These features collectively create a holistic experience, bridging the gap between the series and biblical teachings.

Season 1: What Does it Mean to be Chosen?

Season 1 explores the calling of the first disciples, delving into themes of identity, purpose, and faith. It examines Jesus’ teachings and their impact on ordinary people.

Episode-by-Episode Breakdown

The study guide provides a detailed analysis of each episode in Season 1, offering summaries, discussion questions, and biblical references. Each episode’s themes, character arcs, and spiritual insights are explored, helping viewers connect with the story on a deeper level. The breakdown highlights key moments and their biblical context, fostering a richer understanding of the series and its message. This structured approach makes it ideal for both individual reflection and group discussions, ensuring a meaningful engagement with the content. The guide also emphasizes the human side of the disciples, making their journeys relatable and inspiring.

Themes and Biblical Context

The study guide delves into the core themes of Season 1, such as faith, redemption, and community, weaving them into the biblical narrative. It explores how the lives of ordinary people intersect with the divine, highlighting Jesus’s teachings and their relevance today. By connecting the series’ storylines to specific scripture passages, the guide enriches viewers’ understanding of the spiritual messages. This section helps participants reflect on the universal themes and their personal application, fostering a deeper connection to the biblical context and the characters’ journeys. It serves as a bridge between the show and the Bible, enhancing spiritual growth and insight.

Season 2: The Way of the Chosen

Season 2 explores the deepening relationships and spiritual journeys of key characters, offering insights into their faith and growth. The study guide provides a detailed examination of the season’s themes, character development, and biblical connections, helping viewers understand the significance of their experiences and how they align with scriptural teachings.

Character Development and Spiritual Growth

Season 2 of The Chosen delves into the profound spiritual journeys of its characters, showcasing their growth and struggles. Through detailed analysis, the study guide highlights how characters like Jesus, Mary Magdalene, and Peter navigate their faith, offering viewers insights into the human experience of following God. Discussion questions and biblical references help deepen understanding of their transformations, fostering personal reflection and group dialogue. This section emphasizes how the characters’ stories mirror our own spiritual paths, inviting viewers to apply these lessons to their lives, enriching their connection with the divine and their communities.

Scriptural References and Discussions

The study guide enriches viewers’ understanding by aligning episodes with relevant biblical passages, such as Jesuss Sermon on the Mount. It provides script excerpts, quotes, and illustrations, offering a deeper look at Gods character and promises. Discussion questions encourage reflection on how these teachings apply to modern life. Interactive elements, like maps and behind-the-scenes content, further enhance engagement. This section helps viewers connect the shows narrative to scripture, fostering a richer appreciation of the biblical context and its relevance today.

Season 3: The Life of Jesus Through the Gospels

Season 3 delves into the life of Jesus, exploring His teachings, miracles, and interactions through the lens of the Gospels. Interactive elements enhance spiritual growth and understanding.

Exploring the Life of Jesus

Season 3 of The Chosen Study Guide immerses participants in the life of Jesus through the Gospels, offering a deeper exploration of His teachings, miracles, and interactions. The guide provides detailed episode summaries, scriptural context, and character insights, helping viewers connect the series’ narrative with biblical truths. Interactive elements, such as discussion questions and biblical references, encourage reflection and spiritual growth. This section is designed to enhance understanding of Jesus’ ministry and its relevance to modern faith, making it ideal for both individual and group study settings. The guide bridges the gap between the show and Scripture, fostering a meaningful engagement with the life of Jesus.

Interactive Bible Study Elements

The Chosen Study Guide incorporates interactive Bible study elements to enhance engagement with the series and Scripture. Features include detailed discussion questions, script excerpts, and character bios, which foster deeper reflection and connection to the biblical narrative. Additionally, the guide provides historical context and maps of key locations, enriching the viewer’s understanding of Jesus’ ministry. These interactive components encourage active participation, whether in a group or individual setting, making the study guide a valuable tool for spiritual growth and faith exploration. The integration of multimedia and scriptural resources further enhances the learning experience, offering a holistic approach to studying The Chosen.

Season 4: Deeper Insights and Reflections

Season 4 offers advanced discussions and reflection tools, guiding viewers to engage deeply with the series’ themes and spiritual lessons, fostering a richer understanding of the narrative.

Advanced Discussions and Analysis

Season 4’s study guide delves into complex themes, offering in-depth analysis of character development and scriptural connections. It provides detailed summaries, quotes, and questions, fostering deeper engagement with the series’ spiritual insights. Designed for mature learners, this guide encourages critical thinking and personal reflection, enhancing the viewer’s understanding of the biblical context and the show’s narrative. Perfect for group discussions or individual study, it helps explore the profound messages embedded in each episode, enriching the faith journey of participants.

Guiding Questions for Groups or Individuals

These thought-provoking questions encourage deeper reflection on Season 4’s episodes, helping viewers explore their faith and the show’s themes. Questions like, “How does Jesus’ teaching in this episode apply to your life?” or “What does it mean to be chosen by God?” foster meaningful discussions. They also prompt personal growth, such as, “How can you embody Jesus’ love in your daily life?” Perfect for both group settings and individual study, these questions enhance understanding of the biblical context and character development, enriching the spiritual journey of all participants.

The Chosen Study Guide concludes with additional materials and downloads, offering further insights and tools for spiritual growth. Resources include discussion guides, Bible references, and interactive elements.

Additional Materials and Downloads

The Chosen Study Guide offers a variety of additional materials, including downloadable PDFs, discussion guides, and Bible study resources. These tools provide deeper insights into the series, with detailed summaries, character analyses, and scriptural references. Many resources are designed for both individual and group use, making them versatile for spiritual growth. Some guides also include interactive elements, such as reflection questions and historical context, to enhance understanding. These materials are easily accessible online, allowing viewers to explore the series’ themes and biblical connections further. They serve as valuable companions for those seeking to deepen their faith journey.

Final Thoughts on the Study Guide

The Chosen Study Guide is an invaluable resource for deepening your faith and understanding of the series. It provides structured insights, episode breakdowns, and meaningful discussion questions, helping to connect the show’s themes to your personal spiritual journey. The guide’s versatility accommodates individual reflection and group discussions, making it accessible to all. By encouraging thoughtful engagement with the content, it fosters a richer appreciation of the biblical narrative. Ultimately, this guide is a powerful tool for transforming your faith journey, offering a comprehensive and engaging pathway to spiritual growth and deeper connection with God’s Word.

form 5471 instructions 2022

Form 5471 is a critical IRS form for U.S. persons with ownership or control in foreign corporations, ensuring compliance with tax reporting obligations. It provides detailed information on foreign business activities, ownership structures, and transactions, helping the IRS monitor international tax compliance and prevent tax evasion. The form includes schedules like A, E, and H-1, each addressing specific aspects of foreign corporate operations. Filing is mandatory for U.S. citizens, residents, and entities meeting certain thresholds, ensuring transparency in international business dealings and adherence to U.S. tax laws. Accurate completion is vital to avoid penalties and maintain legal standing. Always refer to the latest IRS instructions for updates and guidance.

Overview of Form 5471

Form 5471 is an IRS information return required for certain U.S. persons with ownership or control in foreign corporations. It collects detailed data on foreign business activities, including income, distributions, and changes in ownership. The form consists of multiple schedules, such as Schedule A (shareholder information), Schedule E (income statements), and the newly introduced Schedule H-1 (adjusted net income for CAMT purposes). Filers must report transactions, operations, and financial data accurately. The form ensures compliance with U.S. tax laws and transparency in international dealings. Recent updates include new principal business activity codes and amended instructions for clarity and precision in reporting.

Who Must File Form 5471?

Form 5471 must be filed by U.S. persons who are officers, directors, or shareholders in certain foreign corporations. This includes U.S. citizens, residents, and entities holding at least 10% ownership in a foreign corporation. Additionally, U.S. persons acquiring or disposing of stock in a foreign corporation that meets specific thresholds must file. Officers and directors of foreign corporations in which a U.S. person owns at least 10% stock are also required to file. The form ensures transparency and compliance with U.S. tax laws, particularly for those involved in international business activities. Filing is mandatory to avoid penalties and maintain legal compliance.

Purpose of Filing Form 5471

The primary purpose of filing Form 5471 is to provide the IRS with detailed information about U.S. persons’ involvement in foreign corporations. This includes reporting ownership stakes, transactions, and distributions related to these entities. The form ensures compliance with U.S. tax laws by disclosing foreign business activities, helping to prevent tax evasion and ensuring accurate tax liability calculations. It also aids in monitoring international transactions and enforcing reporting requirements for foreign income. By filing Form 5471, individuals and entities maintain transparency in their foreign dealings, fulfilling legal obligations and supporting the IRS’s efforts to regulate cross-border financial activities effectively.

Filing Requirements and Eligibility

Form 5471 is required for U.S. citizens, residents, and entities with significant ownership or control in foreign corporations, ensuring compliance with specific filing thresholds and categories. Accurate eligibility determination is crucial to meet obligations effectively.

Categories of Filers and Their Obligations

Filers of Form 5471 are categorized based on their relationship with foreign corporations. Category 1 includes officers, directors, and certain shareholders who must submit detailed reports. Category 2 applies to U.S; persons acquiring or owning stock in foreign corporations, requiring specific disclosures. Each category has distinct obligations, such as filing schedules like A, E, and H-1. Mutual life insurance companies may qualify for exceptions. Understanding these categories is essential for accurate compliance, as failure to meet obligations can result in penalties. Proper classification ensures filers meet all reporting requirements effectively.

Exceptions to Filing Requirements

Certain U.S. persons may be exempt from filing Form 5471 under specific conditions. Mutual life insurance companies are notably excluded from filing obligations. Additionally, exceptions apply when adjusted net income or international boycott income is reported on lines 18 and 19. Notice 2018-13 provides relief for U.S. shareholders in foreign corporations, exempting them from filing if certain criteria are met. These exceptions aim to simplify compliance for eligible filers while maintaining transparency. It’s crucial to review IRS guidelines to determine if an exception applies, as failing to file when required can lead to penalties. Always consult the latest instructions for updates on exemptions.

Key Schedules and Their Instructions

Form 5471 includes essential schedules like A, E, and H-1, each with specific instructions for reporting foreign corporate income, transactions, and adjustments. These schedules ensure accurate and detailed disclosures.

Understanding Schedule A

Schedule A of Form 5471 is used to report distributions from foreign corporations, including dividends, distributions, and redemptions. It requires detailed information about the type and amount of distributions, as well as the recipient’s share. Filers must categorize distributions properly and ensure accuracy in reporting. Schedule A also captures essential details about the foreign corporation’s earnings and profits, which are critical for tax compliance. Proper completion of Schedule A is vital to avoid penalties and ensure adherence to IRS reporting standards. Always refer to the latest IRS instructions for specific guidance on completing this schedule accurately.

Completing Schedule E

Schedule E of Form 5471 is used to report income categories such as Subpart F income, foreign personal holding company income, and foreign base company income. Filers must categorize income accurately, using specific codes provided in the IRS instructions. Each category of income must be reported separately, ensuring compliance with IRS guidelines. Schedule E is particularly relevant for Controlled Foreign Corporations (CFCs) and requires detailed reporting to avoid penalties. Proper completion involves careful review of the instructions and accurate categorization of all applicable income types. Always ensure compliance with the latest updates and filing requirements for tax year 2022.

Reporting Requirements for Schedule H-1

Schedule H-1 is used to report a Controlled Foreign Corporation’s (CFC) adjusted net income or loss for Corporate Alternative Minimum Tax (CAMT) purposes. Introduced in tax year 2022, this schedule requires filers to provide detailed calculations of adjusted net income, taking into account specific adjustments and allocations. The schedule must be completed accurately to ensure compliance with CAMT reporting requirements. Filers should refer to the latest IRS instructions for guidance on completing Schedule H-1, as incorrect reporting may result in penalties. This schedule is a critical component of Form 5471 for CFCs subject to CAMT provisions.

Recent Changes and Updates for Tax Year 2022

For tax year 2022, the IRS introduced new principal business activity codes and updated Form 5471 instructions. These changes aim to enhance reporting accuracy and compliance.

New Principal Business Activities and Codes

The IRS introduced new principal business activity codes for tax year 2022 to enhance reporting accuracy. These codes align with modern industry classifications, ensuring better categorization of foreign corporations’ operations. Filers must now select codes that precisely reflect the primary business activities of the foreign entity. The updated instructions provide detailed guidance on selecting appropriate codes, reducing ambiguity. This change ensures consistency in reporting and aids the IRS in tracking international business activities more effectively. Filers are required to review their business operations annually to ensure accurate code selection, maintaining compliance with IRS requirements.

Amendments to Form 5471 Instructions

The IRS introduced amendments to Form 5471 instructions for tax year 2022, clarifying filing obligations and reporting requirements. Key updates include additional questions on Schedule E, addressing foreign corporation income categories. New guidance also covers the reporting of adjusted net income for corporate alternative minimum tax (CAMT) purposes in Schedule H-1. Furthermore, the IRS added an exception for mutual life insurance companies, reducing their filing burden. These changes aim to enhance reporting accuracy and compliance. Filers must review the updated instructions carefully to ensure proper completion of all schedules and sections, as penalties for non-compliance remain significant. Visit www.irs.gov/Form5471 for the latest details.

Special Considerations and Exceptions

Form 5471 includes exceptions for mutual life insurance companies and specific reporting requirements for adjusted net income and international boycott income, ensuring accurate compliance with IRS rules.

Mutual Life Insurance Companies Exception

Mutual life insurance companies are exempt from certain filing requirements under Form 5471, specifically for adjusted net income and international boycott income reporting. This exception simplifies compliance for such entities, focusing on their unique operational structures. The IRS provides specific guidance in the instructions, detailing the exemption criteria and applicable sections, such as Line 18 for adjusted net income and Line 19 for international boycott income. This exception ensures that mutual life insurance companies are not unduly burdened by reporting obligations that do not align with their business activities. Always refer to the latest IRS instructions for detailed guidance on this exemption.

Reporting Adjusted Net Income and International Boycott Income

Form 5471 requires U.S. persons to report adjusted net income and international boycott income related to foreign corporations. Adjusted net income reflects earnings adjusted for tax purposes, ensuring accurate reporting of foreign profits. International boycott income involves earnings derived from activities participating in or cooperating with boycotts not sanctioned by the U.S. This reporting helps the IRS monitor compliance with anti-boycott laws and compute taxable income correctly. Filers must complete specific sections, such as Line 18 for adjusted net income and Line 19 for boycott income, providing detailed breakdowns. This ensures transparency in foreign operations and adherence to U.S. tax regulations.

Compliance and Penalties

Failure to properly file Form 5471 may result in significant penalties, including fines and potential criminal charges. Ensure accurate and timely submissions to avoid IRS enforcement actions.

Consequences of Non-Compliance

Non-compliance with Form 5471 filing requirements can lead to severe penalties, including fines of up to $10,000 for each failure to file or furnish information. Additional penalties may apply for continued non-compliance, potentially reaching $50,000 or more. Criminal charges, including fines and imprisonment, can result if the IRS determines willful intent to evade reporting obligations. Accurate and timely filing is crucial to avoid these consequences. Understanding the filing requirements and seeking professional assistance can help ensure compliance and mitigate risks associated with penalties.

Best Practices for Accurate Filing

Consulting with tax professionals or legal advisors ensures compliance with Form 5471 requirements. Understanding the specific filing category (e.g., Category 1-5) is crucial for accurate reporting. Carefully review instructions for updates, such as new principal business activity codes for tax year 2022. Ensure all schedules, like Schedule H-1 for adjusted net income, are completed correctly. Double-check data accuracy, especially for foreign corporations’ financial details. Refer to IRS resources, like the updated instructions, to stay informed. Timely filing avoids penalties and ensures adherence to all regulatory changes.

Accessing Form 5471 and Instructions

Visit the official IRS website at www.irs.gov/Form5471 to access the latest Form 5471 and its instructions. Ensure you download the most recent version for tax year 2022.

Where to Find the Latest Form and Instructions

To access the most current version of Form 5471 and its instructions, visit the official IRS website at www.irs.gov/Form5471. This page provides the latest updates, including revisions for tax year 2022. You can download the form in PDF format, along with detailed instructions, schedules, and additional resources. The IRS regularly updates this page to reflect changes in tax laws and reporting requirements. Ensure you review the instructions carefully for specific guidance on completing the form accurately. For further assistance, the IRS also offers publications and FAQs related to Form 5471 on its website.

givenergy all in one installation manual

This manual provides a comprehensive guide for installing and maintaining GivEnergy’s All in One system‚ covering product details‚ installation steps‚ and essential maintenance procedures for trained professionals.

1.1 Importance of Training and Approval

Proper training and approval are essential for the safe and efficient installation of the GivEnergy All in One system. Only authorized personnel‚ having completed GivEnergy’s certification program‚ should perform installations to ensure compliance with safety standards and optimal system performance. Unauthorized installations may lead to safety hazards‚ system malfunctions‚ and voided warranties. GivEnergy’s training courses cover technical specifications‚ best practices‚ and troubleshooting techniques‚ ensuring installers are fully prepared. These programs are available through GivEnergy’s official channels‚ and successful completion is mandatory for all installers. Always verify an installer’s certification before proceeding with any GivEnergy system installation.

System Overview

The GivEnergy All in One system integrates a bidirectional inverter‚ battery storage‚ and energy management‚ designed for seamless energy storage and grid management in residential settings.

2.1 Components and Architecture

The GivEnergy All in One system comprises a bidirectional inverter‚ battery modules‚ and the Giv-Gateway controller. The architecture integrates energy storage‚ grid management‚ and smart energy monitoring into a single unit. The inverter manages power flow between the grid‚ battery‚ and home‚ while the Giv-Gateway acts as the central control unit‚ enabling communication and system optimization. Battery modules store excess energy for later use‚ ensuring energy availability during power outages or off-peak times. This design simplifies installation and enhances system efficiency‚ providing a comprehensive energy management solution for residential applications.

2.2 Energy Management System (EMS)

The Energy Management System (EMS) is a core component of the GivEnergy All in One solution‚ designed to optimize energy distribution and storage. It intelligently manages power flow between the grid‚ battery‚ and home‚ ensuring efficient energy use. The EMS enables advanced features like load shifting‚ where it stores excess energy during off-peak hours for use during high-demand periods. This system also provides real-time monitoring and control‚ allowing users to track energy usage and adjust settings for maximum savings. By integrating with the Giv-Gateway‚ the EMS ensures seamless communication and system optimization‚ making it a vital part of the overall energy management strategy.

Installation Process

The GivEnergy All in One installation process requires trained personnel to ensure proper system setup‚ safety‚ and efficiency‚ following detailed guidelines for a successful deployment.

3.1 Site Preparation Requirements

Proper site preparation is essential for a successful GivEnergy All in One installation. The location for the inverter and battery must be assessed for clearance‚ structural integrity‚ and accessibility. Ensure the area is free from obstructions and meets electrical and safety standards. Verify the electrical supply meets the system’s requirements‚ including proper grounding. Check for adequate ventilation to prevent overheating. Ensure the site complies with local building codes and regulations. Prepare the mounting surfaces for the inverter and battery units‚ ensuring they are level and secure. Confirm the system’s environmental operating conditions‚ such as temperature and humidity ranges‚ are met for optimal performance.

3.2 Physical Installation Steps

Begin by unboxing and inspecting all components‚ ensuring no damage is present. Mount the inverter and battery cabinet on a stable‚ level surface‚ adhering to the manufacturer’s specifications. Connect the electrical wiring‚ starting with the DC cables for the battery and then the AC supply for the inverter. Ensure all connections are secure and meet the recommended torque specifications. Install the Giv-Gateway communication module‚ linking it to the system for monitoring and control. Connect the communication cables between the inverter‚ battery‚ and gateway. Test the system to confirm proper functionality and communication. Finally‚ configure the system settings according to the user’s preferences and local grid requirements.

Commissioning and Configuration

Commissioning begins with powering up the system and initializing all components. Connect the GivEnergy All in One to the grid and ensure communication between the inverter‚ battery‚ and Giv-Gateway is established. Use the GivEnergy portal to configure system settings‚ such as energy management preferences and grid parameters. Enable remote monitoring to track performance and receive real-time updates. Set up energy tariffs and load-shifting options to optimize savings. Verify firmware versions and update if necessary. Conduct a full system test to ensure proper operation under various conditions‚ including grid and off-grid modes. Finally‚ review and confirm all configurations align with user requirements and local regulations before finalizing the setup.

Operation and Maintenance

Regularly inspect system components‚ ensure software updates‚ and monitor performance via the GivEnergy portal to maintain optimal functionality and efficiency over time.

5.1 Energy Tariffs and Load Shifting

The GivEnergy All-in-One system is designed to optimize energy usage by utilizing off-peak or flexible energy tariffs. This feature allows users to charge their batteries during low-demand periods when energy costs are lower‚ reducing overall electricity expenses. Load shifting ensures that stored energy is used during high-demand or high-cost periods‚ maximizing savings. The system’s energy management capabilities automatically adjust energy storage and consumption based on tariff schedules‚ ensuring efficient operation. This functionality not only helps in managing energy costs but also supports grid stability by reducing peak demand. Proper configuration of these settings is essential to fully benefit from energy tariff optimization.

Safety Considerations

Always follow safety protocols when handling electrical components. Ensure proper grounding‚ wear protective gear‚ and adhere to installation guidelines to prevent accidents and ensure system reliability.

6.1 Safety Protocols and Best Practices

Adhering to safety protocols is crucial when installing and maintaining the GivEnergy All in One system. Always ensure proper grounding of the system to prevent electrical hazards. Wear appropriate protective gear‚ including gloves and safety glasses‚ when handling components. Follow the manufacturer’s guidelines for disconnecting and reconnecting electrical connections to avoid shocks or injuries. Regularly inspect all cables and connections for damage or wear. Ensure the system is installed in a well-ventilated area‚ away from flammable materials. Keep emergency contact information handy and familiarize yourself with local electrical safety standards. Properly label all components for easy identification and maintenance. Never attempt repairs without proper training or authorization.

Product Specifications

The GivEnergy All in One system is designed for high efficiency and reliability‚ featuring a bidirectional inverter and a 13.5kWh battery cabinet. The system operates at a nominal voltage of 400V DC‚ with a maximum efficiency of 96.5%. It supports both AC and DC coupling‚ ensuring flexibility in various installations. The inverter has a continuous power output of 30kW‚ making it suitable for commercial and residential applications. The battery management system (BMS) ensures optimal charging and discharging cycles‚ extending the lifespan of the battery. The system also includes Wi-Fi and Ethernet connectivity for remote monitoring and control via the GivEnergy portal. It is compatible with energy management systems (EMS) and supports load shifting based on energy tariffs.

Troubleshooting Common Issues

Common issues with the GivEnergy All in One system include error codes‚ communication faults‚ and battery performance problems. Error codes can often be resolved by restarting the system or checking connections. Communication issues may arise due to unstable network connections or incorrect IP settings. Ensure all components are properly connected and configured. Battery performance issues can be addressed by checking the state of charge and ensuring proper charging cycles. For persistent problems‚ refer to the detailed troubleshooting guide in the manual or contact GivEnergy support for assistance. Regular system updates and maintenance can prevent many of these issues from occurring. Always follow safety protocols when troubleshooting.

FAQs and Common Concerns

Frequently asked questions about the GivEnergy All in One system include inquiries about load shifting‚ energy tariffs‚ and battery performance. Many users ask how to optimize energy savings through off-peak charging. Others seek clarity on system compatibility with existing electrical setups. Common concerns include understanding error codes and resolving communication issues between components. Additionally‚ users often inquire about warranty details and the expected lifespan of the battery. For detailed answers‚ refer to the troubleshooting section or contact GivEnergy support. Proper installation and regular maintenance are key to addressing these concerns effectively. Always ensure the system is installed by an approved professional.

The GivEnergy All in One Installation Manual provides a thorough guide for installing‚ commissioning‚ and maintaining the system. By following the outlined steps and adhering to safety protocols‚ users can ensure optimal performance and longevity. Proper training and approval are critical for a successful installation. The system’s advanced features‚ such as energy management and load shifting‚ offer significant energy savings. Always refer to the troubleshooting section for resolving common issues. For further assistance‚ consult the additional resources or contact GivEnergy support. Remember to retain this manual for future reference and adhere to all safety guidelines to ensure a safe and efficient operation of your GivEnergy system.

Additional Resources

For further assistance‚ access the GivEnergy All in One Installation Manual PDF or contact GivEnergy support for professional help and additional updated resources.

11.1 Accessing the PDF Manual

To access the GivEnergy All in One Installation Manual PDF‚ visit the official GivEnergy website or check the product support section; Ensure you download the latest version for accurate information.

11.2 Contact Information for Support

For assistance with the GivEnergy All in One system‚ contact their dedicated support team via phone‚ email‚ or through the official website. Trained professionals are available to address any inquiries or technical issues‚ ensuring efficient resolution and optimal system performance.

delta shower faucet manual pdf

The Delta Shower Faucet Manual PDF provides comprehensive guidance for installing, maintaining, and troubleshooting Delta shower faucets. It includes detailed diagrams, step-by-step instructions, and essential safety precautions to ensure proper installation and optimal performance. This manual is designed for both professional installers and DIY enthusiasts, offering clear instructions to help users achieve a successful and safe setup. By following the manual, users can ensure their Delta shower faucet functions efficiently and lasts for years.

1.1 Overview of the Delta Shower Faucet Manual

The Delta Shower Faucet Manual provides detailed instructions and guidelines for the proper installation, maintenance, and repair of Delta shower faucets. It covers various models, including single-handle, dual-handle, and pressure-balanced faucets, ensuring users can address specific needs. The manual also includes troubleshooting tips, safety precautions, and warranty information, making it an essential resource for both professionals and homeowners. Its user-friendly format ensures clarity and accessibility, helping users achieve optimal performance and longevity from their Delta shower faucets.

1.2 Importance of Reading the Manual Before Installation

Reading the Delta Shower Faucet Manual before installation is crucial to ensure a safe and successful setup. It provides essential safety precautions, step-by-step instructions, and troubleshooting tips to avoid common errors. The manual also outlines compliance with plumbing codes and manufacturer recommendations, preventing potential damage or voiding the warranty. By following the guidelines, users can achieve a proper installation, ensuring optimal performance and longevity of their Delta shower faucet. This step is vital for both professionals and DIY enthusiasts.

Types of Delta Shower Faucets Covered in the Manual

The manual covers various Delta shower faucet models, including single-handle, dual-handle, pressure-balanced, and thermostatic options, ensuring compatibility with different plumbing setups and user preferences.

2.1 Single-Handle Shower Faucets

Single-handle shower faucets are a popular choice for their simplicity and ease of use. They feature a single lever that controls both water temperature and flow, making them user-friendly. These faucets are designed for durability and come in various styles to suit different bathroom aesthetics. The manual provides detailed installation steps, including how to connect water supply lines and assemble the faucet components. It also offers maintenance tips, such as cleaning the aerator and replacing worn-out seals to ensure optimal performance.

2.2 Dual-Handle Shower Faucets

Dual-handle shower faucets offer precise temperature and flow control with separate hot and cold water handles. They are ideal for traditional bathroom designs and provide easy operation. The manual details installation steps, including connecting two water supply lines and assembling handle components. Maintenance tips include inspecting O-rings and washers for leaks. Troubleshooting guides help address common issues like uneven water temperature or dripping handles, ensuring long-lasting performance and user satisfaction.

2.3 Pressure-Balanced and Thermostatic Faucets

Pressure-balanced faucets maintain consistent water temperature despite pressure changes, preventing scalding. Thermostatic faucets offer precise temperature control with an adjustable thermostat; Both types are ideal for safety and comfort. The manual provides installation tips, such as setting temperature limits and ensuring proper water supply connections. Maintenance advice includes cleaning valve cartridges and checking for mineral buildup. Troubleshooting sections address issues like inconsistent temperatures or leaks, ensuring optimal performance and safety for users. These faucets are recommended for modern bathrooms seeking advanced functionality and reliability.

Installation Instructions for Delta Shower Faucets

The manual guides through preparing tools, mounting the faucet, and connecting water lines. Detailed steps ensure proper installation, while diagrams simplify complex tasks for DIY enthusiasts and professionals alike.

3.1 Tools and Materials Needed for Installation

To install a Delta shower faucet, gather essential tools and materials. These include an adjustable wrench, channel-type pliers, needle-nose pliers, screwdrivers, and Teflon tape. Additional materials like mounting nuts, gaskets, and O-rings may be required. Ensure all components from the package are present. Proper preparation prevents installation delays and ensures a secure, leak-free connection. Always refer to the specific model’s manual for exact requirements, as tools may vary slightly depending on the faucet type and configuration.

3.2 Step-by-Step Installation Guide

Begin by shutting off the water supply to the shower area. Next, prepare the shower valve by attaching it to the wall studs using the provided mounting hardware. Carefully connect the water supply lines to the valve, ensuring they are securely fastened with Teflon tape. Install the faucet handle and trim according to the manual’s instructions. Attach the shower head to the shower arm, tightening it by hand. Finally, turn the water supply back on and test the faucet for leaks or proper function.

3.3 Troubleshooting Common Installation Issues

Common issues during Delta shower faucet installation include leaks, incorrect water temperature, or improper handle alignment. For leaks, check connections and ensure all gaskets and washers are properly seated. If water pressure is low, inspect the shower head for mineral buildup or debris. For temperature issues, verify the valve’s calibration and ensure the mixing valve is correctly installed. Always refer to the manual for specific troubleshooting steps, and consider consulting a professional if problems persist.

Maintenance and Care of Delta Shower Faucets

Regular maintenance ensures longevity and optimal performance of Delta shower faucets. Clean the faucet and shower head regularly, inspect for worn parts, and prevent mineral buildup. Use professional help for complex repairs.

4.1 Cleaning the Faucet and Shower Head

Regular cleaning is essential to maintain the performance and appearance of Delta shower faucets. Use a mild detergent and soft cloth to wipe down surfaces, avoiding harsh chemicals. For mineral buildup, soak the shower head in vinegar or baking soda solution. Rinse thoroughly and dry to prevent water spots. Cleaning should be done monthly to ensure optimal water flow and prevent corrosion. Always follow the manufacturer’s recommendations for cleaning products to avoid damaging finishes.

4.2 Inspecting and Replacing Worn-Out Parts

Regularly inspect Delta shower faucets for worn-out parts like O-rings, gaskets, or cartridges, which can cause leaks or reduced performance. Check for mineral buildup, corrosion, or visible damage. Replace parts promptly using genuine Delta replacement components to ensure compatibility and longevity. Refer to the manual for specific instructions on disassembling and reassembling the faucet. Proper replacement ensures optimal function, prevents further damage, and maintains water efficiency. Always follow safety guidelines when performing repairs.

4.3 Preventing Mineral Buildup and Corrosion

To prevent mineral buildup and corrosion on Delta shower faucets, regularly clean the faucet and shower head with a mixture of white vinegar and water. Remove and soak aerators or shower heads to eliminate mineral deposits. Use a soft cloth to wipe down surfaces and apply a protective finish to maintain luster. Avoid harsh chemicals that may damage finishes. Drying the faucet after use and replacing worn-out parts promptly can further prevent corrosion and extend the faucet’s lifespan.

Repair and Replacement Guidelines

Identify common issues like leaks or faulty cartridges and replace them with genuine Delta parts. Refer to the manual for specific repair instructions and troubleshooting tips.

Ensure all repairs are done with proper tools and follow warranty guidelines. Contact Delta support for assistance or professional installation if needed to maintain product integrity.

5.1 Identifying Common Issues with Delta Shower Faucets

Common issues with Delta shower faucets include leaks around the handle or shower head, faulty cartridges, and mineral buildup. Leaks often result from worn-out gaskets or O-rings, while temperature malfunctions may stem from pressure-balanced or thermostatic valve issues. Low water flow could indicate clogged aerators or shower heads. Regular inspection and maintenance, as outlined in the manual, help identify these problems early. Addressing these issues promptly ensures optimal performance and extends the faucet’s lifespan, maintaining its efficiency and reliability over time.

5.2 Replacing the Cartridge or Valve

Replacing the cartridge or valve in a Delta shower faucet is a common repair to address leaks or temperature control issues. Begin by shutting off the water supply and disassembling the faucet to access the cartridge or valve. Remove the old part by gently pulling or using an adjustable wrench, then install the new one by aligning it properly and securing it firmly. Refer to the manual for specific instructions, as procedures may vary depending on the faucet model. This process ensures proper functionality and prevents further issues.

5.3 Fixing Leaks and Other Common Problems

Leaky faucets are often caused by worn-out washers or O-rings. To fix leaks, turn off the water supply, disassemble the faucet, and inspect for damaged parts. Replace faulty washers, O-rings, or gaskets with genuine Delta replacement parts. Reassemble the faucet carefully, ensuring all connections are tight but not over-tightened. For persistent issues, refer to the manual or contact Delta support. Regular maintenance and part replacement can prevent future leaks and extend the faucet’s lifespan.

Warranty and Support Information

The Delta Shower Faucet Manual PDF provides a lifetime warranty on parts and finishes, ensuring durability. For support, contact Delta directly via phone or their official website.

6.1 Understanding the Delta Faucet Warranty

The Delta Faucet Warranty ensures all parts and finishes are free from defects in material and workmanship for as long as the original purchaser owns their home. This warranty covers leaks, finish durability, and functional issues, providing peace of mind for users. However, it excludes damage due to misuse, improper installation, or failure to follow maintenance guidelines. Registration and adherence to care instructions are essential to uphold warranty benefits. Delta’s commitment to quality is reflected in this comprehensive coverage.

6.2 Registering Your Product and Filing Claims

Registering your Delta shower faucet is essential to activate warranty benefits. Visit Delta’s official website and complete the online registration form with details like purchase date, model number, and installation information. Keep your receipt as proof of purchase. If filing a claim, contact Delta’s customer support with your product details and issue description. Claims are processed based on warranty terms, ensuring timely resolution for defective parts or finishes. Proper documentation is key for a smooth claims process.

6.3 Contacting Delta Faucet Customer Support

For assistance with your Delta shower faucet, contact customer support via phone at 1-800-345-DELTA (3358) or through their official website. Live chat and email options are also available for convenience. Have your faucet model number and purchase details ready for efficient service. Delta’s support team is available to address installation, repair, or warranty-related inquiries. Visit Delta’s website for additional resources, including FAQs and troubleshooting guides, to resolve issues quickly and effectively.

Safety Precautions and Best Practices

Always shut off water supply before maintenance. Ensure proper installation to avoid damage. Follow local plumbing codes and manufacturer guidelines for safe and reliable operation.

7.1 shutting Off Water Supply Before Maintenance

7.1 Shutting Off Water Supply Before Maintenance

Shutting off the water supply is crucial before starting any maintenance or repair on your Delta shower faucet. Locate the shut-off valves, typically found near the water supply lines, and turn them clockwise to stop water flow. Verify water is completely turned off by checking the faucet for drips or leaks. This step prevents water damage and ensures safety during repairs. Always refer to the manual for specific instructions and consider consulting a professional if unsure.

7.2 Avoiding Damage from Improper Installation

Improper installation of your Delta shower faucet can lead to leaks, water damage, and premature wear. To avoid such issues, always follow the manufacturer’s instructions and ensure all connections are secure. Misaligned parts or overtightening can damage components. Use the correct tools and materials, as specified in the manual. Delta Faucet Company recommends professional installation for complex setups. Proper alignment and tightening techniques are essential to prevent long-term damage and ensure optimal performance.

7.3 Ensuring Compliance with Plumbing Codes

When installing a Delta shower faucet, ensure compliance with local plumbing codes and regulations. Verify water pressure requirements and use approved materials. Properly align and secure connections to avoid leaks. Check temperature settings to prevent scalding. Always follow safety guidelines and consult a licensed plumber if unsure. Compliance ensures safe operation and avoids potential legal issues. Delta Faucet Company emphasizes adherence to these standards for optimal performance and longevity of the product.

The Delta Shower Faucet Manual PDF provides a comprehensive guide for installation, maintenance, and troubleshooting. Following its instructions ensures optimal performance and longevity of your faucet.

8.1 Summary of Key Points

The Delta Shower Faucet Manual PDF is an essential resource for understanding installation, maintenance, and repair processes. It covers various faucet types, including single-handle, dual-handle, and thermostatic models. The guide emphasizes proper tools, materials, and safety precautions to ensure successful setup. Regular cleaning, part inspection, and mineral buildup prevention are highlighted for longevity. Troubleshooting common issues and warranty details are also provided. By following the manual, users can maintain optimal performance and extend the lifespan of their Delta shower faucet.

8.2 Final Tips for a Successful Installation

For a successful Delta shower faucet installation, ensure the water supply is turned off before starting. Use the recommended tools and materials to avoid damage. Follow the step-by-step guide carefully, and double-check all connections for tightness. Test the faucet after installation to confirm proper function. Align all parts correctly to prevent leaks and ensure optimal performance. Always refer to the manual for specific instructions, and consider consulting a professional if unsure. Proper installation ensures longevity and satisfaction with your Delta shower faucet.

jnc660 owners manual

Welcome to the JNC660 Owner’s Manual, your comprehensive guide to understanding and safely operating the Jump-N-Carry JNC660 jump starter. This manual provides essential safety precautions, product features, and troubleshooting tips to ensure optimal performance and longevity of your device; By following the instructions carefully, you can maximize the capabilities of your JNC660 while maintaining safety standards. Refer to this manual for detailed information on installation, maintenance, and proper usage techniques to get the most out of your Jump-N-Carry JNC660.

Overview of the JNC660 Jump Starter

The JNC660 Jump Starter is a powerful 12-volt power supply designed for jump-starting vehicles and powering equipment. Known for its rugged construction and durability, it delivers exceptional cranking power and extended cranking duration. With multiple jumps per charge and a long service life, it is ideal for professional use in service garages, fleet operations, and emergency situations. Its reliability and versatility make it a preferred choice for both professionals and enthusiasts.

Importance of Reading the Manual

Reading the JNC660 Owner’s Manual is crucial for safe and effective operation. It provides detailed instructions, safety guidelines, and troubleshooting tips to prevent damage or explosions. Understanding the manual ensures you maximize the device’s capabilities while adhering to safety standards. Failure to follow instructions can lead to improper usage, reducing performance and potentially causing harm. Always prioritize safety by thoroughly reviewing the manual before use.

Safety Precautions and Warnings

Adhere to all safety guidelines to avoid accidents. Misuse can cause explosions or damage. Always shield eyes and follow instructions carefully to ensure safe operation and prevent hazards.

General Safety Guidelines

Always read and follow all safety instructions carefully. Shield eyes and avoid using near open flames or sparks. Keep the device away from children and flammable materials. Never touch electrical components with wet hands. Ensure proper ventilation and avoid overcharging. Misuse can lead to explosions or damage. Follow all warnings to prevent accidents and ensure safe operation of the JNC660 jump starter. Always prioritize caution when handling electrical equipment.

Handling the Battery and Electrical Components

Handle the battery with care to prevent damage. Avoid short circuits by keeping terminals clean and dry. Never touch electrical components with wet hands or while standing in water. Use insulated tools to prevent shocks. Always disconnect the battery when not in use or during maintenance. Proper handling ensures safety and extends the lifespan of your JNC660. Follow all precautions to avoid potential hazards and electrical risks.

Product Features and Specifications

The JNC660 is a powerful 12-volt jump starter designed for professional use, offering exceptional cranking power and extended cranking duration. Built with rugged construction, it ensures reliability in demanding environments.

Technical Details of the JNC660

The JNC660 is a 12-volt jump starter designed for heavy-duty applications, featuring a high-capacity battery and robust electrical components. It includes a 150-amp manual breaker and supports 3-wire and 4-wire jumper configurations. Built with a sealed battery, the JNC660 offers reliable performance in various environments. Its durable construction ensures long service life, making it ideal for professional use in garages, fleets, and towing services. Technical specifications are detailed in the manual for optimal functionality.

Design and Build Quality

The JNC660 boasts a rugged and durable design, built to withstand demanding environments. Its heavy-duty construction ensures reliability in professional settings, with a sealed battery for added safety and longevity. The unit is crafted with high-quality materials, offering excellent resistance to wear and tear. Its ergonomic design allows for easy portability, making it a practical choice for frequent use in garages, fleets, and towing operations.

Installation and Setup

Proper installation and setup are crucial for optimal performance. Follow the manual’s guidelines to configure the JNC660 correctly, ensuring all components are securely connected and tested before use.

Initial Setup and Configuration

Begin by carefully reading the manual to understand safety guidelines and operational steps. Charge the battery fully before first use and ensure all cables and components are securely connected. Familiarize yourself with the control panel and settings. Perform a test jump-start on a vehicle to verify proper function. Always follow the recommended sequence for connecting and disconnecting cables to avoid damage or injury. Proper initial setup ensures reliable performance and longevity of your JNC660 jump starter.

Maintenance and Storage Recommendations

Regularly inspect the cables and clamps for wear or damage, replacing them if necessary. Store the JNC660 in a cool, dry place, away from direct sunlight and moisture. Charge the battery every 30 days when not in use to maintain its health. Clean the terminals periodically to ensure proper electrical connections. Avoid extreme temperatures and physical stress to preserve the unit’s performance. Proper storage and maintenance will extend the lifespan and reliability of your JNC660 jump starter.

Troubleshooting Common Issues

Check connections and battery status for charging issues. Inspect cables and clamps for damage. Ensure proper voltage settings and avoid overcharging. Refer to the manual for detailed diagnostic steps.

Diagnosing Battery and Charging Problems

Identify battery and charging issues by checking connections and ensuring the JNC660 is properly charged. Look for damaged cables or clamps, as these can prevent effective charging. If the device fails to charge, verify the power source and cable integrity. Monitor charging time and ensure the battery reaches full capacity. Refer to the manual for detailed troubleshooting steps to address specific charging or battery-related problems effectively.

Resolving Common Operational Issues

Address common operational issues by ensuring proper connections and following safety guidelines. Check the power level and ensure the device is fully charged before use. Verify cable integrity and avoid overcharging. If the JNC660 fails to start a vehicle, check the battery terminals and connections. Refer to the manual for troubleshooting steps and solutions to resolve issues efficiently and safely. Always follow recommended usage practices to maintain performance and longevity.

Accessories and Replacement Parts

The JNC660 supports various accessories like heavy-duty cables, adapters, and replacement parts. Explore compatible components to enhance functionality; Visit official sources for authentic parts and accessories.

Recommended Accessories for Enhanced Functionality

To maximize the performance of your JNC660, consider adding heavy-duty cables, adapters, and replacement parts. These accessories ensure optimal charging and jumping capabilities. Explore compatible components designed to enhance durability and versatility. Visit authorized retailers or the manufacturer’s website for authentic parts that meet safety and quality standards. Upgrading with recommended accessories can extend the life of your JNC660 and improve its reliability in various situations.

Replacement Parts and Compatibility

Ensure optimal performance by using genuine replacement parts specifically designed for the JNC660. Compatible components, such as cables, clamps, and adapters, are available from authorized retailers or the manufacturer’s website. Always verify compatibility to maintain safety and functionality. Genuine parts guarantee reliability and compliance with safety standards, ensuring your JNC660 operates efficiently and effectively in all situations.

Compliance and Regulations

The JNC660 complies with environmental and safety standards, ensuring eco-friendly performance. It meets regulatory requirements for safe operation and disposal, adhering to global environmental protection guidelines.

Environmental and Safety Compliance

The JNC660 is designed to meet stringent environmental and safety regulations, ensuring minimal ecological impact. Its sealed battery technology prevents acid spills, aligning with eco-friendly standards. Compliance with international safety certifications guarantees reliable operation. Proper disposal methods are outlined to protect the environment. Adherence to these guidelines ensures the device is both safe and environmentally responsible for long-term use.

Disposal and Recycling Guidelines

Proper disposal of the JNC660 is crucial for environmental protection. The battery must be recycled according to local regulations to prevent hazardous waste. Remove the battery before recycling the unit. Do not dispose of the device in regular trash. Check local guidelines for electronic waste recycling centers. Ensure all components are handled responsibly to minimize ecological impact and promote sustainable practices.

Downloading and Referencing the Manual

The JNC660 Owner’s Manual is available for free download in PDF format from the manufacturer’s website or platforms like eBay and ManualsLib. Ensure you download the correct version for your device to access step-by-step instructions, safety guidelines, and troubleshooting tips. Referencing the manual regularly will help you optimize the performance and safety of your JNC660 jump starter.

How to Download the PDF Manual

To download the JNC660 Owner’s Manual in PDF format, visit the manufacturer’s official website or trusted platforms like ManualsLib or eBay. Search for “JNC660 Manual” to locate the file. Click the download link and save the PDF to your device. Ensure the document is compatible with your JNC660 model for accurate information. Review the manual thoroughly before using the device to understand safety guidelines and operational procedures.

Navigating the Manual for Quick Reference

The JNC660 Owner’s Manual is designed for easy navigation, with clear sections and indexing for quick access to essential information. Use the table of contents to locate specific topics, such as safety guidelines or troubleshooting. Key sections are highlighted with bullet points and numbered lists for readability. Familiarize yourself with the layout to quickly find answers to common questions or operational guidance, ensuring safe and effective use of your JNC660 jump starter.

Warranty and Support Information

This section outlines the warranty terms for your JNC660, including coverage details and duration. It also provides contact information for customer support and service options.

Understanding the Warranty Terms

This section details the warranty coverage for your JNC660, including the duration and scope of coverage. It outlines what is included, such as parts and labor, and any conditions that may void the warranty. Proper use and adherence to the manual are essential for warranty validity. Refer to this section for a clear understanding of your rights and the manufacturer’s obligations. For detailed terms and conditions, visit the manufacturer’s website or consult the provided manual. Contact customer support for any warranty-related inquiries or concerns.

Contacting Customer Support

If you have questions or need assistance with your JNC660, contacting customer support is straightforward. Visit the official website for contact details, including phone numbers, email, and live chat options. The support team is available to address warranty inquiries, troubleshooting, and product-related questions. Ensure you have your product serial number ready for efficient service. For quick reference, the manual includes a dedicated section with contact information and support resources. Reach out to the support team for any concerns or clarification needed.

Operational Limits and Capabilities

The JNC660 is designed for heavy-duty use, offering robust performance for jump-starting vehicles and powering equipment. It delivers exceptional cranking power and extended cranking duration, allowing numerous jumps per charge. Built to last, the JNC660 ensures reliable service in various conditions, making it ideal for professional and frequent use. Always adhere to the specified limits to maintain optimal functionality and safety.

Maximum Charging Capacity and Usage Limits

The JNC660 is designed to handle heavy-duty applications, with a maximum charging capacity tailored for robust performance. It offers a 12-volt power supply and a 150-amp manual breaker, ensuring reliable operation. The unit is capable of delivering up to 1,000 peak amps, suitable for jump-starting a wide range of vehicles. However, to maintain safety and longevity, avoid exceeding the recommended load limits and never overcharge the battery. Always follow the specified usage guidelines for optimal functionality.

Optimal Usage Scenarios

The JNC660 excels in demanding environments, making it ideal for emergency jump-starts, powering tools, and charging batteries in remote locations. Its 12-volt power supply and 150-amp manual breaker ensure reliable performance for cars, trucks, and boats. Designed for heavy-duty applications, it is perfect for service garages, car dealerships, and towing operations. The JNC660’s rugged design and long service life make it a top choice for professionals and fleets needing consistent power delivery in challenging conditions.

Best Practices for Safe Operation

Always shield eyes, read the manual, and follow safety guidelines to prevent damage or explosion. Properly connect cables, avoid overcharging, and ensure the battery is fully charged before use.

Proper Usage Techniques

Properly connect the JNC660 cables to the vehicle’s battery, ensuring correct polarity. Always attach the positive cable first and negative last. Avoid overcharging and keep the unit away from flammable materials. Regularly inspect cables for damage and store the device in a cool, dry place. Follow these steps to ensure safe and effective operation every time.

Avoiding Common Mistakes

Avoid improper cable connections to prevent damage or explosion. Never touch terminals to bare skin or metallic objects. Ensure correct polarity when connecting batteries. Do not overcharge the JNC660, as this can reduce its lifespan. Always shield eyes during jump-starting. Follow the manual’s instructions carefully to prevent accidents and maintain optimal performance of your JNC660 jump starter.

The JNC660 is a reliable tool when used correctly. Always adhere to the manual’s guidelines for safe and effective operation. Happy jumping!

Final Thoughts on Using the JNC660

The JNC660 is a reliable and powerful tool when used correctly. Always prioritize safety, following the manual’s guidelines to avoid accidents; Regular maintenance ensures longevity. For optimal performance, adhere to charging and usage limits. Refer to the manual for troubleshooting and maintenance tips. Proper storage and handling will extend its service life. Enjoy the convenience and versatility of your JNC660 jump starter with responsible use.

Encouragement to Follow Manual Guidelines

Adhering to the JNC660 manual ensures safe and effective use. Proper techniques prevent accidents and device damage. Reading the manual thoroughly helps users understand safety precautions and optimal usage. Failure to follow guidelines may lead to explosions or malfunctions. Always prioritize safety and refer to the manual for troubleshooting and maintenance tips. This ensures your JNC660 performs reliably and lasts longer, providing consistent service over time.

schlage co 100 user guide

Overview of the Schlage CO-100

The Schlage CO-100 is a keypad-only, off-line electronic lock in the CO-Series product line. It is UL294 and ULC-S319 certified, powered by four AA batteries, and available in Classroom/Storeroom or Office functions.

1.1 Product Features

The Schlage CO-100 is a keypad-only, off-line electronic lock designed for secure access control. It features two factory-configured functions: Classroom/Storeroom and Office modes. The lock is powered by four AA batteries, ensuring reliable operation without hardwiring. Constructed with durable materials, it is suitable for both indoor and outdoor applications. The CO-100 includes a backlit keypad for easy operation in low-light conditions and is UL294 and ULC-S319 certified, meeting rigorous security standards. Its keypad-only design eliminates the need for a keyway, enhancing security by reducing potential vulnerabilities. This lock is ideal for commercial settings, offering a balance of convenience, security, and low maintenance.

1.2 Factory-Configured Functions

The Schlage CO-100 is available in two factory-configured functions: Classroom/Storeroom and Office modes. In Classroom/Storeroom mode, the outside lever is locked by default, requiring a valid user code to unlock, while the inside lever remains unlocked for emergency egress. The Office function allows the outside lever to be unlocked by default, locking with a button press, and requiring a code to unlock. These configurations provide tailored security solutions for different environments, ensuring ease of use while maintaining robust access control. The lock’s preset functions simplify installation and setup, catering to specific commercial needs without requiring extensive customization. This flexibility makes it ideal for various applications, from educational institutions to corporate offices.

1.3 UL Certifications

The Schlage CO-100 is UL294 and ULC-S319 certified, ensuring compliance with safety and security standards for electronic locking systems. UL294 pertains to access control systems, verifying the lock’s reliability in securing doors while maintaining safety. ULC-S319 certification ensures the lock meets Canadian standards for electronic locks, providing peace of mind for users. These certifications confirm the CO-100’s ability to operate safely and securely in various environments, including commercial settings. The lock’s compliance with these standards underscores its durability and adherence to industry regulations, making it a trusted solution for secure access control. Additionally, the CO-100 is designed to meet fire safety standards, further enhancing its reliability in critical applications.

Installation Requirements

Ensure proper door preparation, compatible hardware, and alignment. Follow the provided installation guide for mounting the lock and connecting components. Use templates for accurate drilling and placement.

2.1 Pre-Installation Steps

Before installing the Schlage CO-100, ensure the door is properly prepared and compatible with the lock’s specifications. Verify the door thickness and hardware alignment. Check that all components, including the keypad and strike plate, are included. Review the installation manual for specific templates and drilling requirements. Ensure the door is aligned correctly to avoid installation issues. Remove any existing lock hardware and prepare the door for the new lock. Confirm the factory-configured function matches the intended use (Classroom/Storeroom or Office). Charge or install the batteries according to the user guide. Familiarize yourself with the locking mechanism and keypad operation before proceeding.

2.2 Installation Process

Mount the keypad assembly on the door using the provided screws. Align the strike plate with the latch and secure it to the door frame. Connect the cable from the keypad to the lock body. Install the lock body on the opposite side of the door, ensuring proper alignment with the strike plate. Attach the lever or push bar to the lock body, tightening securely. Test the mechanical operation by opening and closing the door. Finally, program the lock according to its factory-configured function (Classroom/Storeroom or Office). Refer to the manual for detailed instructions and diagrams to ensure proper installation and functionality.

Getting Started

Install the lock, test mechanical and electronic operation, and program user credentials. Refer to the user guide for detailed setup instructions and troubleshooting tips.

3.1 First-Time Setup

Begin by installing the lock and ensuring proper mechanical function. Power the lock with four AA batteries. Follow the user guide to enter a new programming code and set up user credentials. Conduct a mechanical test by operating the lever or push bar to ensure smooth latch retraction. Next, perform an electronic test by entering valid user codes to verify proper locking and unlocking. If issues arise, consult the troubleshooting section in the manual. This initial setup ensures the lock operates securely and efficiently, providing reliable access control for all users. Proper setup is crucial for maintaining security and functionality.

3.2 Test Lock Operation

After installation, test the lock’s mechanical and electronic operation. For the mechanical test, rotate the inside lever or depress the push bar to ensure smooth door opening and latch retraction. Conduct an electronic test by entering valid user codes to verify proper locking and unlocking. If issues arise during testing, review the installation guide to identify and correct any problems. Proper lock operation ensures security and functionality, confirming that all features work as intended. Regular testing helps maintain reliability and user confidence in the lock’s performance. Always refer to the user guide for troubleshooting steps if any malfunctions occur.

Manual Programming

Manual programming allows setup of user codes and reset to factory defaults, ensuring proper configuration and security. Resetting deletes all codes, so proceed with caution.

4.1 Programming User Codes

Programming user codes on the Schlage CO-100 involves entering a new programming code, followed by the desired user credentials. This ensures secure access control. The default PIN length is five digits, and each user receives a unique PIN. The process is straightforward: enter the programming code, add the new user code, and confirm. The lock confirms successful programming with an audible beep. User rights are stored internally, providing efficient management of access. This feature is essential for businesses needing precise control over who can enter specific areas. Regular updates to user codes enhance security and maintain access integrity.

4.2 Resetting to Factory Defaults

Resetting the Schlage CO-100 to factory defaults removes all programmed user codes and configurations, restoring the lock to its original settings. To perform a factory reset, remove the interior cover and battery pack, then press and hold the Schlage button until it flashes blue. Release the button and wait for three beeps, indicating the reset is complete. This process deletes all user and programming codes, returning the lock to its default state. The door must be in a locked state before initiating the reset. After resetting, the lock will operate with its factory-configured function, and new user codes will need to be programmed. This feature is useful for initializing the lock in new environments or resolving programming issues.

Battery Management

The Schlage CO-100 is powered by four AA batteries, ensuring reliable operation. Monitor battery levels regularly and replace them when low to maintain proper lock functionality and avoid operation issues.

5.1 Replacing Batteries

Replacing the batteries in the Schlage CO-100 is a straightforward process. First, remove the battery pack from the lock’s interior. Insert four new AA batteries, ensuring correct polarity. Reassemble the lock and test its electronic functionality. Regular battery replacement is essential to prevent operational issues. Always use high-quality batteries for optimal performance. If the lock shows low battery indicators, replace them promptly to avoid service interruptions. Proper battery maintenance ensures reliable access control and security features. Refer to the user guide for detailed steps and troubleshooting tips if issues arise. Battery replacement is a critical part of maintaining the lock’s efficiency and longevity. Always check expiration dates and clean terminals for optimal performance.

5.2 Troubleshooting Battery Issues

If the Schlage CO-100 experiences battery-related issues, start by checking the battery levels. Low batteries may cause intermittent operation or failure to power the lock. Replace the batteries with fresh, high-quality AA cells, ensuring proper polarity. Clean the battery terminals to remove any corrosion or debris. If the lock still doesn’t function, verify that the battery pack is securely connected. Test the lock’s electronic features to confirm resolution. If issues persist, consult the user guide for additional troubleshooting steps or contact customer support. Regular maintenance and timely battery replacement are crucial for ensuring reliable performance and security.

Security Features

The Schlage CO-100 offers enhanced security with UL294 and ULC-S319 certifications. It operates on four AA batteries, ensuring reliable power for its Classroom/Storeroom or Office functions, providing robust access control.

6.1 Access Control

The Schlage CO-100 provides robust access control through unique user PIN codes, ensuring only authorized individuals can unlock the door. The system supports multiple user credentials, allowing administrators to grant or revoke access as needed. PIN codes are securely stored on the lock itself, eliminating the need for external databases or network connections. This standalone design enhances security by minimizing potential vulnerabilities associated with connected systems. Additionally, the lock’s keypad interface offers a user-friendly method for entering codes, making it easy to manage access in various settings, from classrooms to offices.

6.2 User Rights Management

The Schlage CO-100 allows administrators to manage user rights effectively, ensuring that access is granted based on specific roles or permissions. User rights can be programmed to restrict or allow entry during certain times or for specific durations. Administrators can assign unique PIN codes to individuals, ensuring that only authorized users can access secured areas. Temporary rights can also be granted for visitors or contractors, providing flexibility without compromising security. The lock stores all user rights locally, eliminating the need for external databases or network connectivity. This feature enhances privacy and simplifies management in environments requiring strict access control, such as schools or offices.

Maintenance and Care

Regular maintenance ensures optimal performance of the Schlage CO-100. Clean the keypad and lock body with a soft cloth and mild cleaner to prevent dirt buildup and maintain functionality.

7.1 Regular Maintenance

Regular maintenance is essential to ensure the Schlage CO-100 operates smoothly. Clean the keypad and exterior with a soft cloth and mild cleaner to remove dirt and grime. Avoid harsh chemicals or abrasive materials that could damage the finish. Check the batteries regularly, as low power can affect performance. Replace them annually or when the low-battery indicator appears. Inspect the door alignment to ensure proper locking and unlocking. Lubricate hinges if necessary to maintain smooth door movement. For finishes, touch up any scratches or worn areas to preserve the lock’s appearance. Regular upkeep prevents malfunctions and extends the lock’s lifespan.

7.2 Cleaning Instructions

Regular cleaning ensures the Schlage CO-100 remains functional and maintains its appearance. Use a soft, dry cloth to wipe the keypad, exterior, and finish. For tougher dirt or stains, dampen the cloth with mild soap and water, but avoid soaking the lock. Never use harsh chemicals, abrasive cleaners, or bleach, as they may damage the finish or harm electronic components. Clean one section at a time to prevent dirt from spreading. For stubborn stains, lightly scrub with a soft-bristled brush. After cleaning, ensure all surfaces are dry to prevent mineral spots. Avoid spraying cleaners directly on the lock to protect internal mechanisms. Regular cleaning prevents dirt buildup and maintains the lock’s performance and aesthetic appeal.